Radiowaves Circular Quilted Playmat—Tutorial
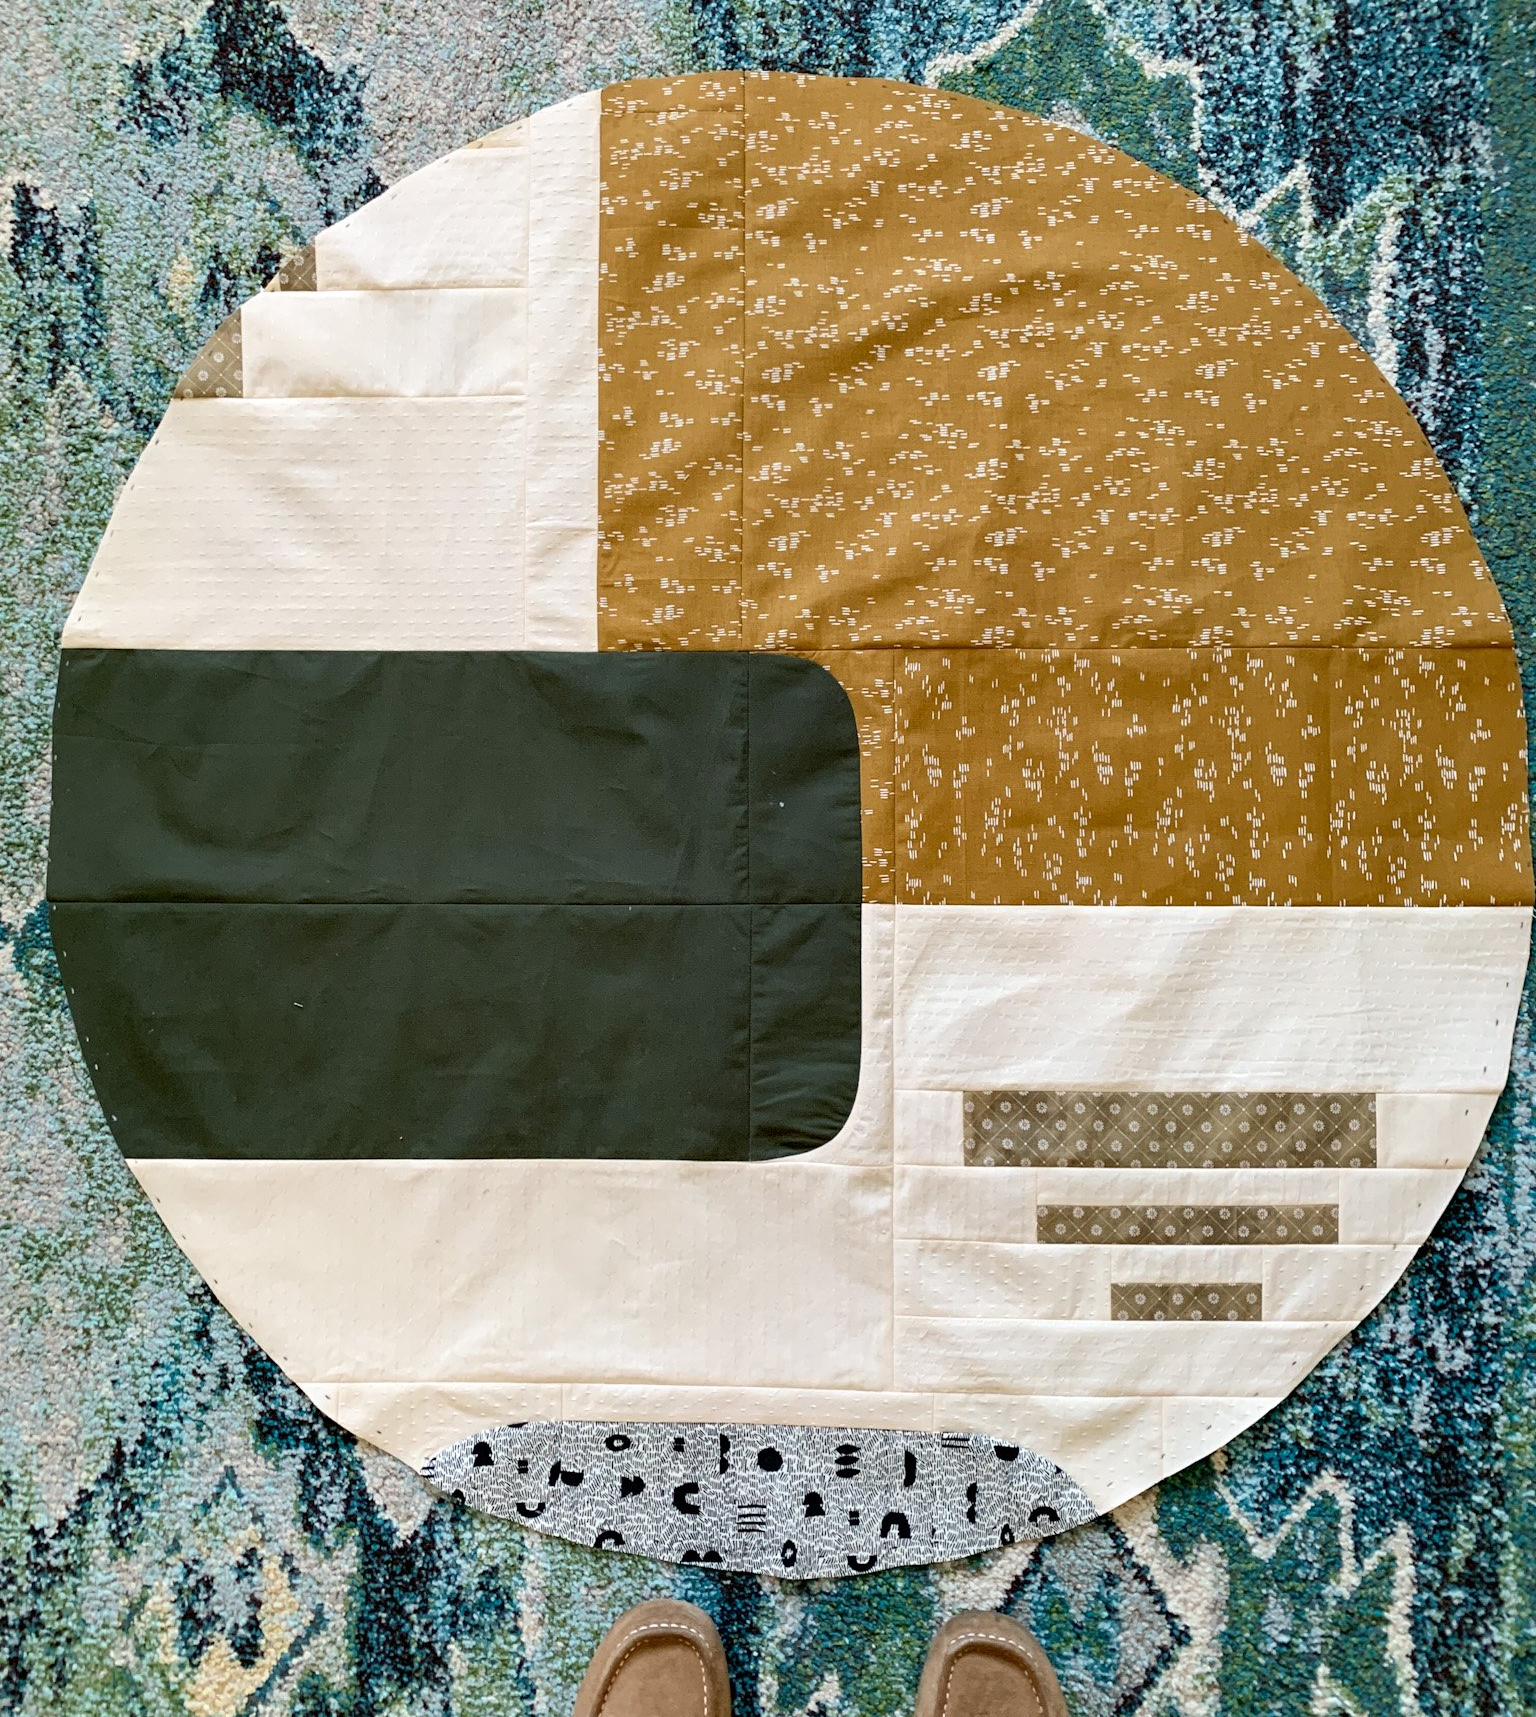
There is something extra adorable about a circular playmat to use during tummy time or throw outside in the grass to protect delicate baby skin. It will also function as an excellent carseat or stroller blanket, as there are no more pesky corners to get caught in the wheels. Lucky for us as quilters, we don’t have to spend $200 on a fast-fashion version, because with this tutorial you’ll be able to turn any square or rectangular quilt pattern into a circular version. And the best part is, the Radiowaves Quilt pattern creates the perfect boho background for spontaneous park day or newborn photoshoot.
Let’s get started! Here is what you need of the process of marking and cutting the quilt top. (This list does not include every notion needed to create the original quilt top):
If you would like to recreate the version pictured, here are the fabrics:
Once the quilt top is completed and supplies are gathered, there are two options for completing your circular mat based on your quilting preference. If machine quilting, create a quilt sandwich with the quilt top, batting, and backing. Baste and quilt as desired. I recommend a high loft batting and less dense quilting to create a softer, cushiony finish for the baby. Once the quilting is completed, follow the instructions below to trim the quilt.
If opting to hand quilt the playmat (as in the example), it is simpler to trim before quilting. In the hand quilted version, trimming will happen in two phases: first measure, mark, and trim the quilt top, then baste the now circular top to the untrimmed batting and backing. Follow instructions on trimming below.
Trimming the quilt top (or machine-quilted unbound quilt):
- Find the center of the quilt top. If it is a square, this will be easy. Simply divide the quilt width by 2 and measure that distance from each edge to find the center. If the quilt top is rectangular, begin by measuring the width (shorter edge) of the quilt and divide by 2. This is the vertical center of the quilt. Now select a horizontal center:
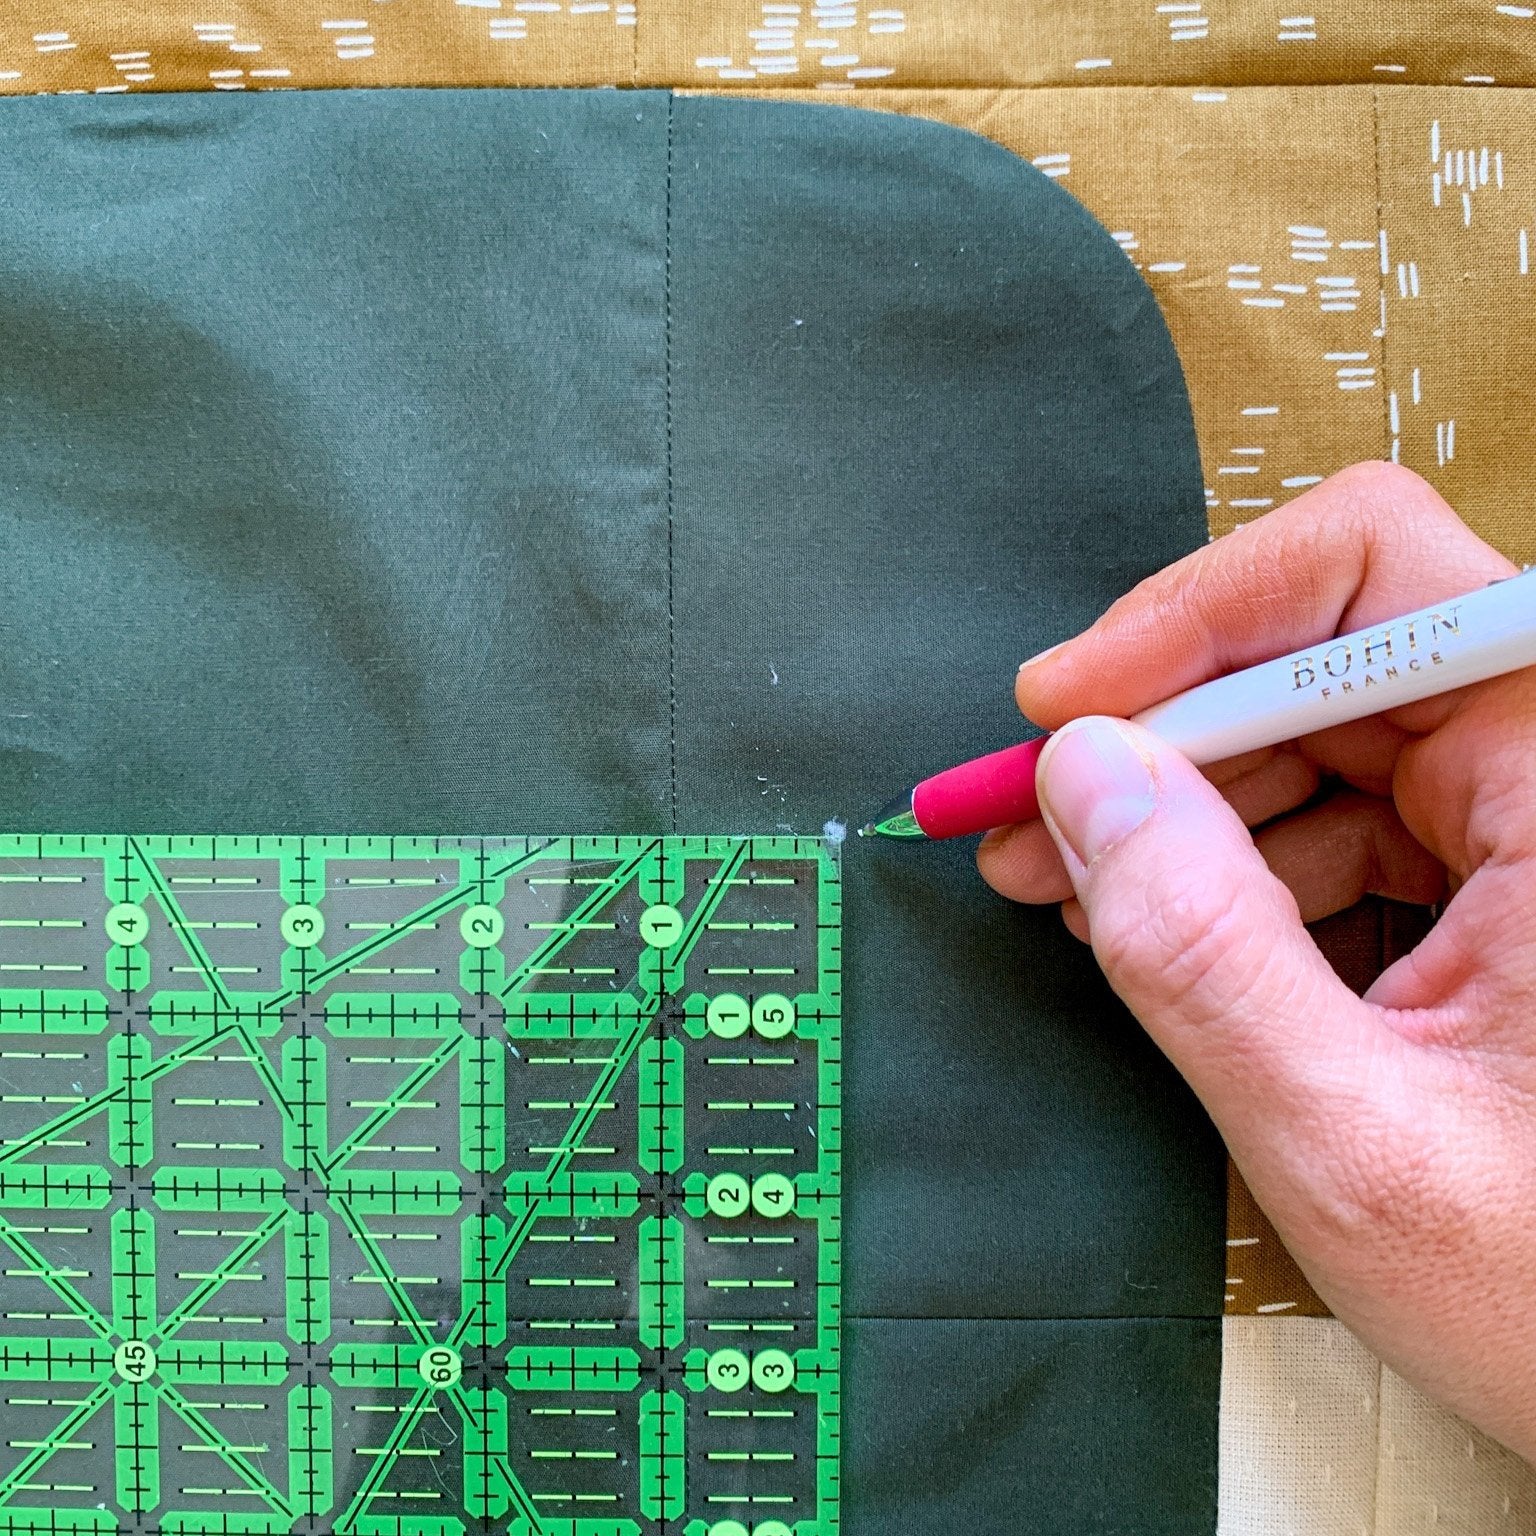
- Mark the circumference of the quilt. I recommend using a pencil instead of a Hera marker at the step, because it is important to have clear lines. If you are concerned about visible markings, know you will be cutting directly along the pencil markings and any residual marks will eventually be hidden under the binding.
- Take scissors or rotary cutter and carefully trim the quilt top along the marked points. Now you’ll appreciate that all the marks are close together and easy to follow!
- The trimmed quilt top is ready for basting and hand quilting. If using a machine-quilted unbound quilt, it is now ready for binding!
- To baste the circular top, create a quilt sandwich of quilt top and untrimmed batting and backing. Once basted, take scissors and trim 1/2” along the outside of the circular quilt top. It is not necessary to mark the batting/backing before trimming, as long as the basting is secure. Also, the 1/2” is excess to accommodate any shifting during quilting and should be trimmed before binding. I have a video demonstrating here. Quilt as desired before the final trim.
Binding the quilt:
To create a smooth finish along a curved edge, it is recommended to use a “bias binding.” This was my first time creating and attaching a bias binding, so I followed a tutorial on Cottoneer’s blog linked here. I found it was a little challenging to create, but once assembled the binding was easy to attach and the finish was smooth. My only tip is: be sure the fabric is cut into an exact square as the tutorial says. I used a large fabric scrap and did not verify that it was square before cutting and assembling… well, it turns out the instructions are written for a reason. Do better than me, and follow them!
Once bound, your Quilted Circular Playmat is finished! It is ready to soften tummy time, buffer pokey grass, or become a lifelong lovey. If you are looking for an alternative quilt pattern to turn into a playmat, the Miss Direction Quilt (3-in-1) pattern and Flowerette Quilt pattern both include square baby size options that would easily translate into a circular versions.
Disclaimers: this product is not verified baby-safe by the AAP; avoid letting a baby sleep on or with blankets until approved by the AAP. Some links are affiliate.
Quilt tutorialbaby quiltquilted playmatRadiowaves Quiltboho baby quiltboho nurseryDIY baby shower gift