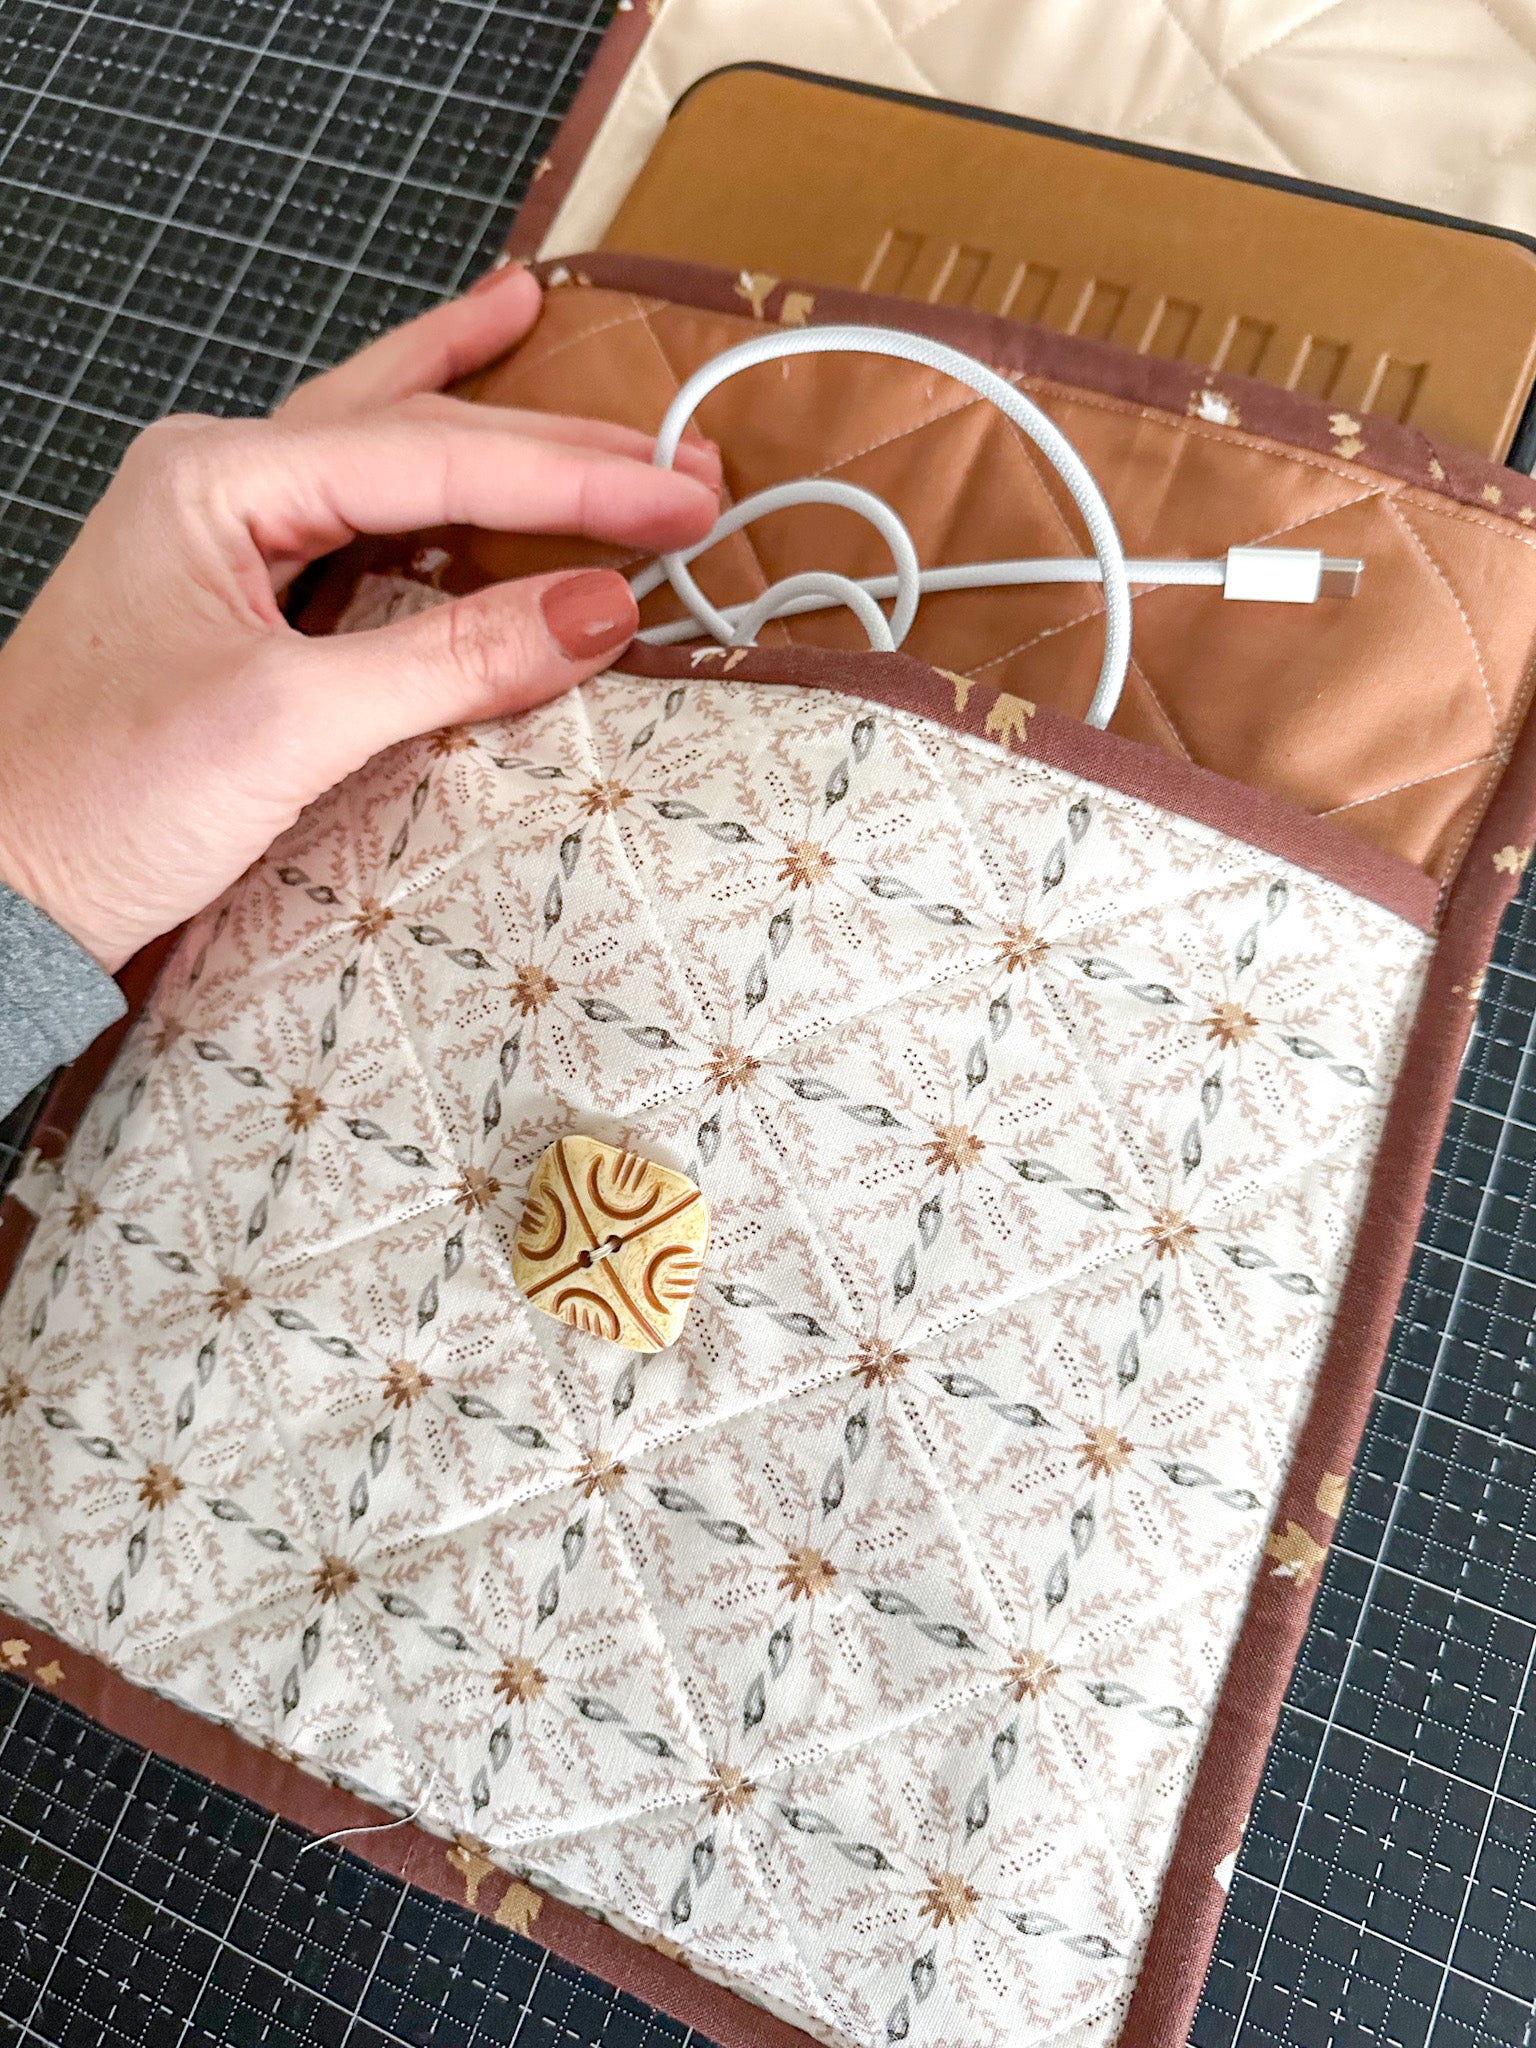
Looking for a quick project to use up a few scraps? This DIY quilted iPad case is the perfect afternoon project, and creates such a beautiful protective layer for your device! This version also includes a pocket (who doesn't love pockets!), to store your charger or notepad. This is a quick, simple tutorial to create a iPad cover regardless of the size of your device. Leave a comment below, and tell me what you love best about this project!
Fabric Requirements:
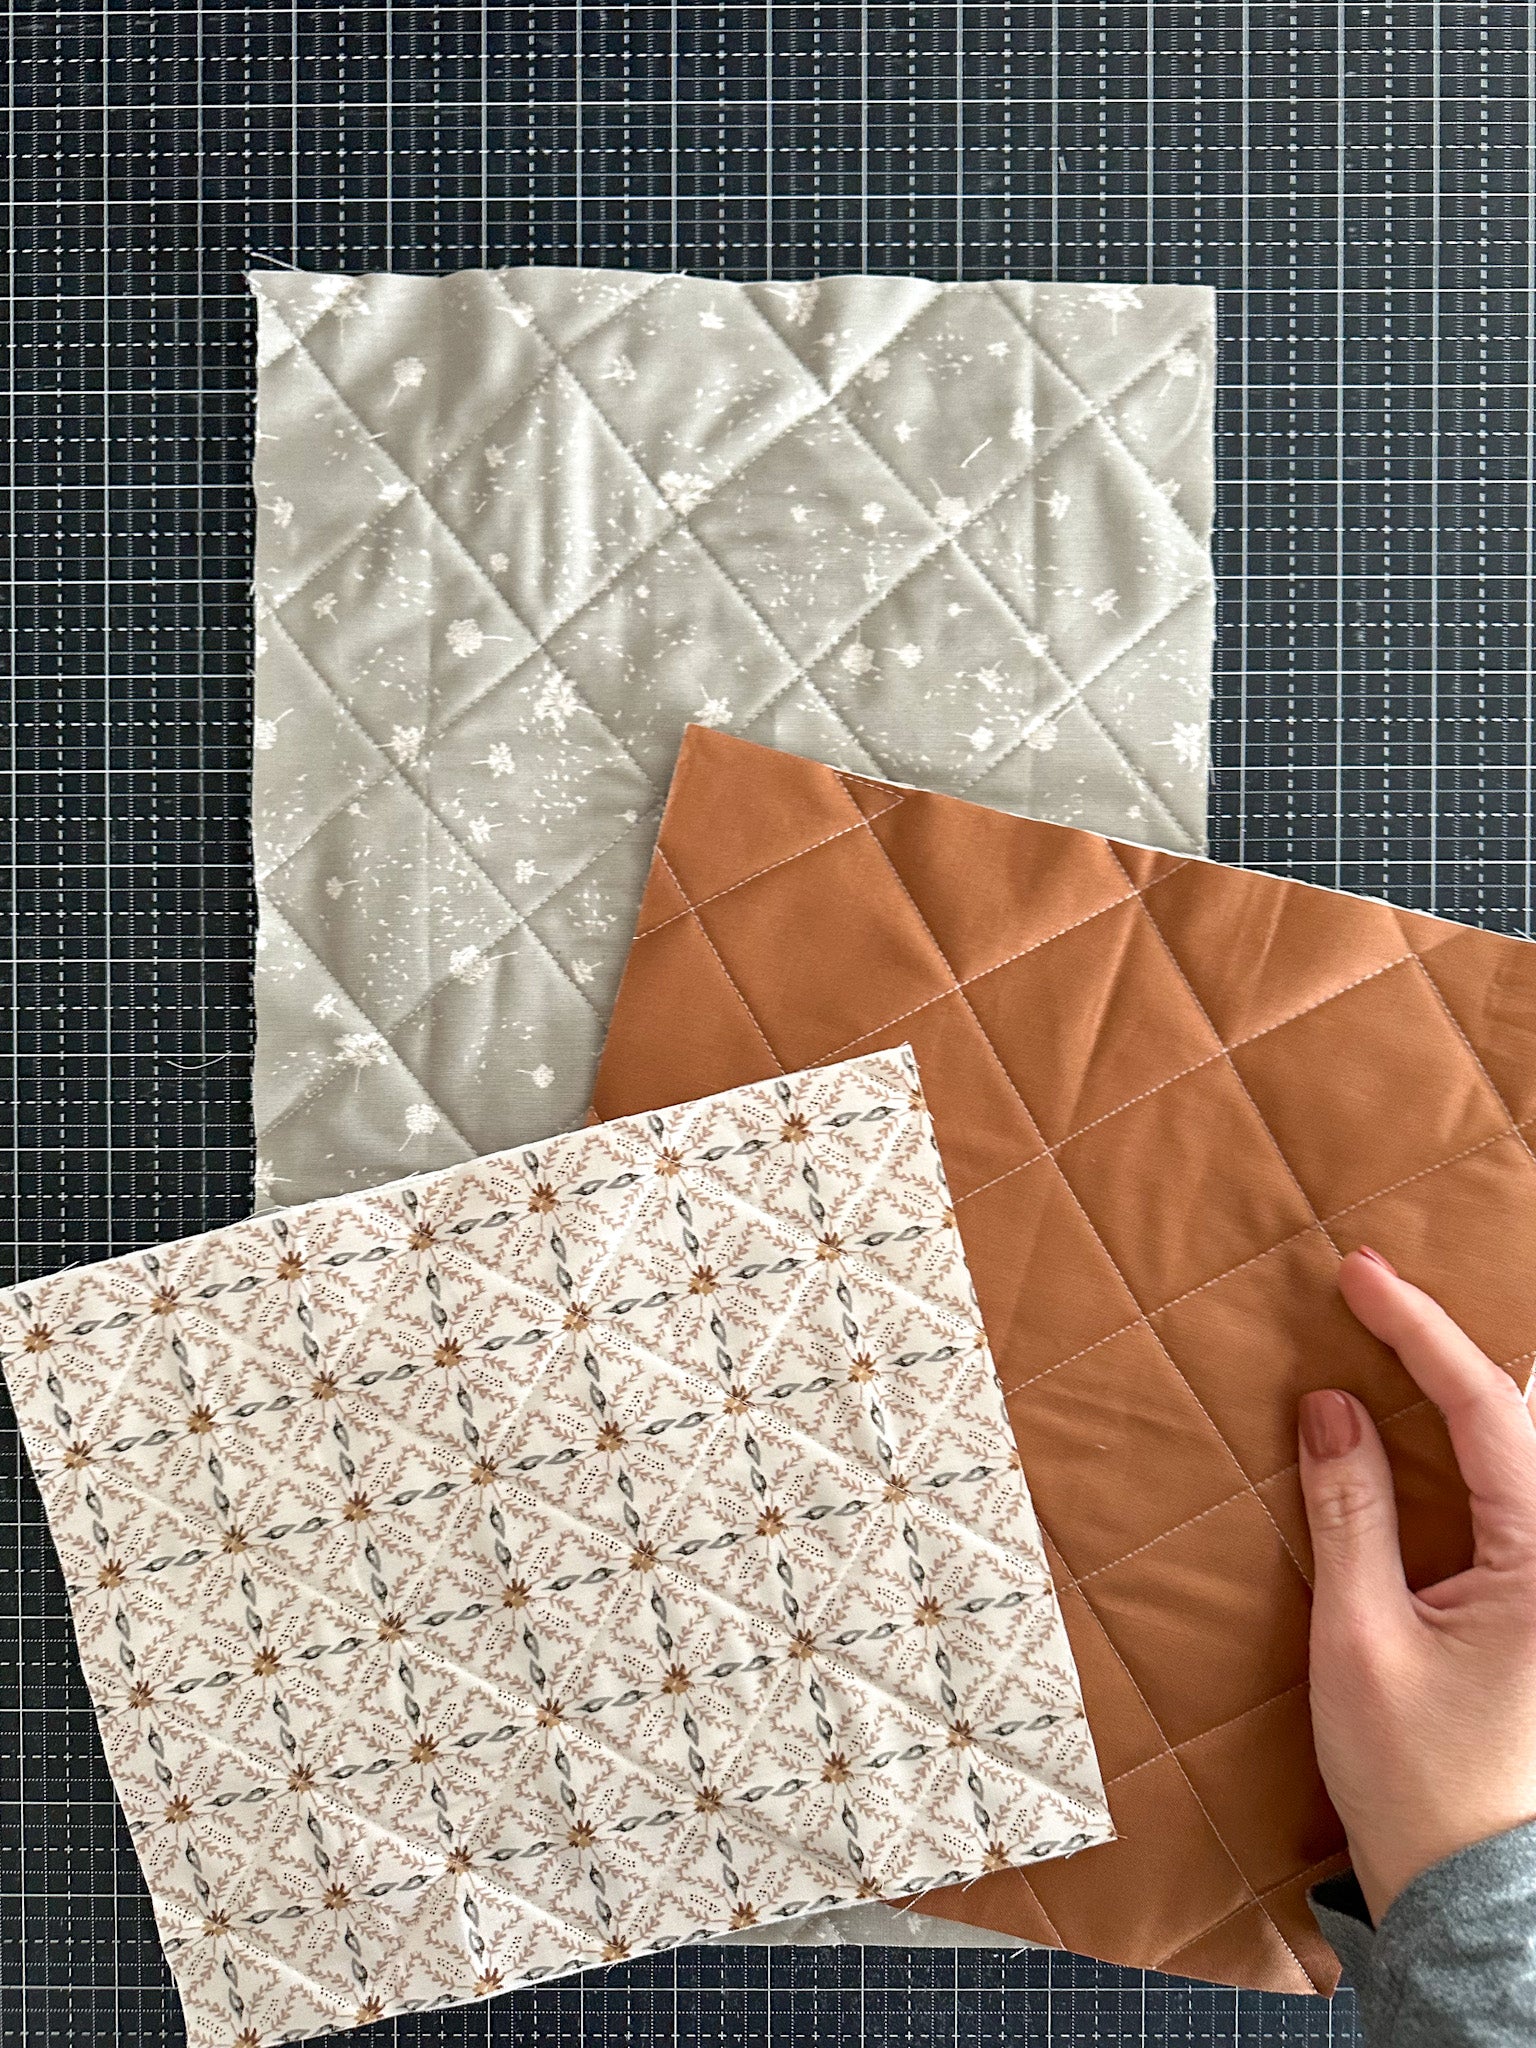
- 2 FQs of coordinating fabric (front and backing) or I used scraps from my Riley Blake Dancing Daisies Collection and Confetti solids line. An 11" iPad Pro, requires enough fabric to create 3 sections: 9.5" x 16", 9.5" x 11", & 8" x 9.5"
- Batting scrap
- Binding
- Bias tape scrap
What you need:
Take FQs or fabric scraps, and backing fabric. Baste the fabric to the batting using adhesive spray, and quilt as desired. Mark the quilting lines with your hera marker. I chose a simple 1.5” grid so the final result would be non-directional.
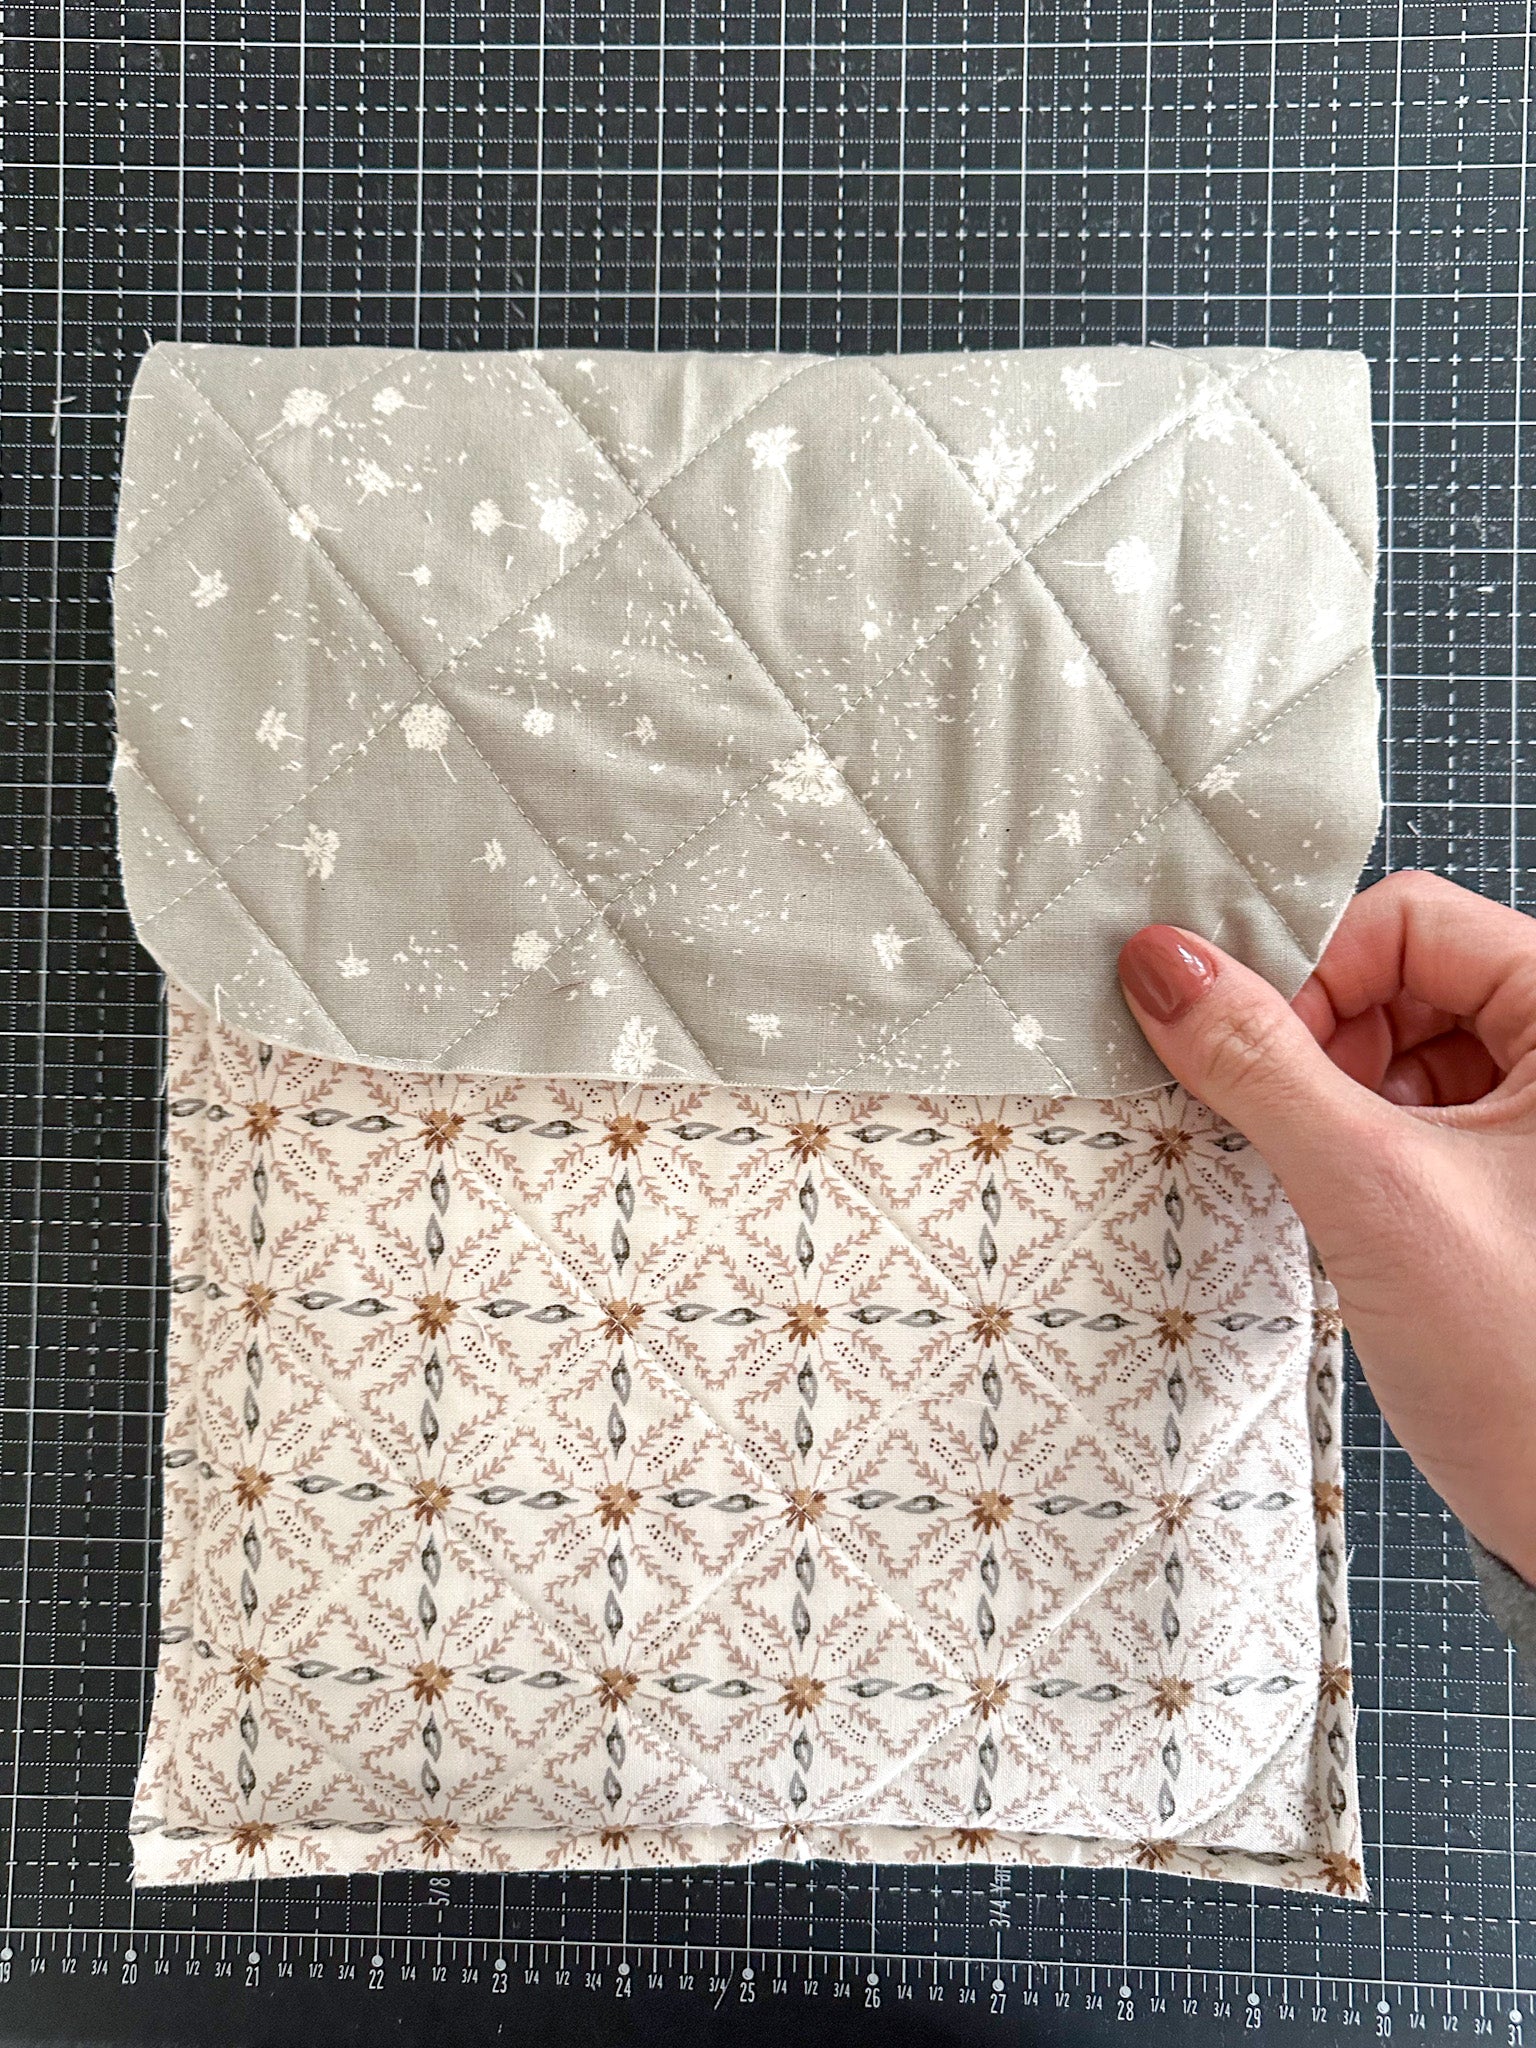
After quilting the FQs or sections, cut the 3 sections of the case: Back panel, front panel, and optional pocket panel. I used measurements to fit my 11" iPad, but sizes vary so I recommend cutting each panel 1" wider than your iPad. Cut 3 sections measuring: 9.5" x 16" (back), 9.5" x 11" (front), & 8" x 9.5" (pocket).
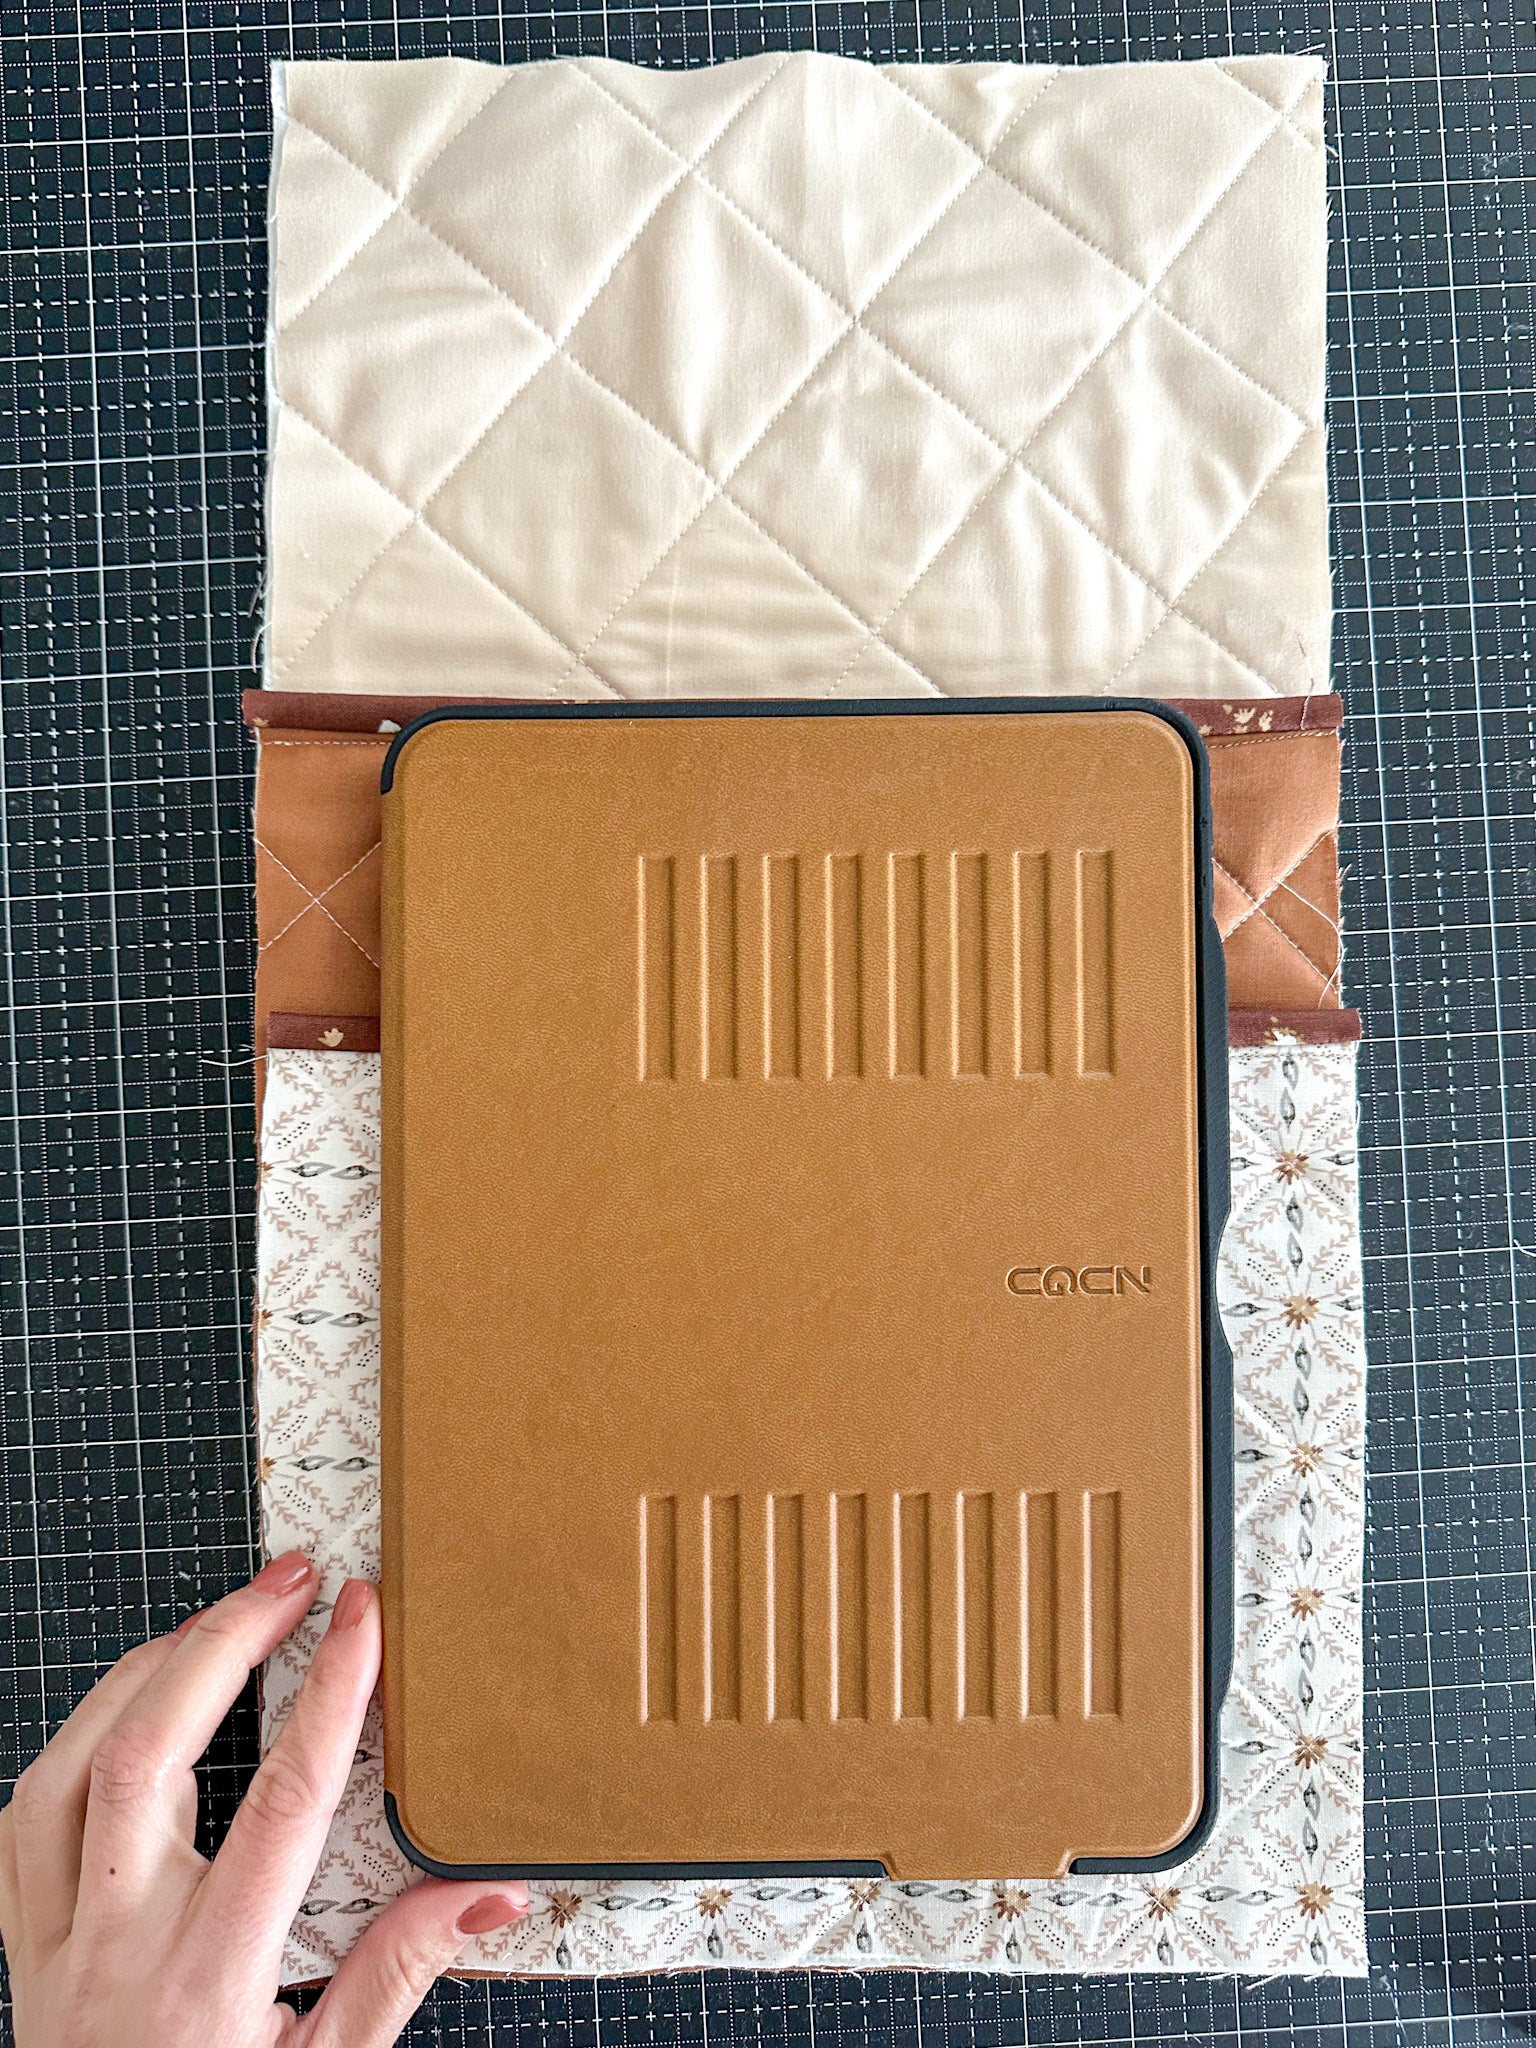
Take binding pieces and bind the upper edges of the front and pocket panels (as shown in photos above). Be sure to do this before sewing the sections together, it is so much easier!
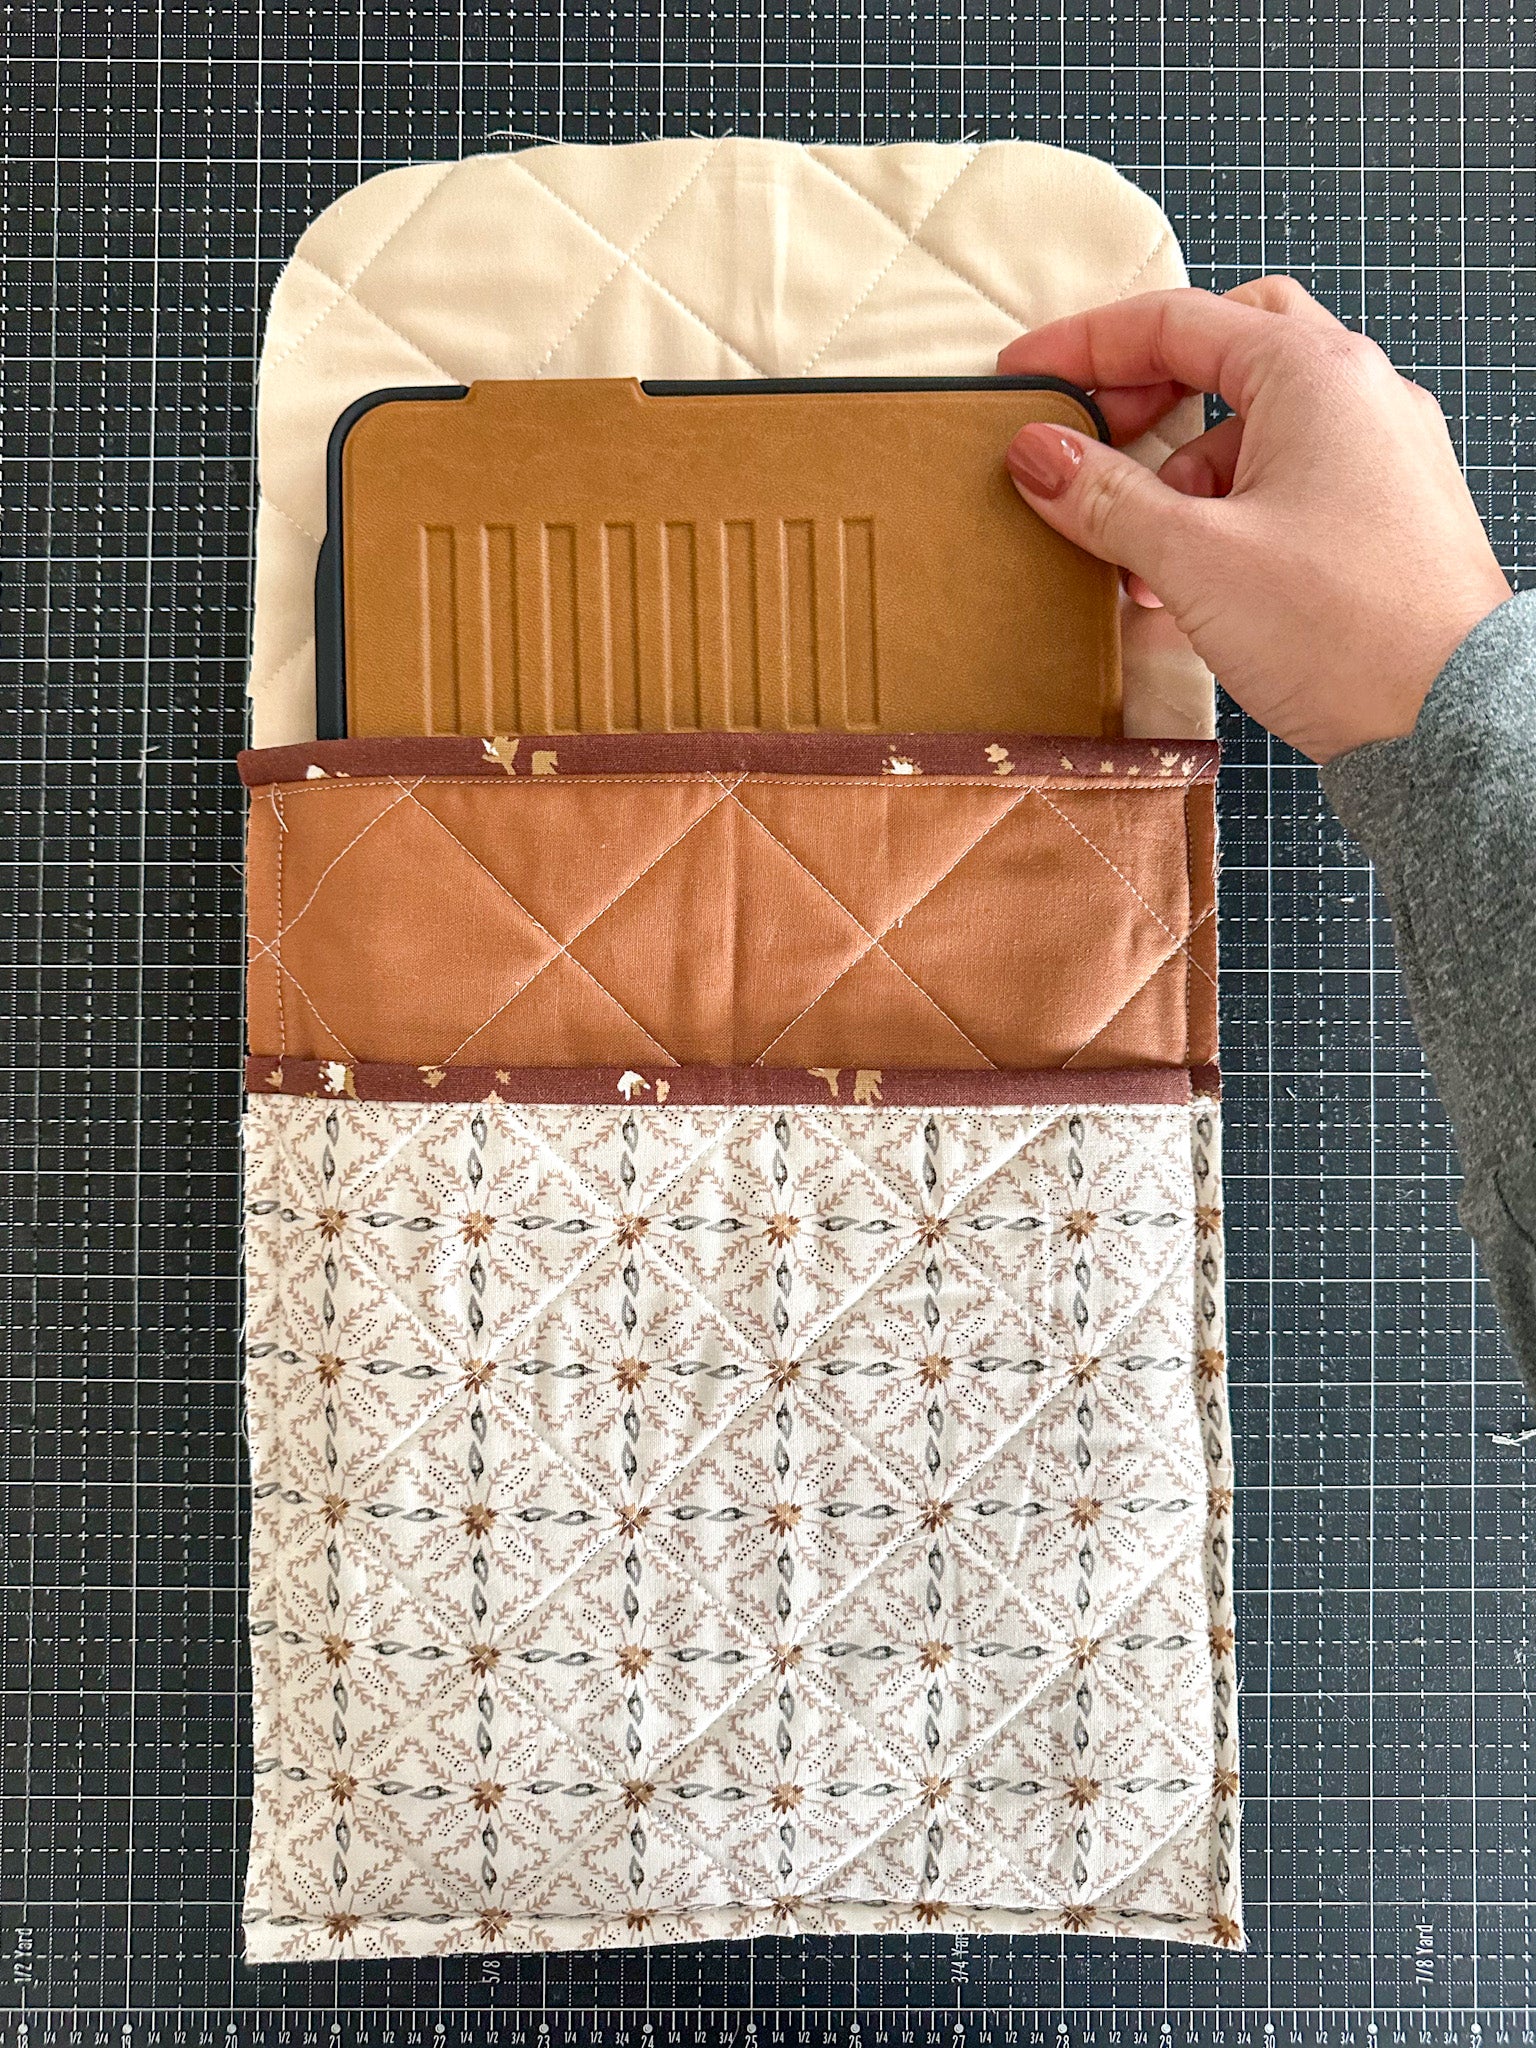
After attaching the bindings, lay out the sections and place your iPad on top to visualize the completed case. As you can see in the photo above, my first sections had more overlap on each side than the suggested .5". I started with a 2" excess (1" on each side) to be sure I had enough room. But once the sections were sewn together, I realized I wanted a more snug fit. In my opinion, .5" excess on each side is ideal! It holds the device tightly without being bulky.
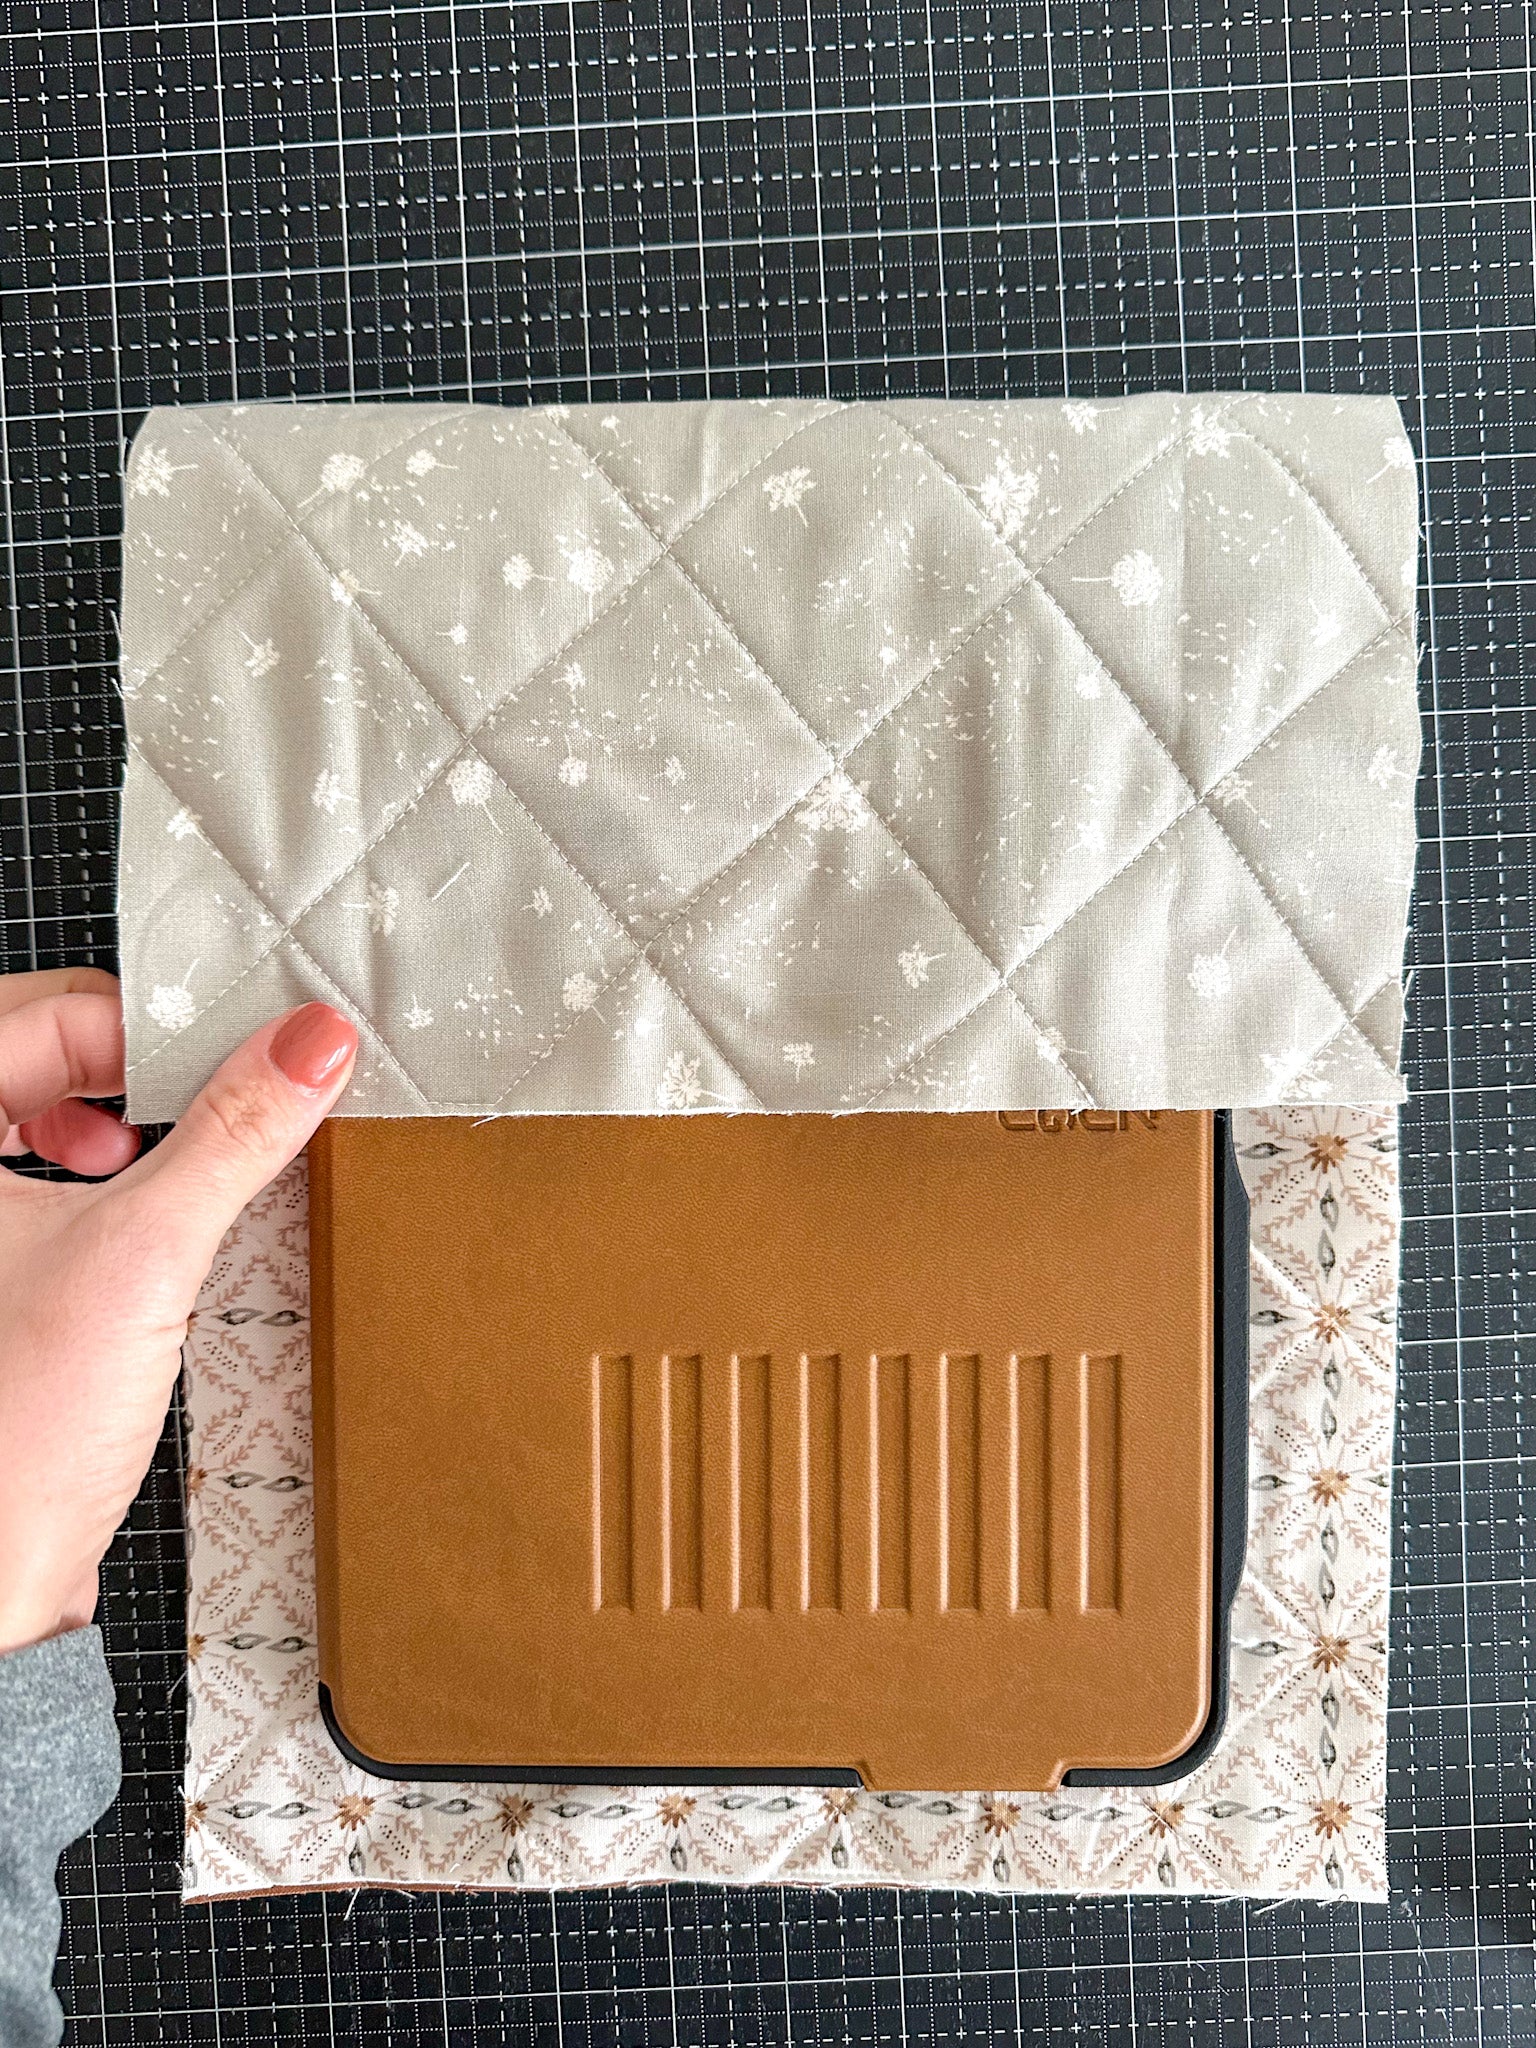
Next, fold the back flap forward to see if you have the right amount of overlap. My overlap was about 5.5", although this is based on personal preference. If you want more or less, that's totally fine! At this point, I also rounded the corners of my back panel. To create the rounded edge, fold the section in half, trace the edge of a cup (or other curved profile), and trim the corners. There's also the option of no flap, which is a super cute alternative! In that case, the front and back panels would be the same size.
Once you're confident in the sizing, get ready to sew your sections together! This is where Wonder Clips will become your best friends. It is really hard to pin 3 layers of quilted fabric together without distortion, but these clips make it easy to align your sections for stitching. Clip the 3 sections wrong-sides together. Did you catch that? - wrong-sides together. Sew along the front panel to secure the sections together.
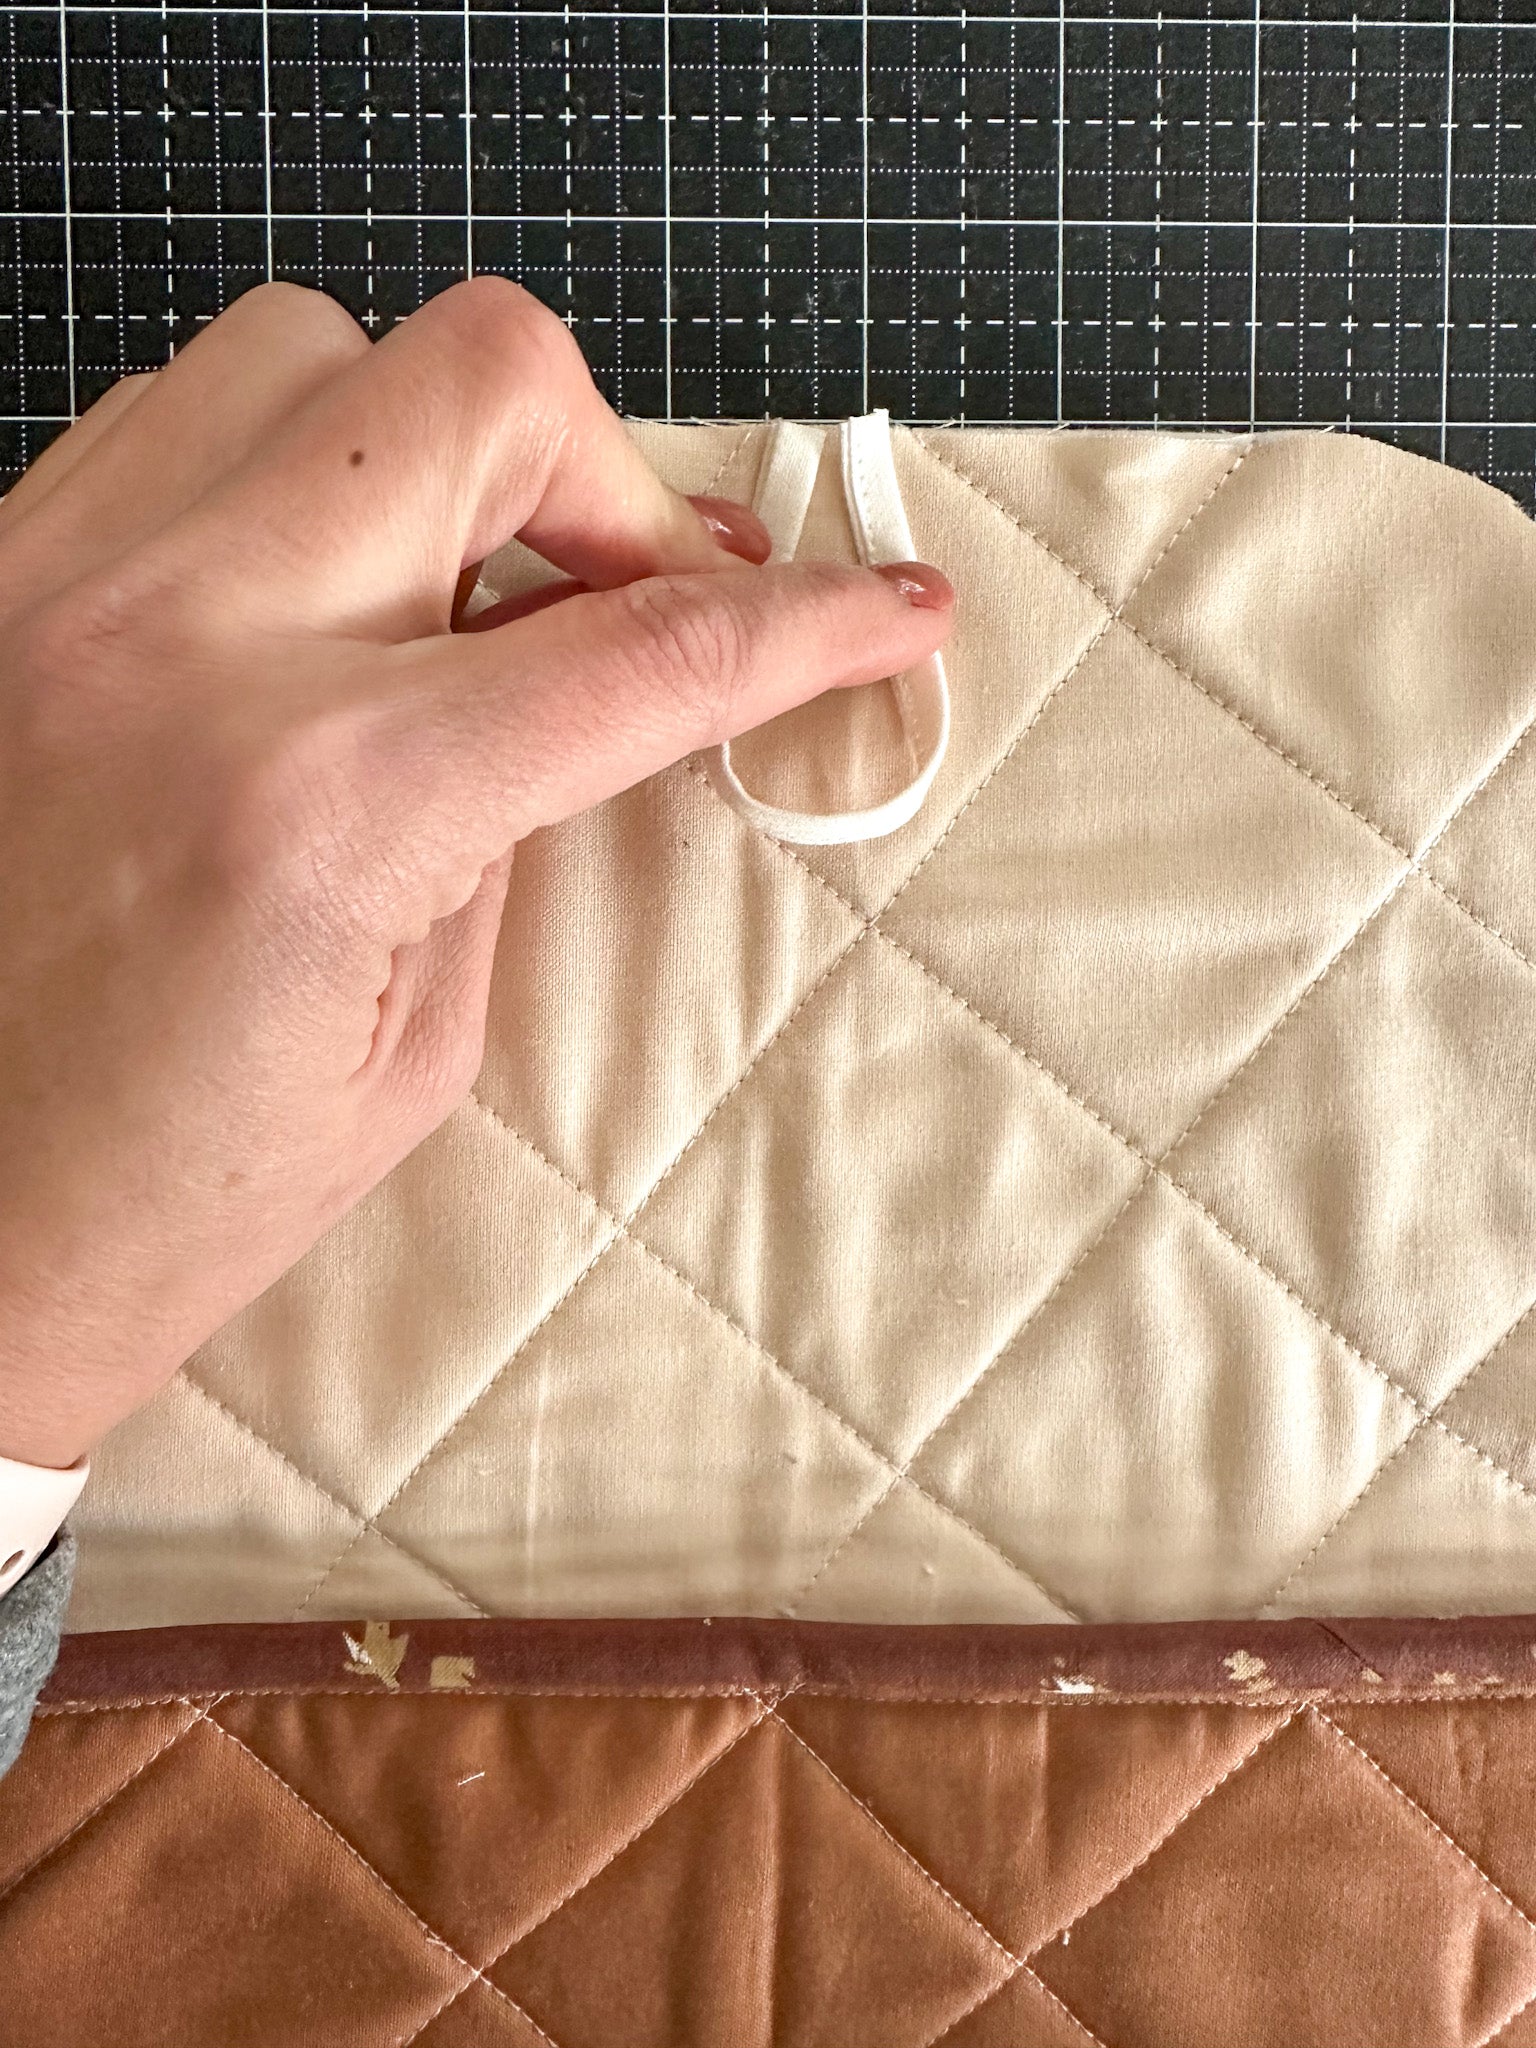
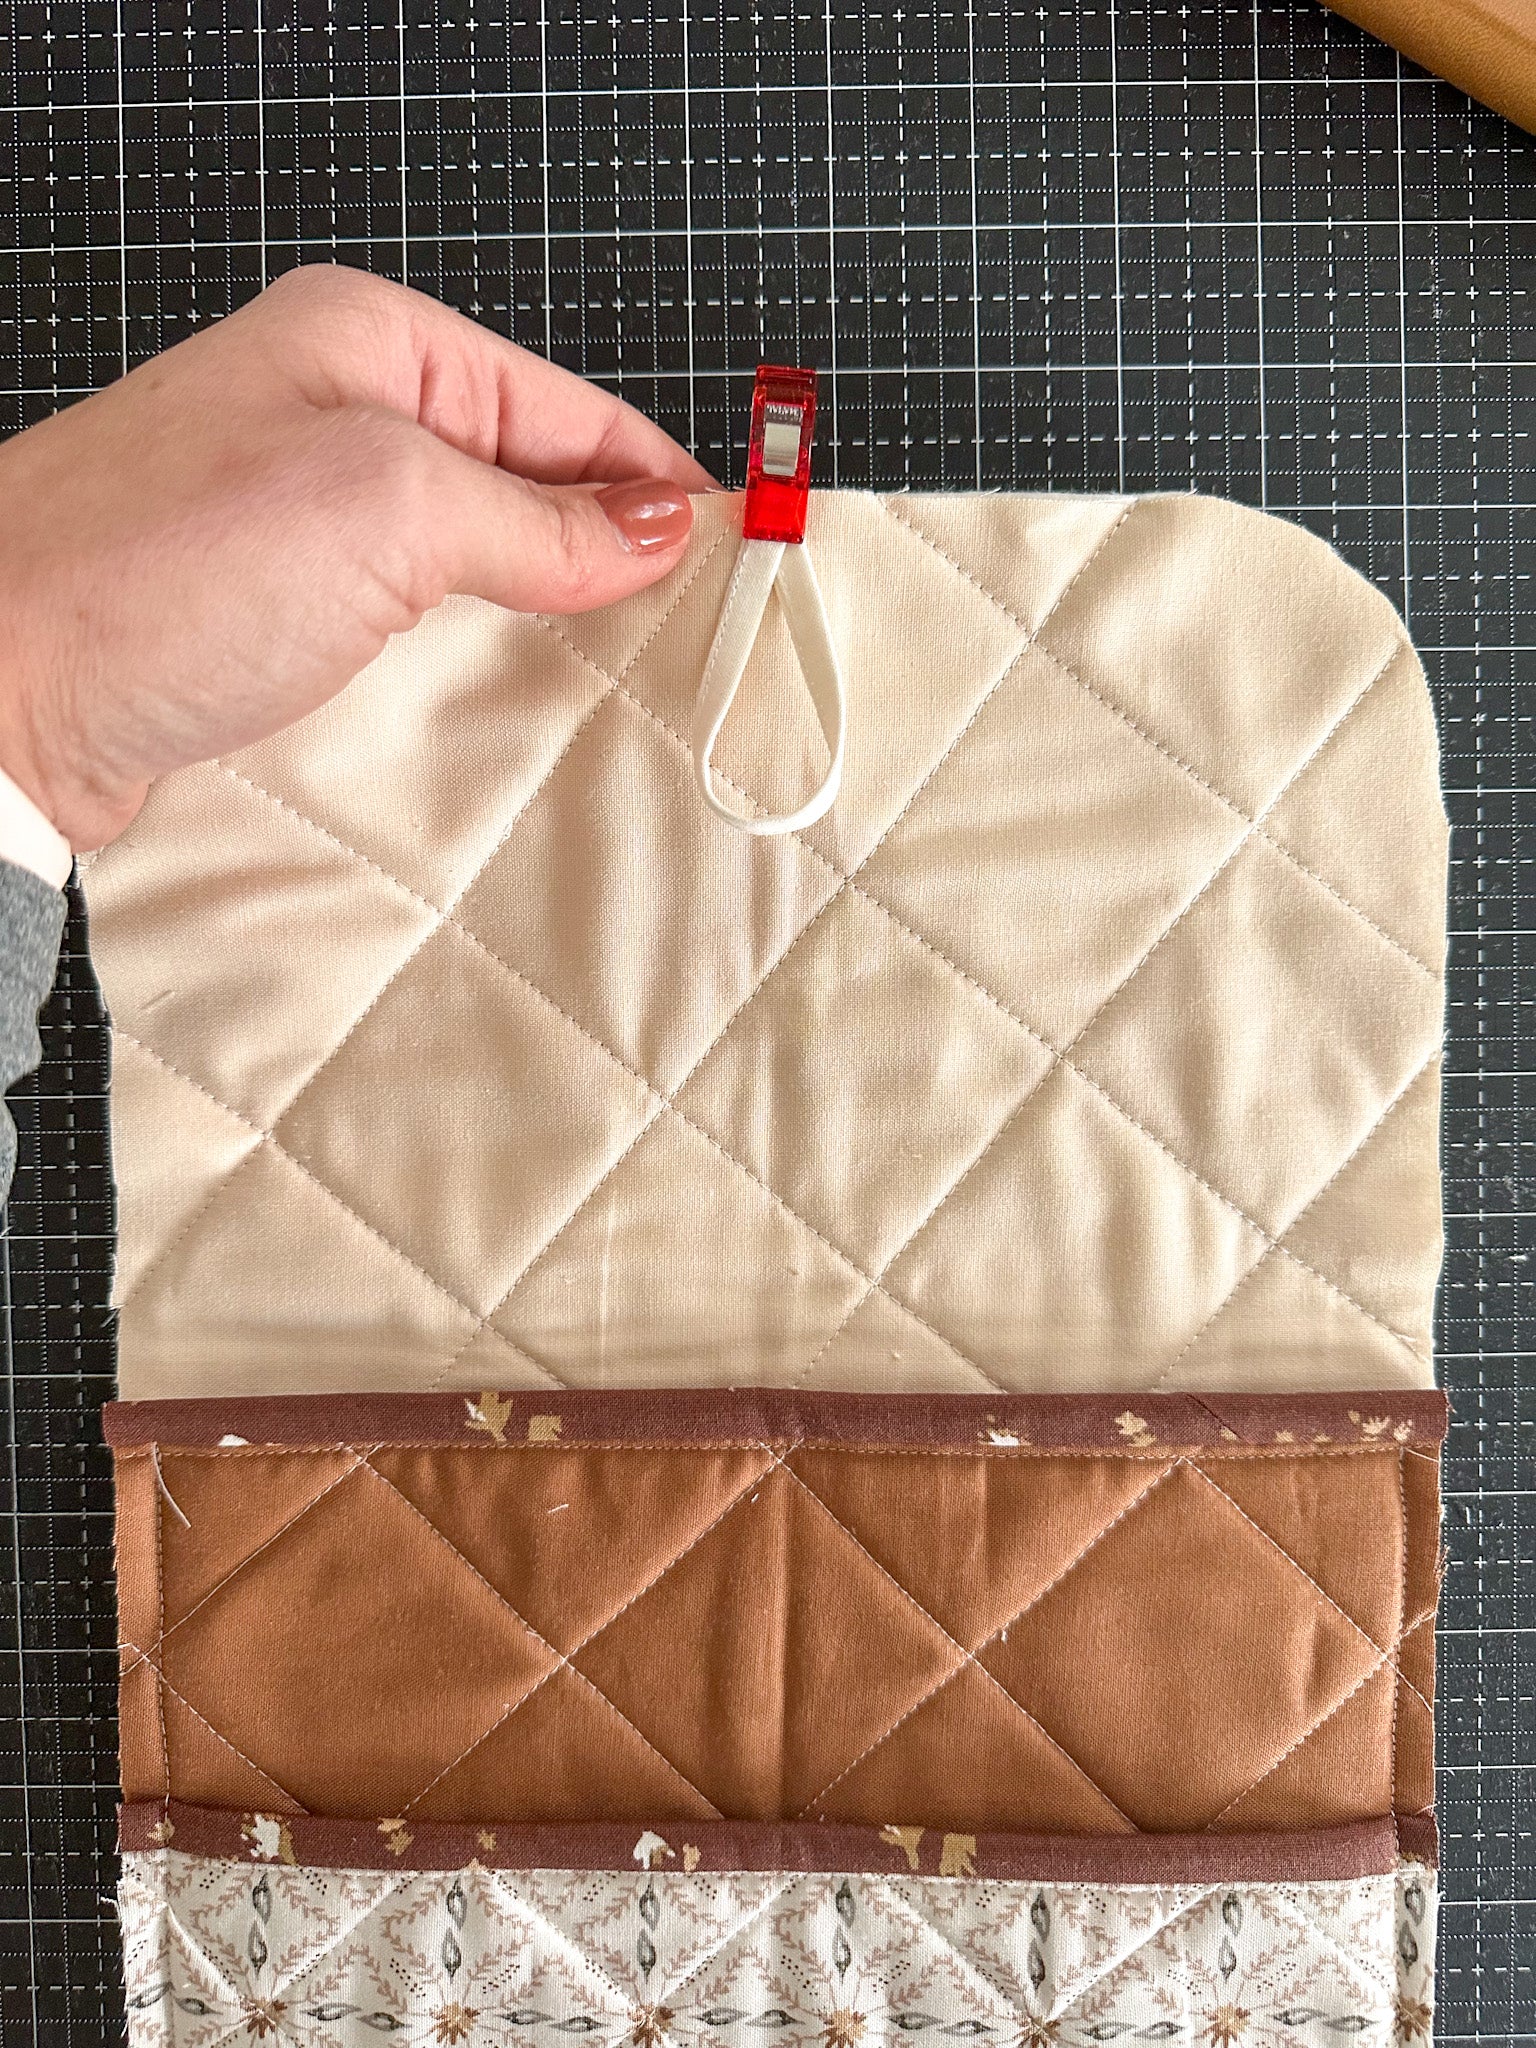
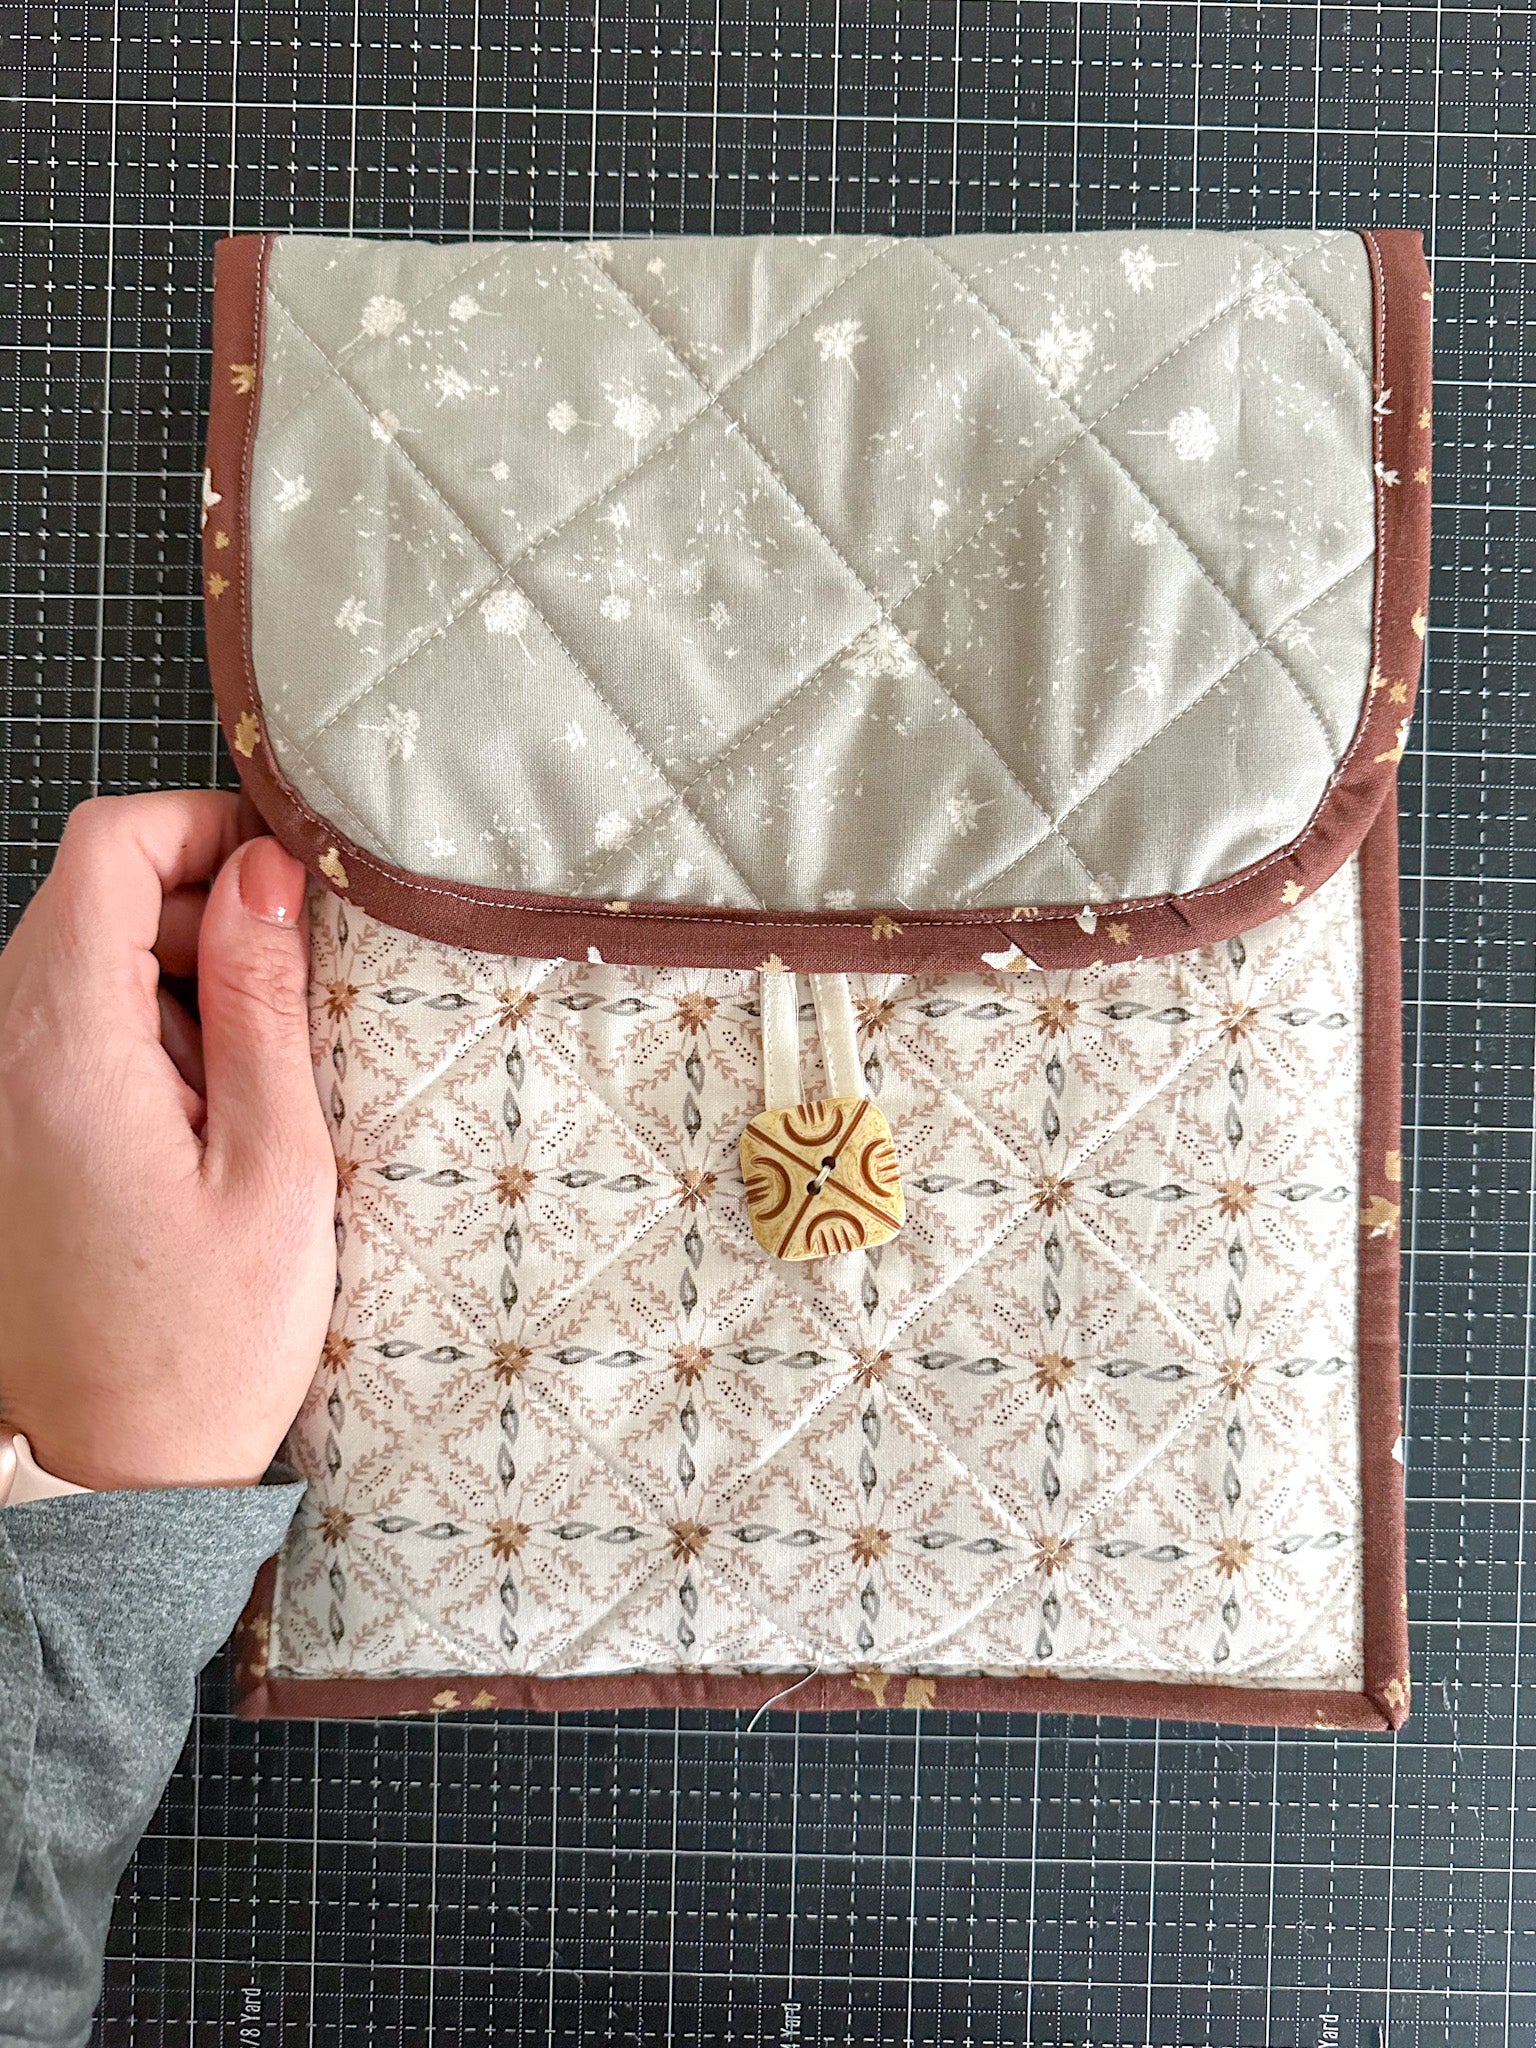
Binding is that last step and you're done! But before binding, it's important to decide how you want to create closure. Do you want a button? Velcro? Snap? I opted for a button, because I like the pretty accent. If using a button, you can either create a button hole or loop to secure it. For the loop, take a scrap of .5" bias tape or material of choice, and clip it at the center of the flap. Sew it down. Then take your binding strips and attach them as usual, stitching over the loop you created. This hides the raw edges. Complete your binding, attach the button, and your iPad cover is done!
Wasn’t that easy?!
Tag me in your finished projects (@wellspringdesigns_co) so I can see them. As always, if you have questions or comments, feel free to email me at wellspringdesigns@gmail.com, or comment on this blog post. I love chatting quilting with you guys!


6 comments
Awesome Thankyou for the pattern ☺️ can’t wait to whip one or two up
Love this and want to make two – for my Kindle and Tablet. Thank you for the instructions.
Can hardly wait to go scrap rummaging and make one! Thank you.
I am not an experienced sewer but this looks doable. ❤️ the fabric too!
What are those beautiful fabrics? I absolutely love those colors.
I will be making several of these ipad cases for my childre.n and grandchildren.
Thank you for the tutorial