DIY Quilted Hoodie Quilt-A-Long: Week 3
Welcome to Week 3 of the QAL!
We made it to the best part - ASSEMBLY! This week, we'll review each step of assembly with lots of photos to visualize. First, let's answer a couple FAQ's from last week:
1. Are the "Pattern Adjustments" reflected in the templates? No, those were just adjustments specific to my preferences, the templates remain the same.
2. Could you clarify the changes to the neckline? I wish I'd taken more photos, it's hard to visualize from just words. Let's harken back to 9th grade geometry for help. Look at your templates - the Front Panel neckline is formed by two lines extending outward in an obtuse angle. The final angle will be closer to a right angle. To widen the neckline, cut 1.5" horizontally past the template boundary, then turn the scissors upward and cut toward the shoulder. This line was originally diagonal, now will be almost vertical. So the shoulder placement will not change, only the lower width of the neckline will increase. Does that make more sense?? I hope it helps!
3. Can a zipper be added? This is a challenging alteration. My best thought is follow Steps 1-4 (of this post), but skip the pocket and don't bind the hood, before cutting the Front Panel in half. After Step 4, cut the front panel in half. Then attach the bottom of the hood to each side of the neck. Trim excess to even the curve of the hood. Follow Steps 5-8, adding the binding contiguously around the whole coat (lower edge, midline, and hood). Finally add the zipper. This is the best fix I came up with - if there are any other suggestions, I'd love to hear!
Now for the fun stuff! What you need:
- Sewing Machine or Serger (I used my serger for the first time ever on second version, and I'll discuss more at the end of the post, but I wouldn't recommend to a beginner)
- Wonder clips (honestly, these are non-negotiable)
- Pins
- Binding strips
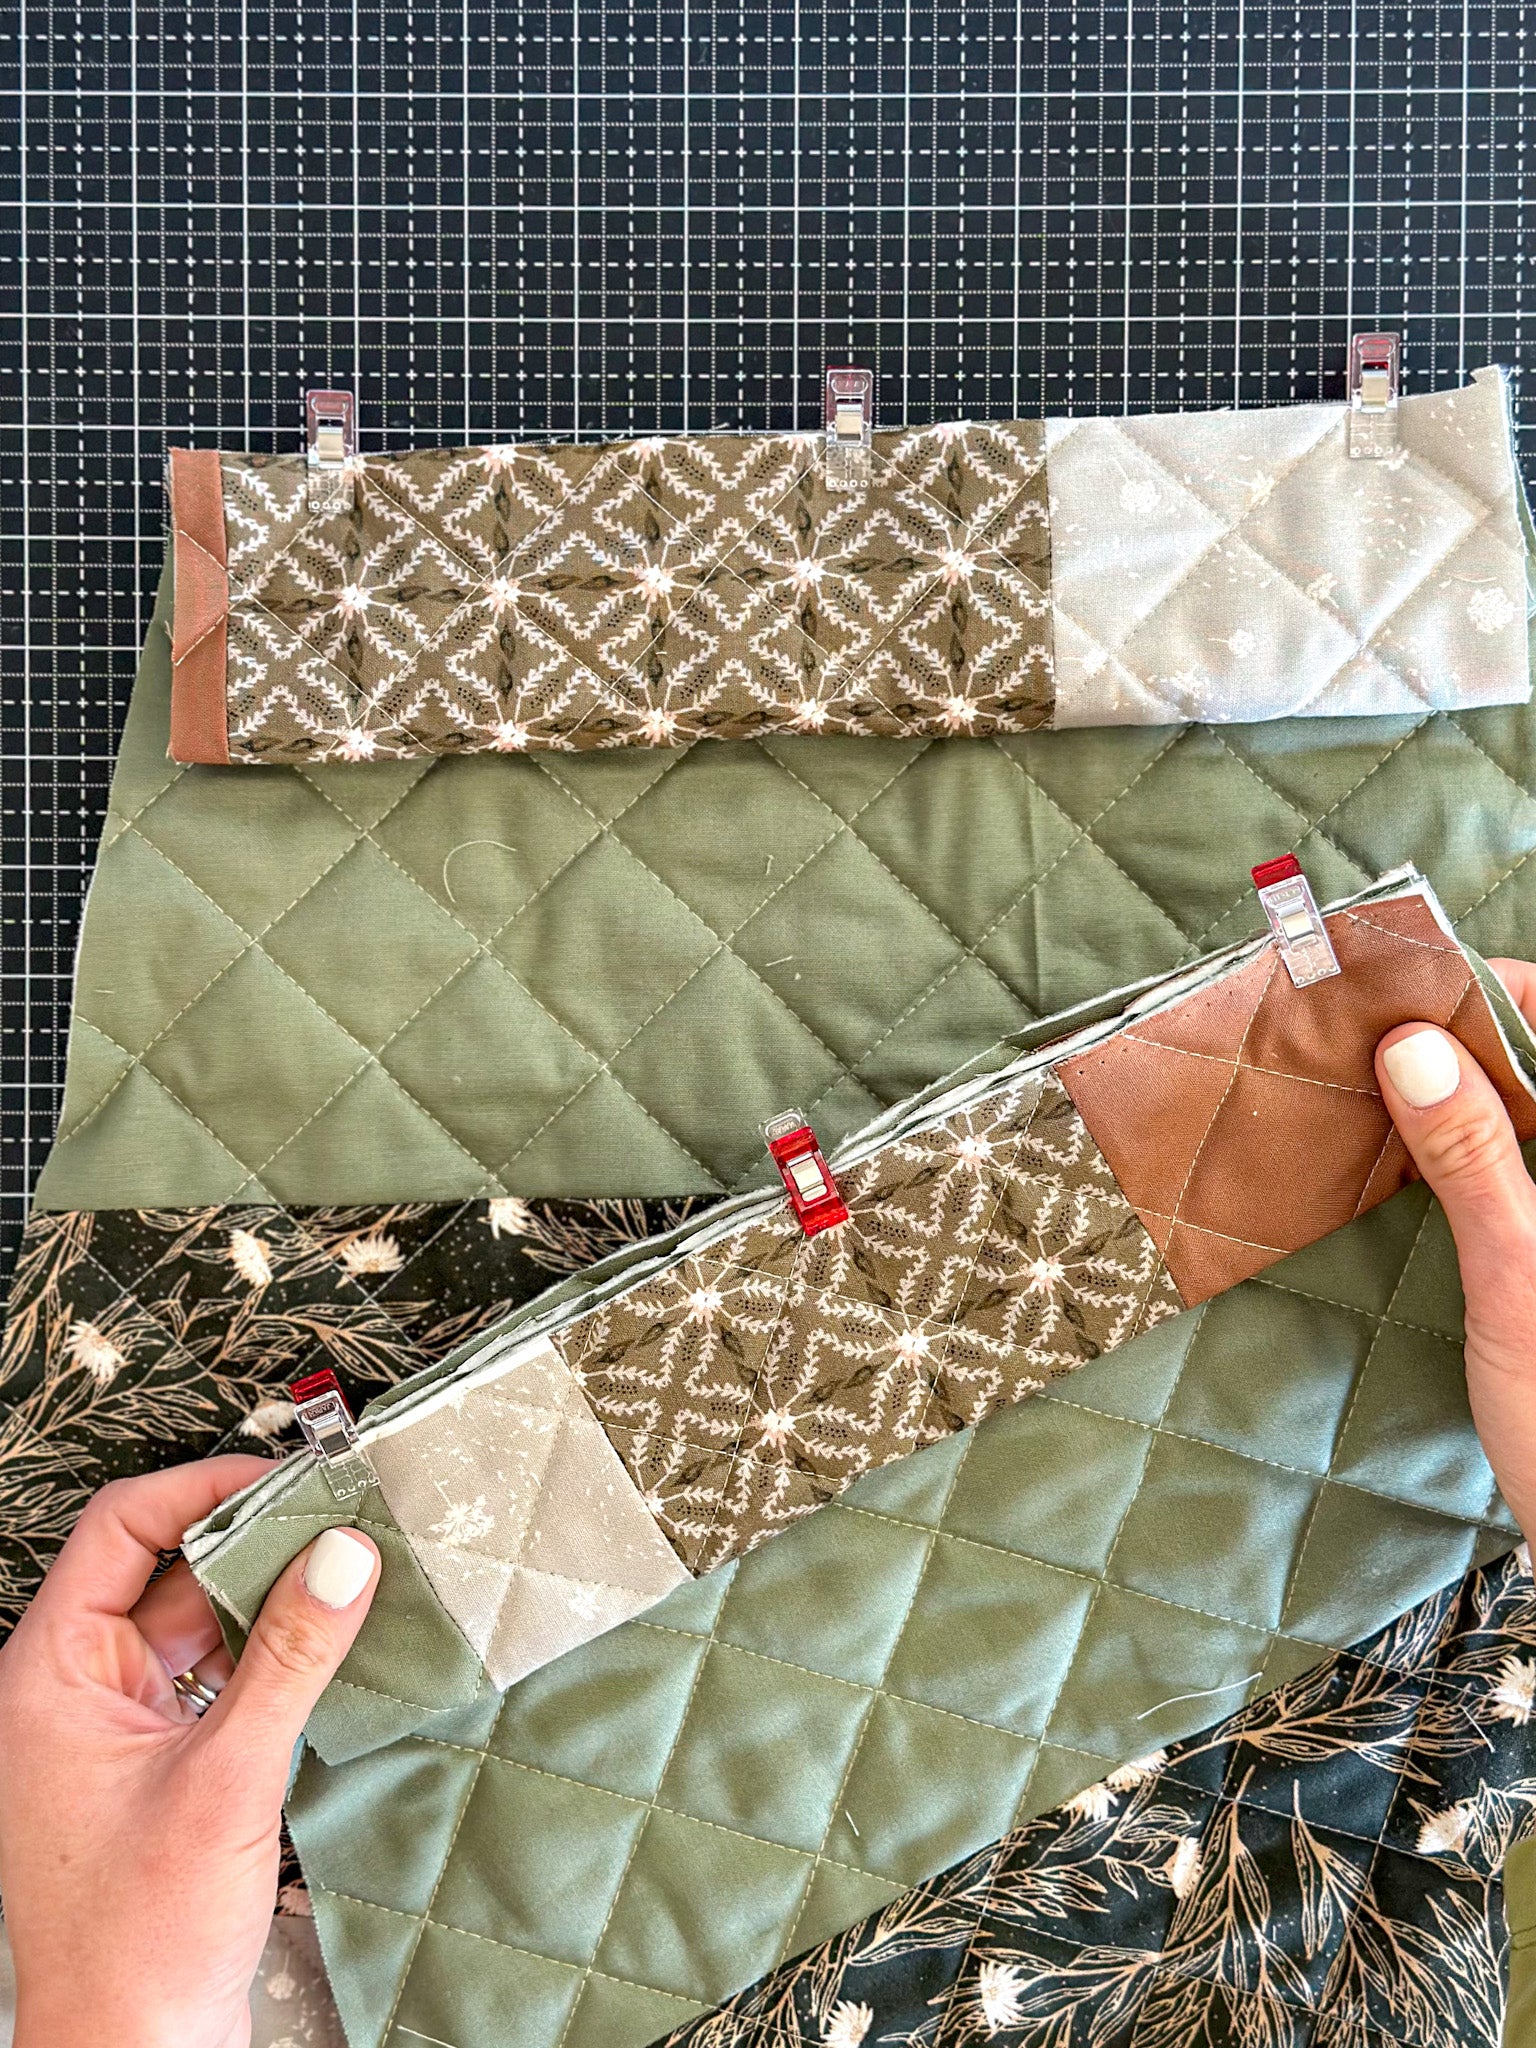
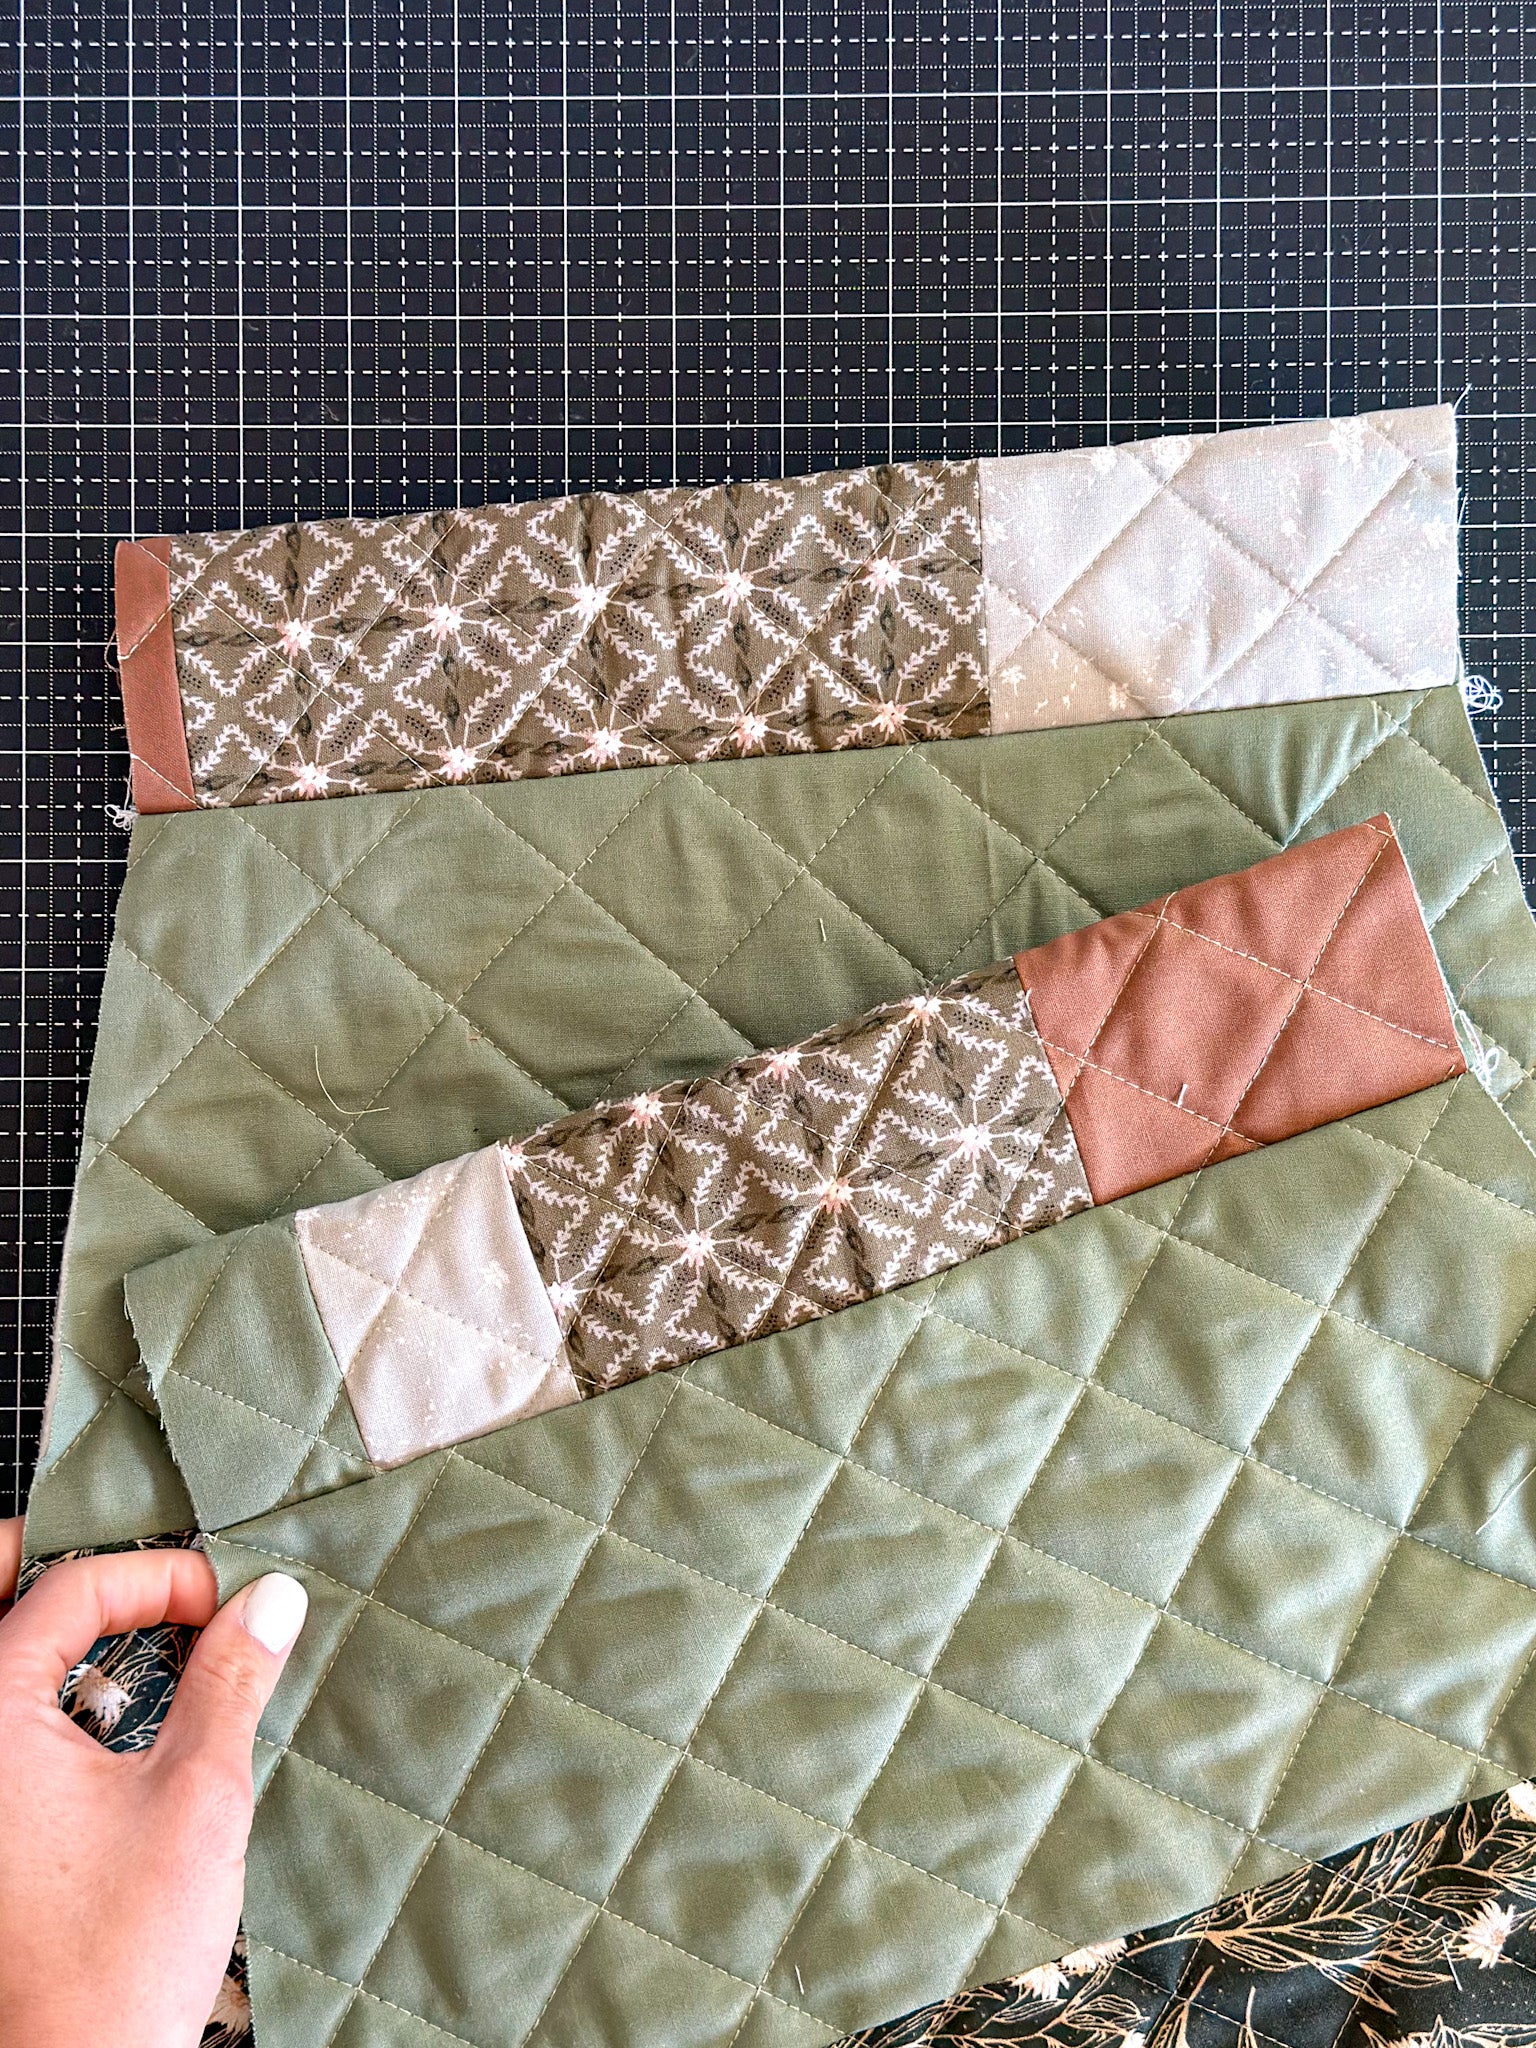
Step 1. Fold cuffs in half, and sew to right side of each sleeve. Place hood sections right-sides together. Sew along curved edge.
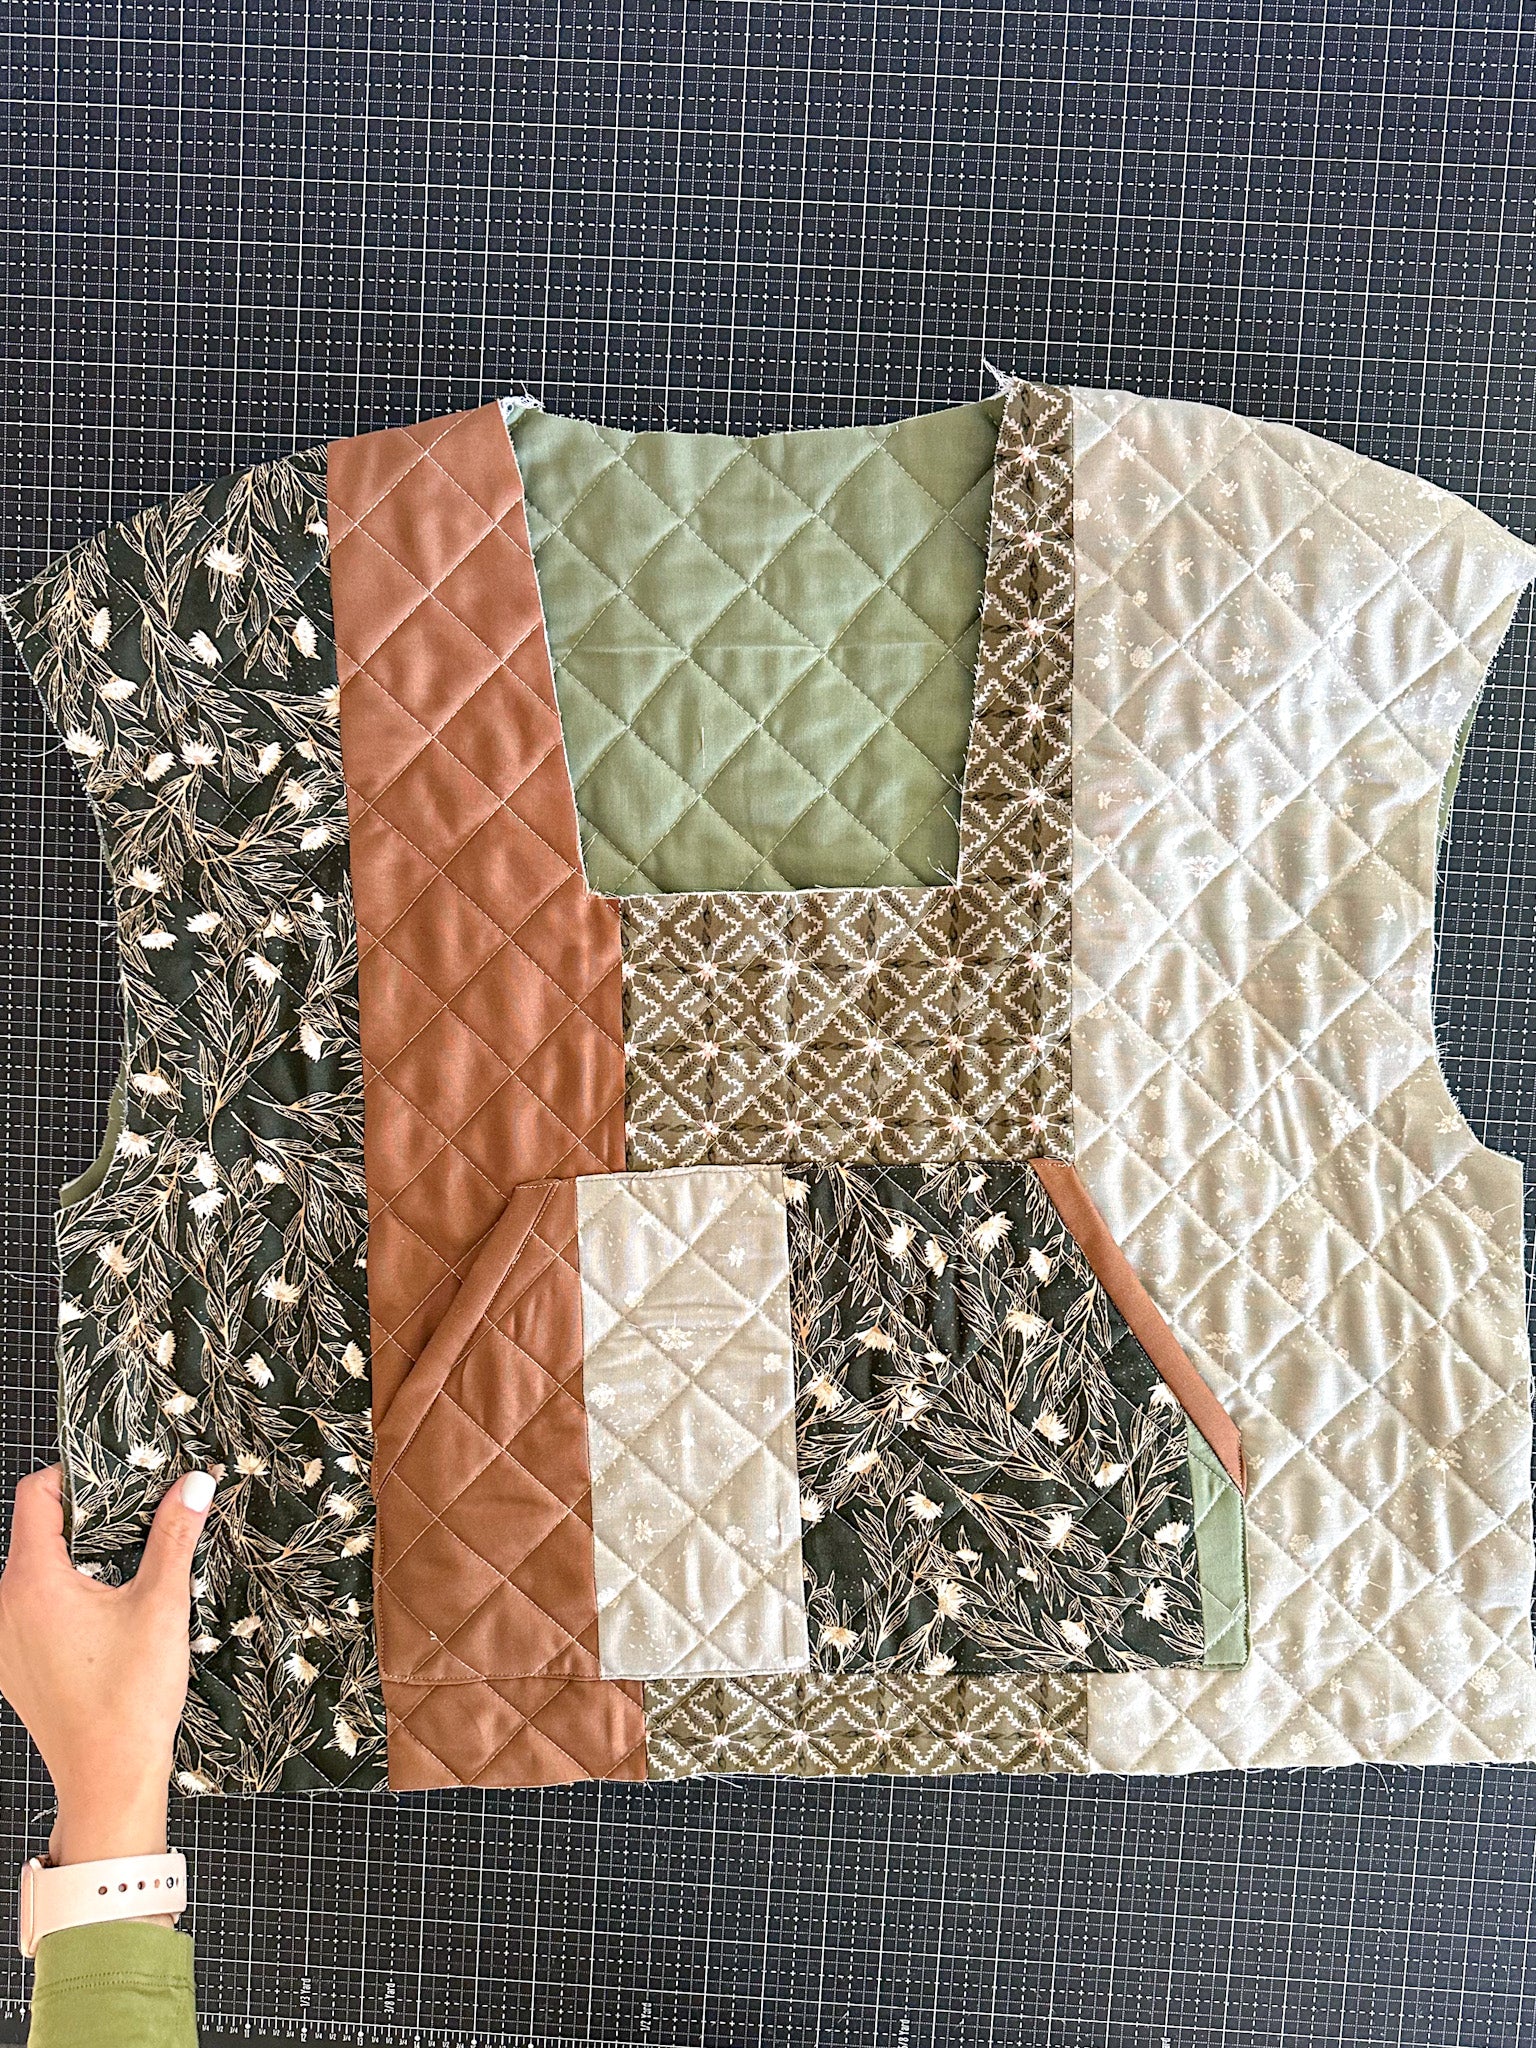
Step 2. Sew binding to hood. Sew binding strips to diagonal edges of pocket section. Prepare pocket by pressing the edges (except the binding) under by 1/4". Center on the front panel and pin turned under edges. Sew along pinned edges.
Step 3. Place Front and Back panels right-sides together. Sew along shoulder seam.
Note: I try on after most steps to see how things are fitting and if adjustments need to be made.
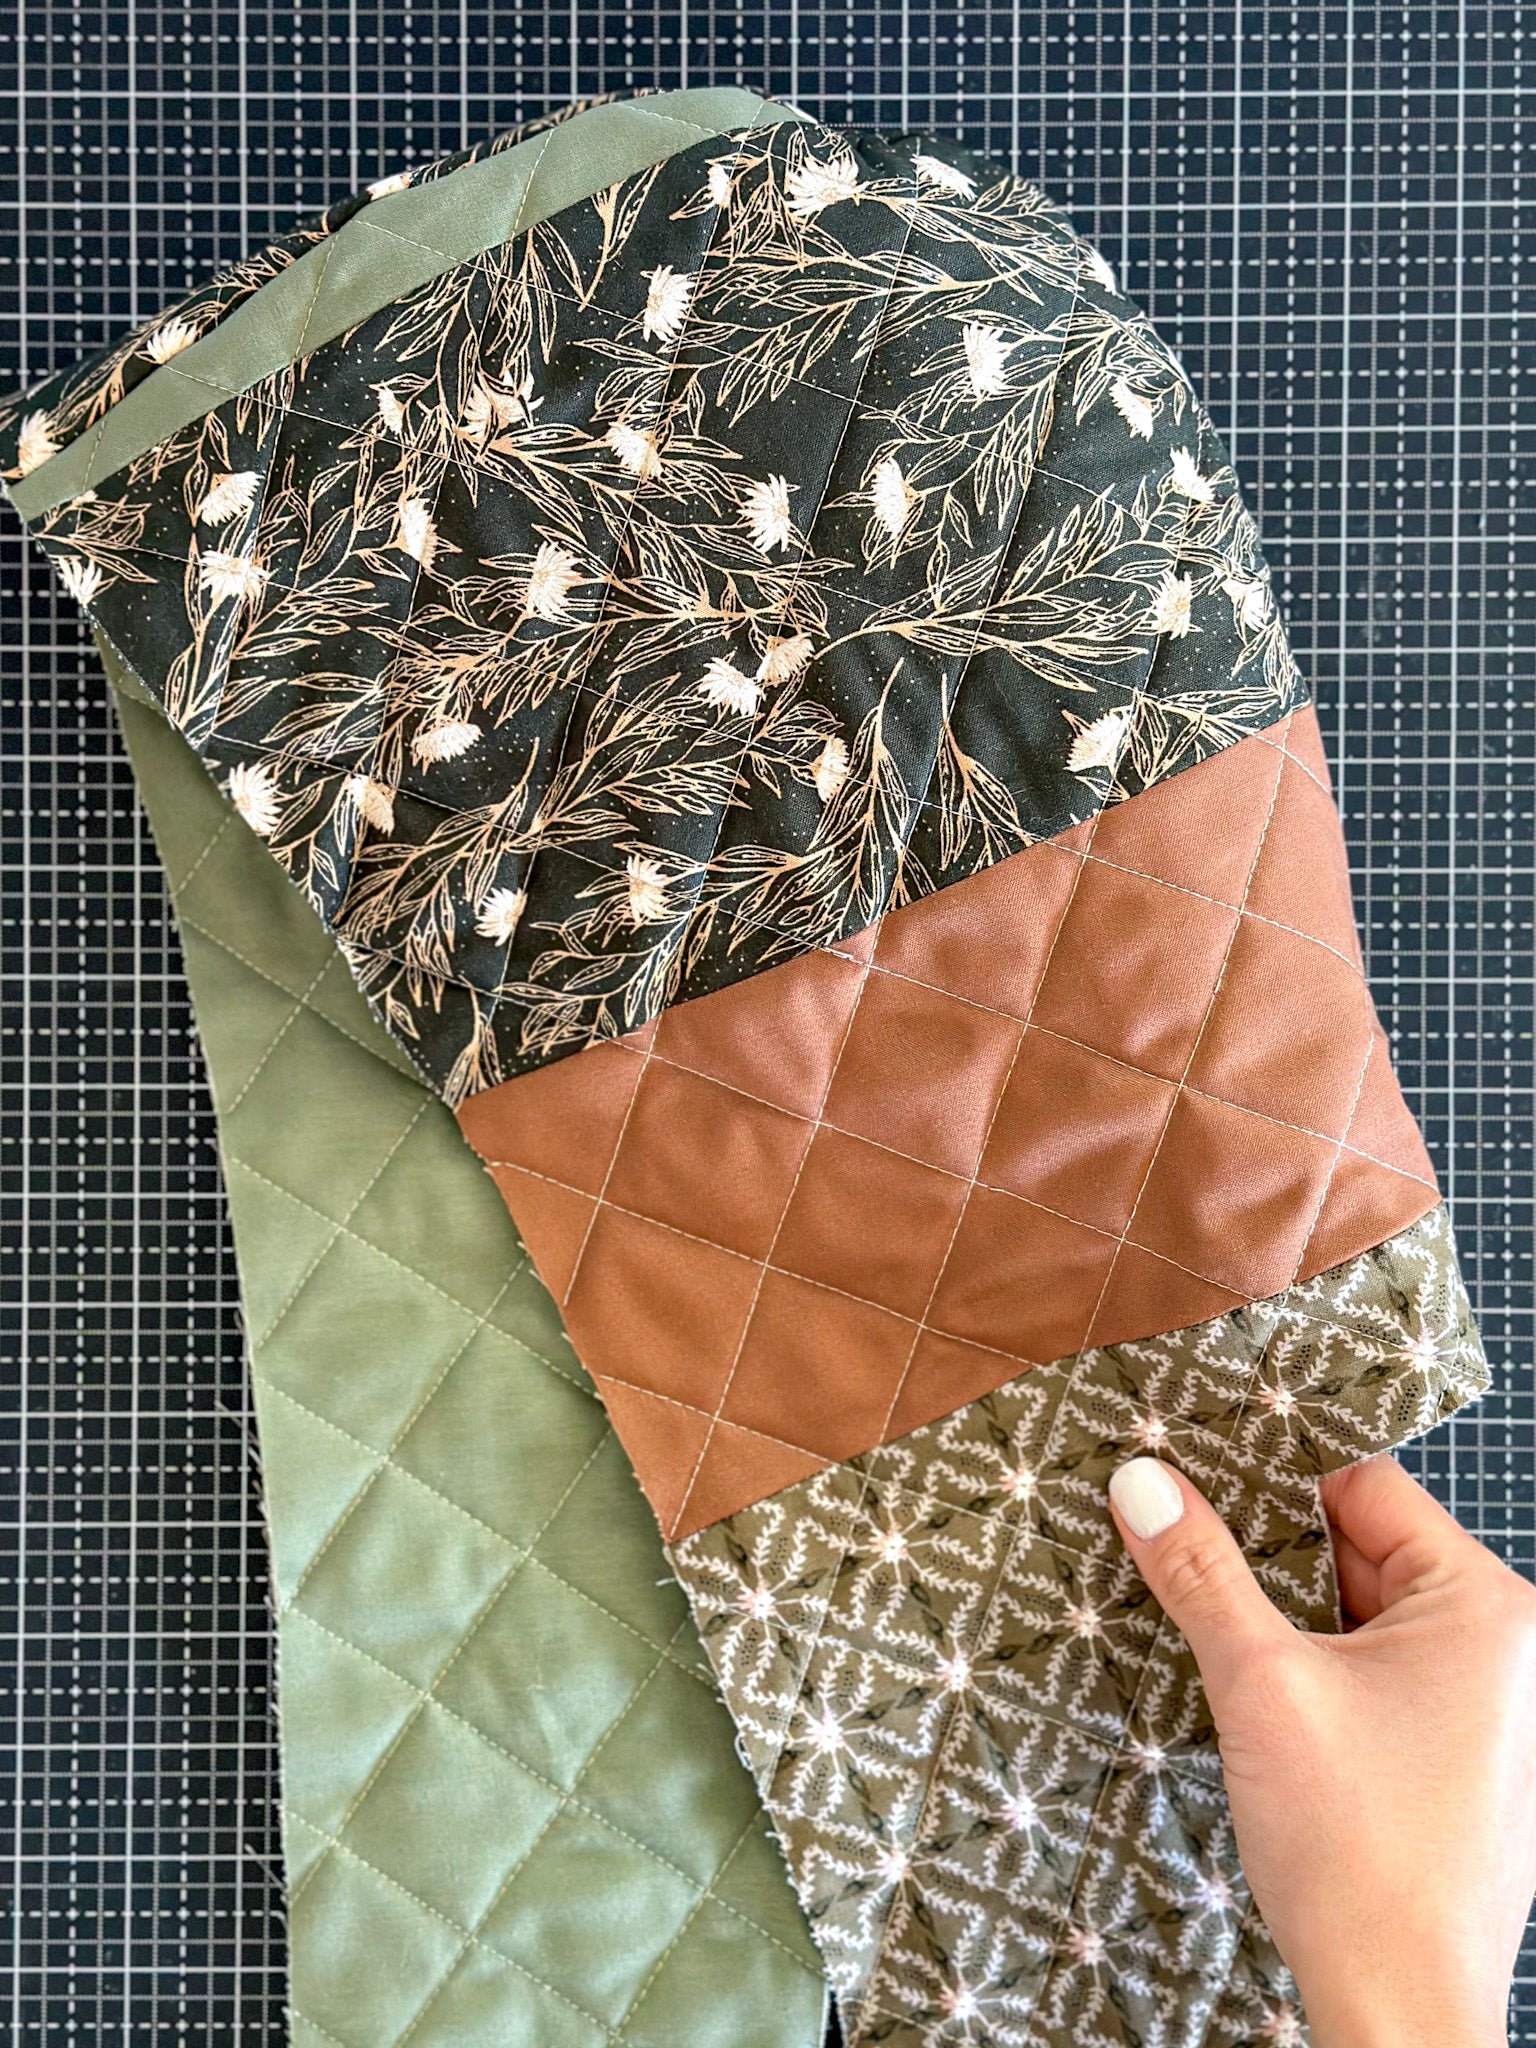
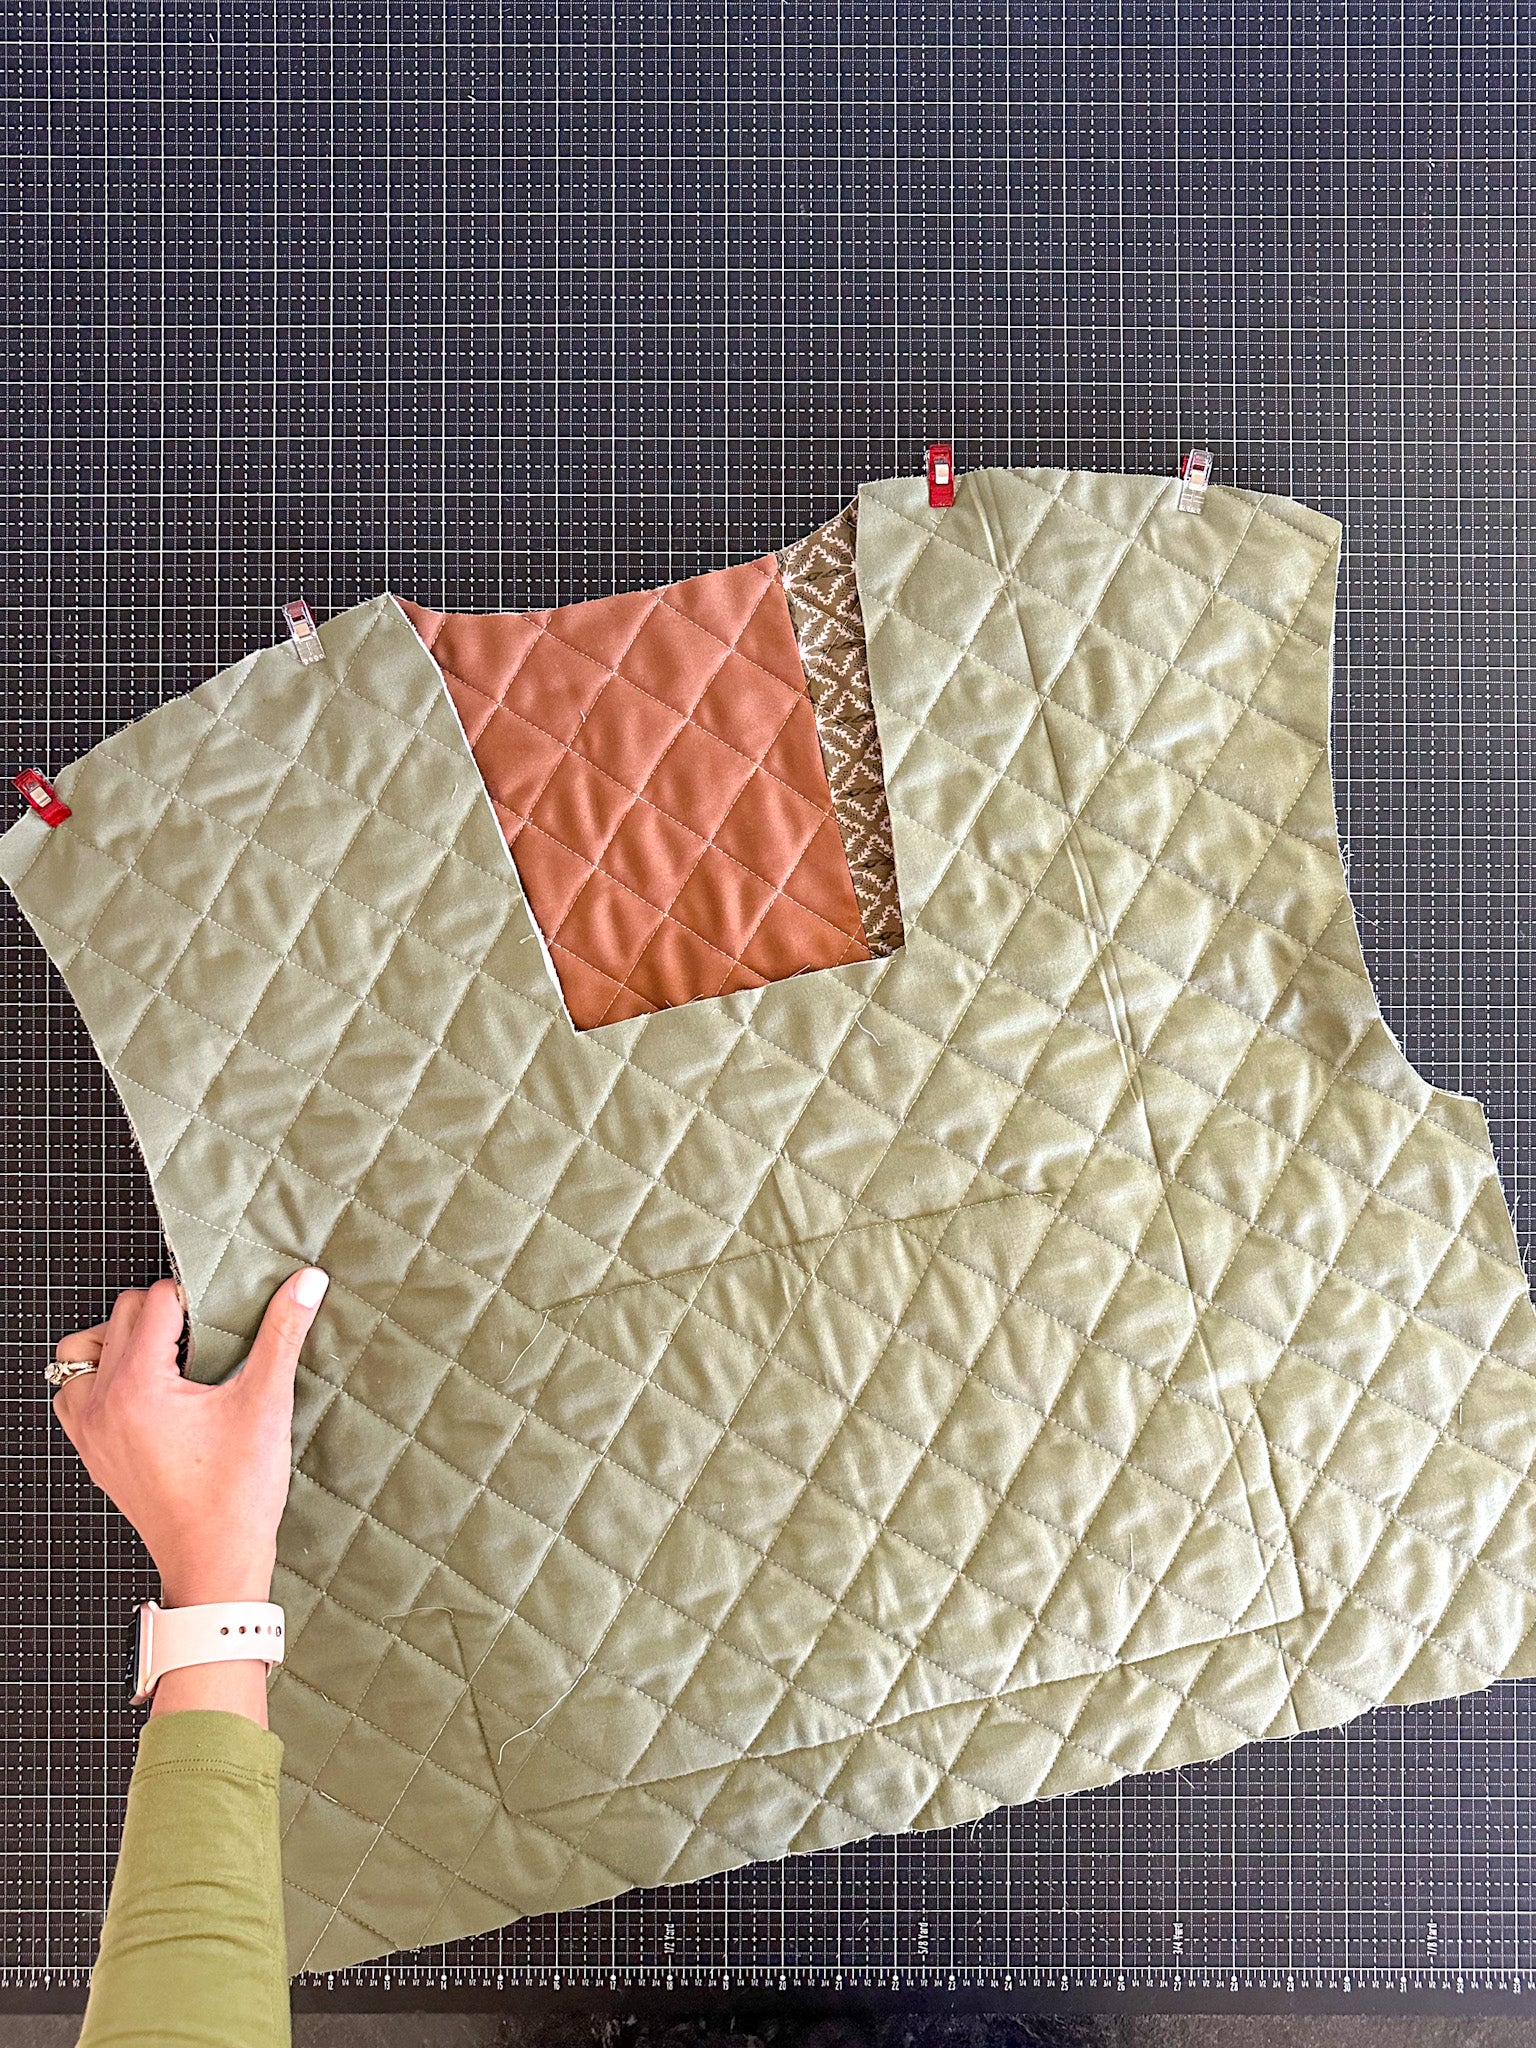
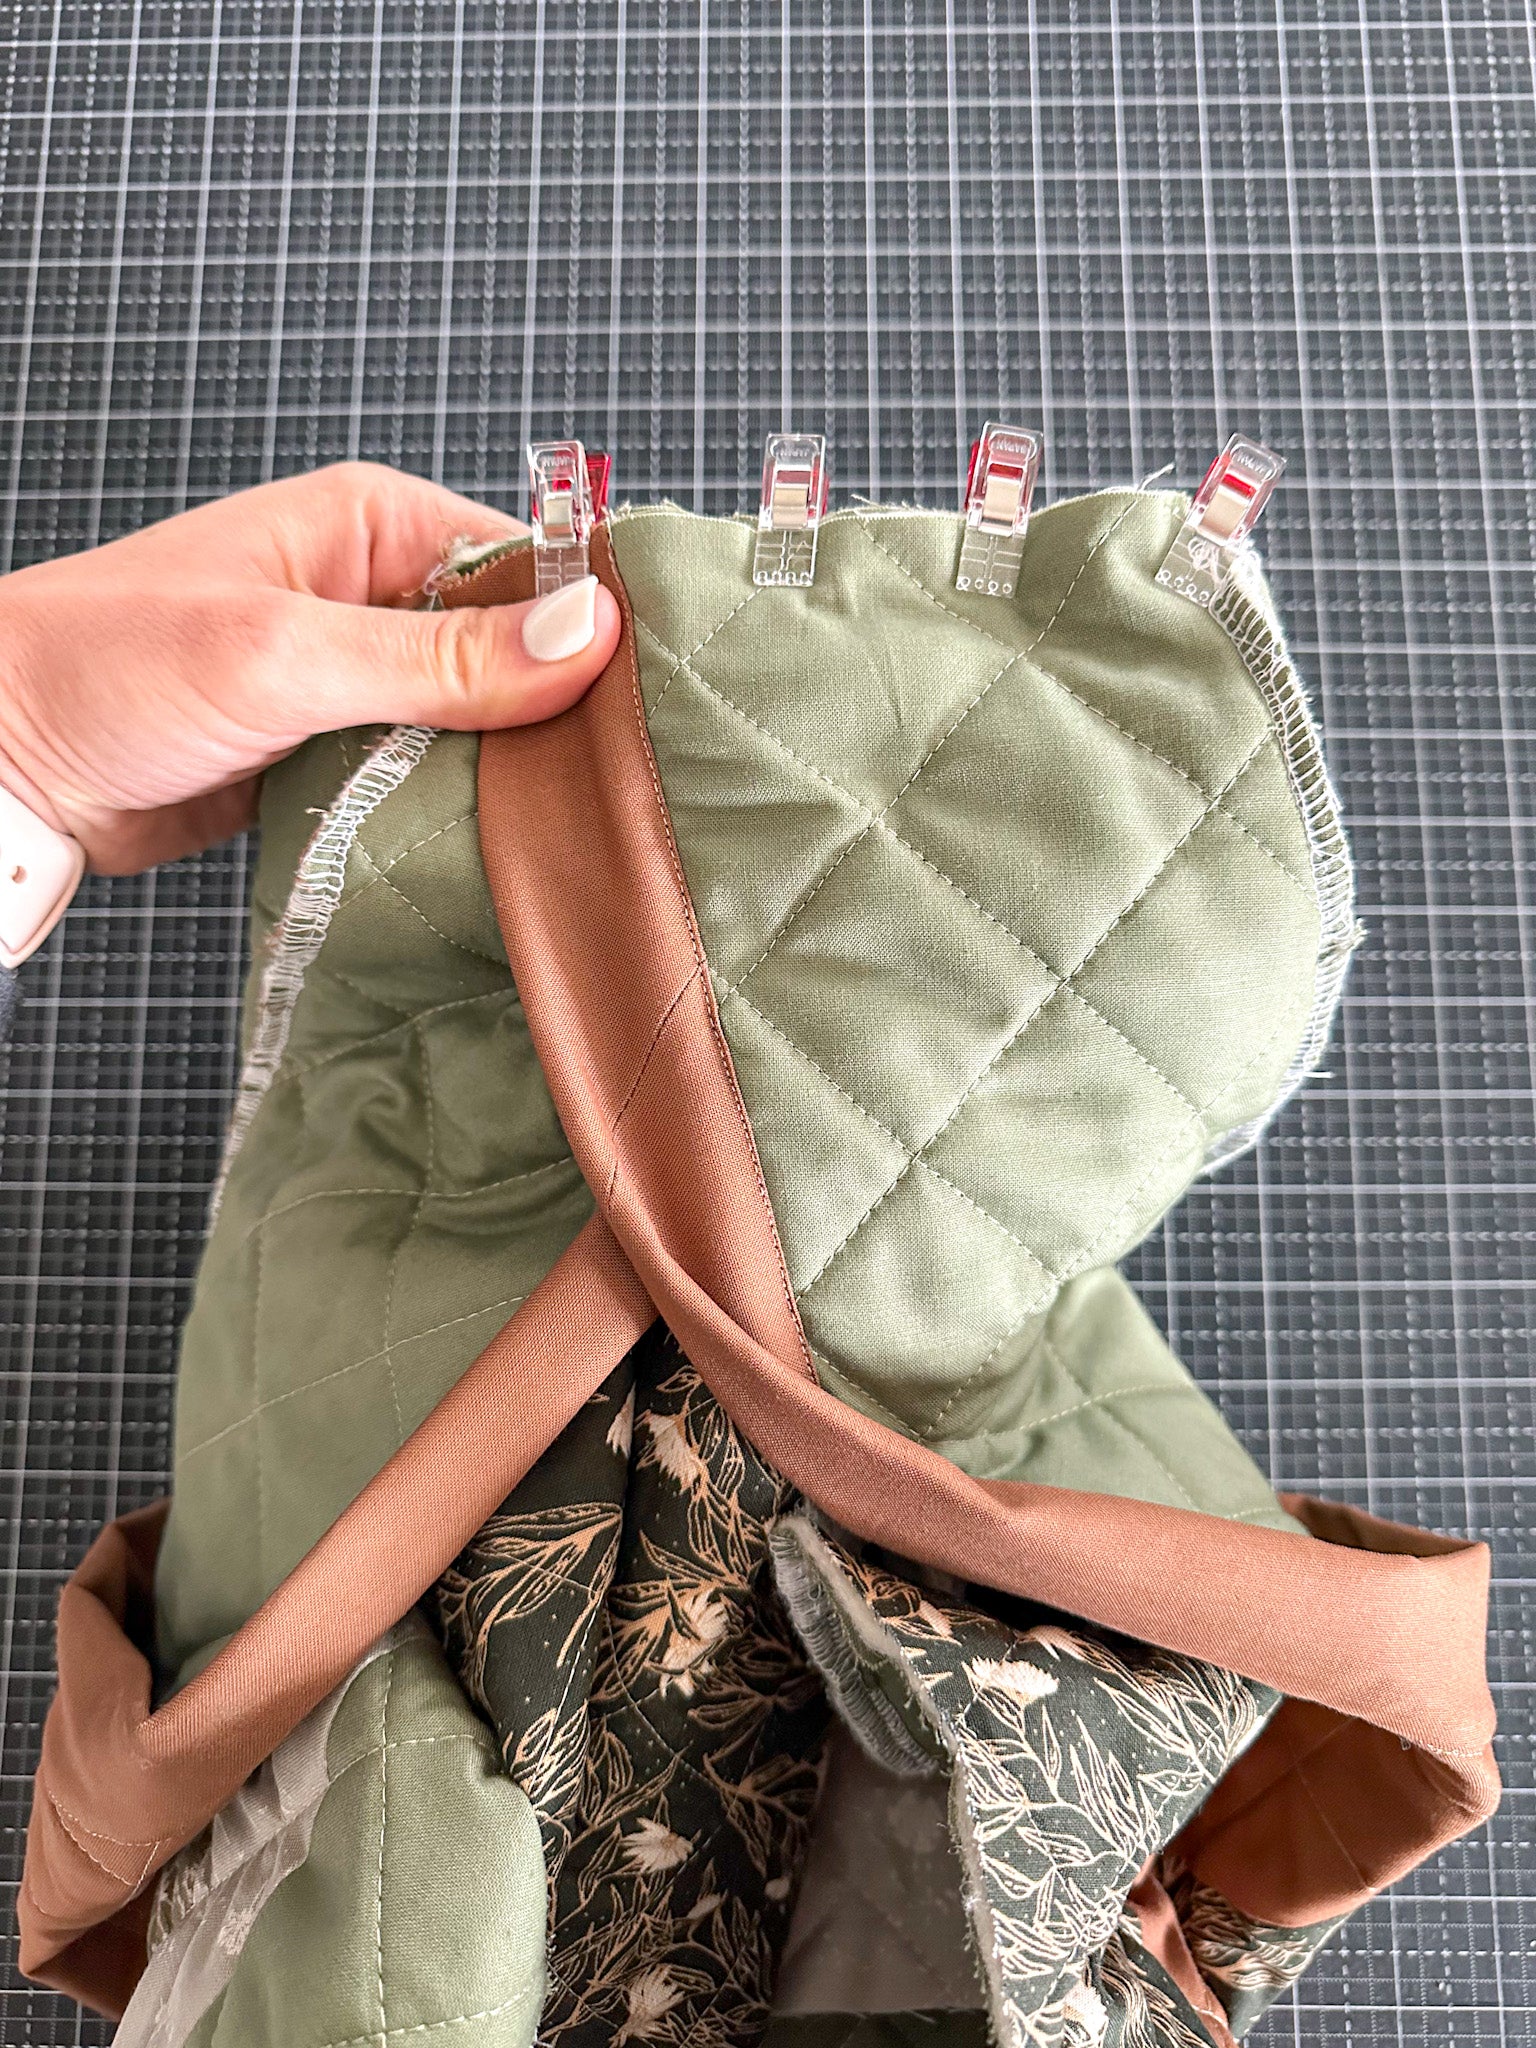
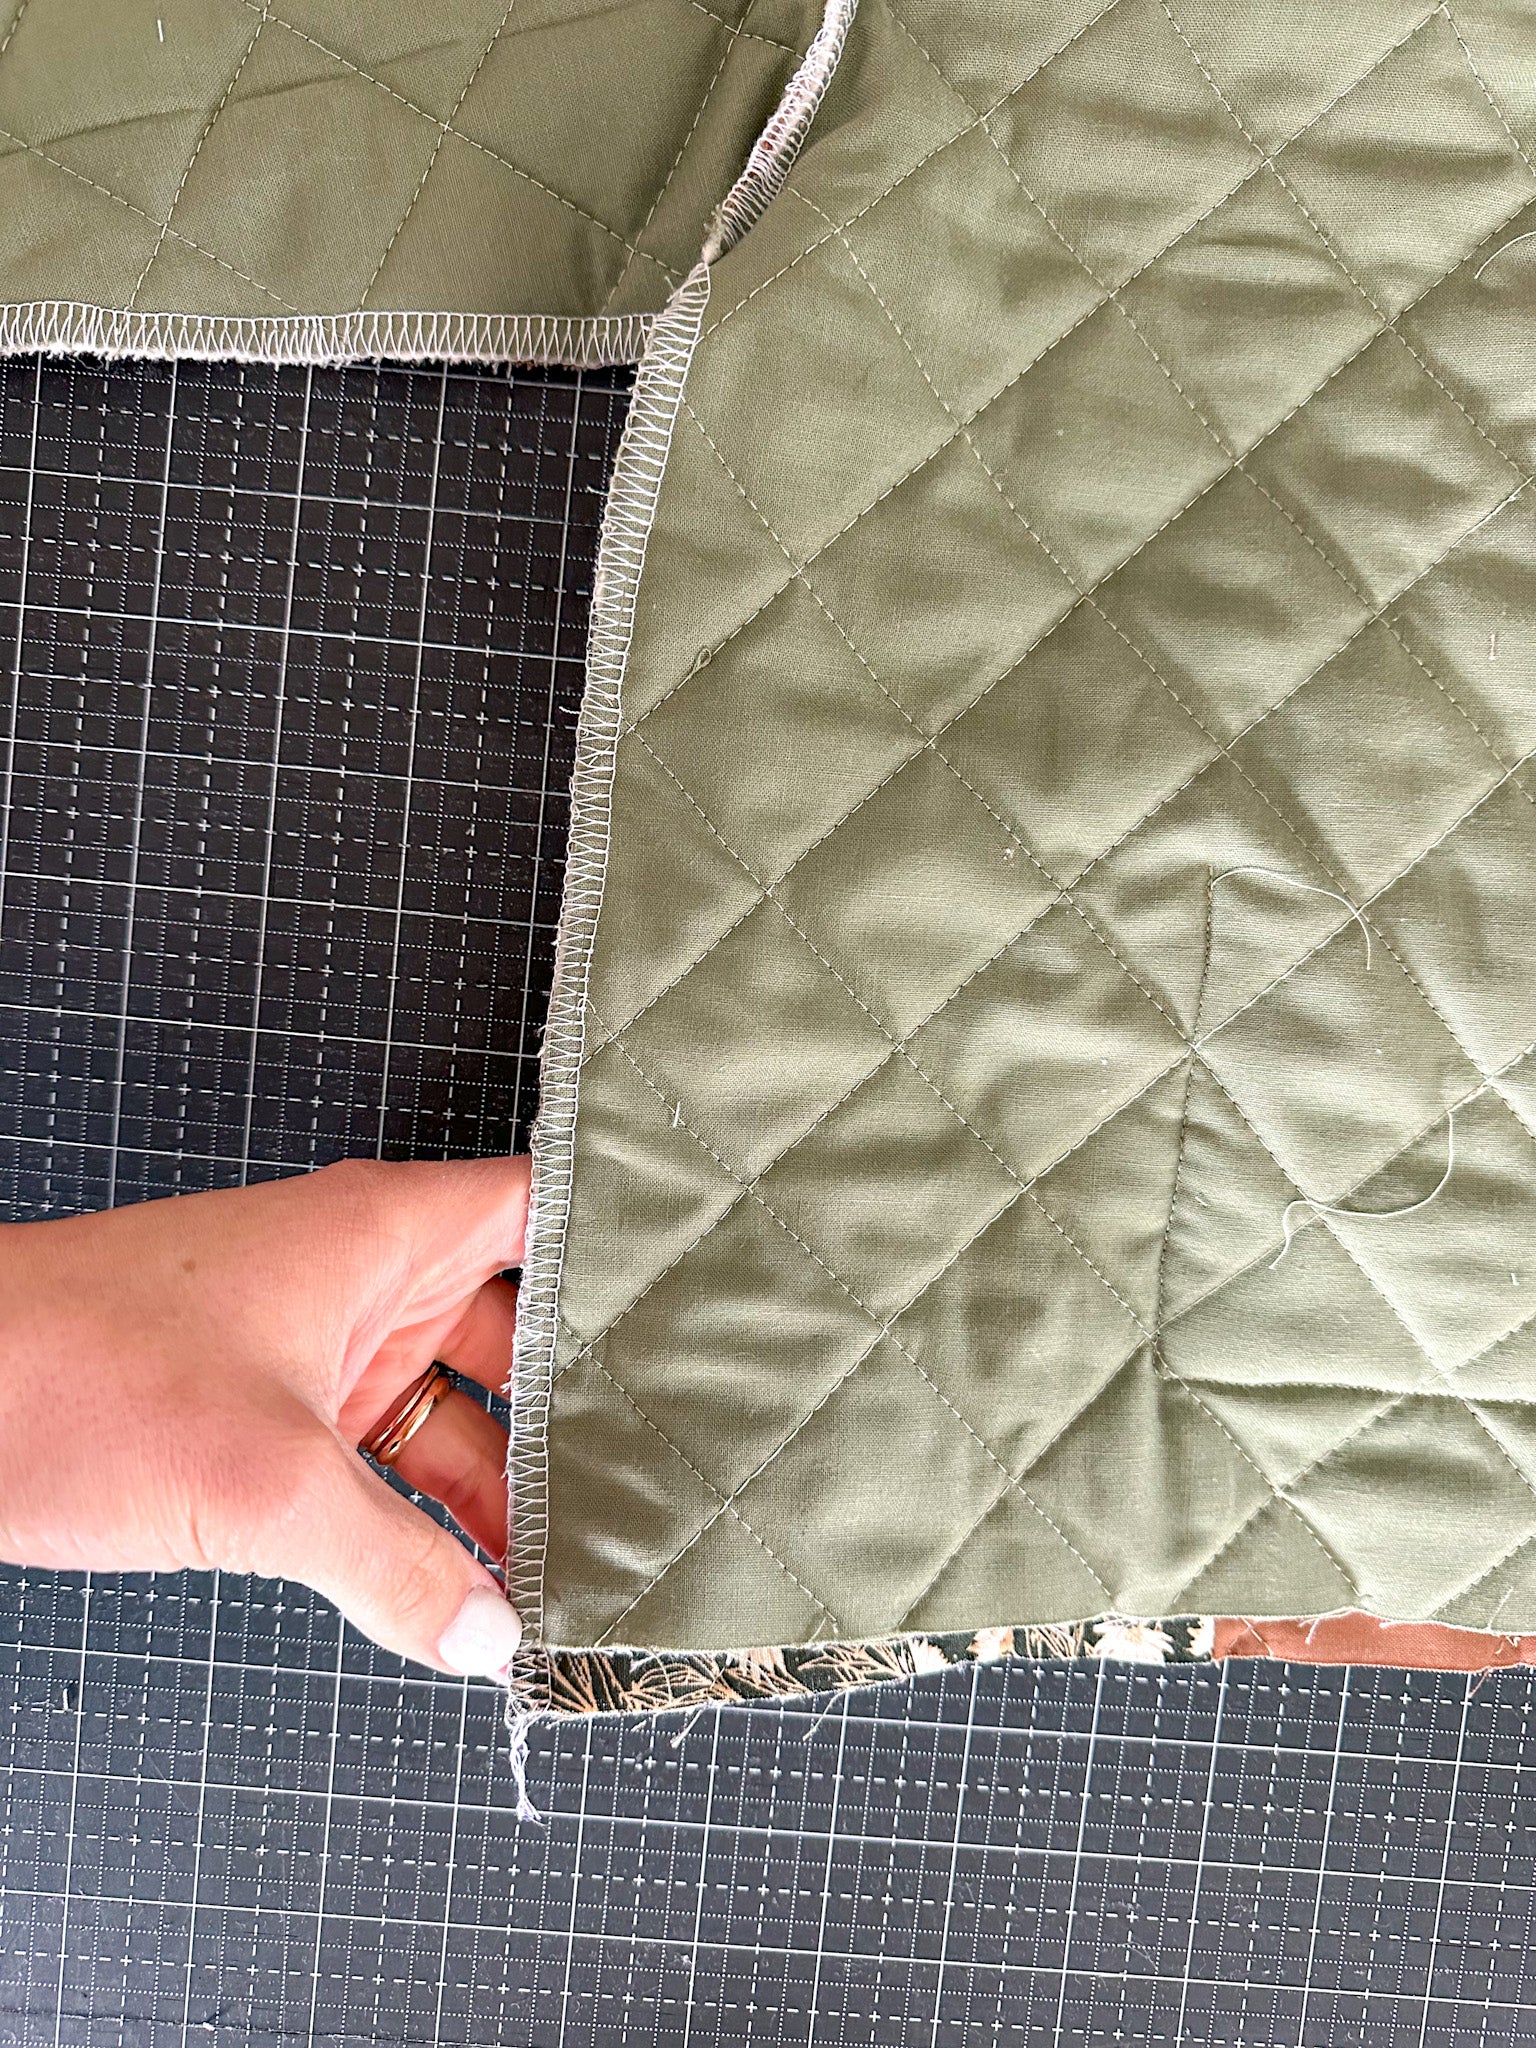
Step 4. Use clips to secure the hoodie to the neckline. You might need to zoom in to see this, but make sure to leave about 3/8" of fabric extending past the lower corners of the neckline. This will make connecting the hoodie together much easier. Sew around the neckline, leaving that 3/8" unattached.
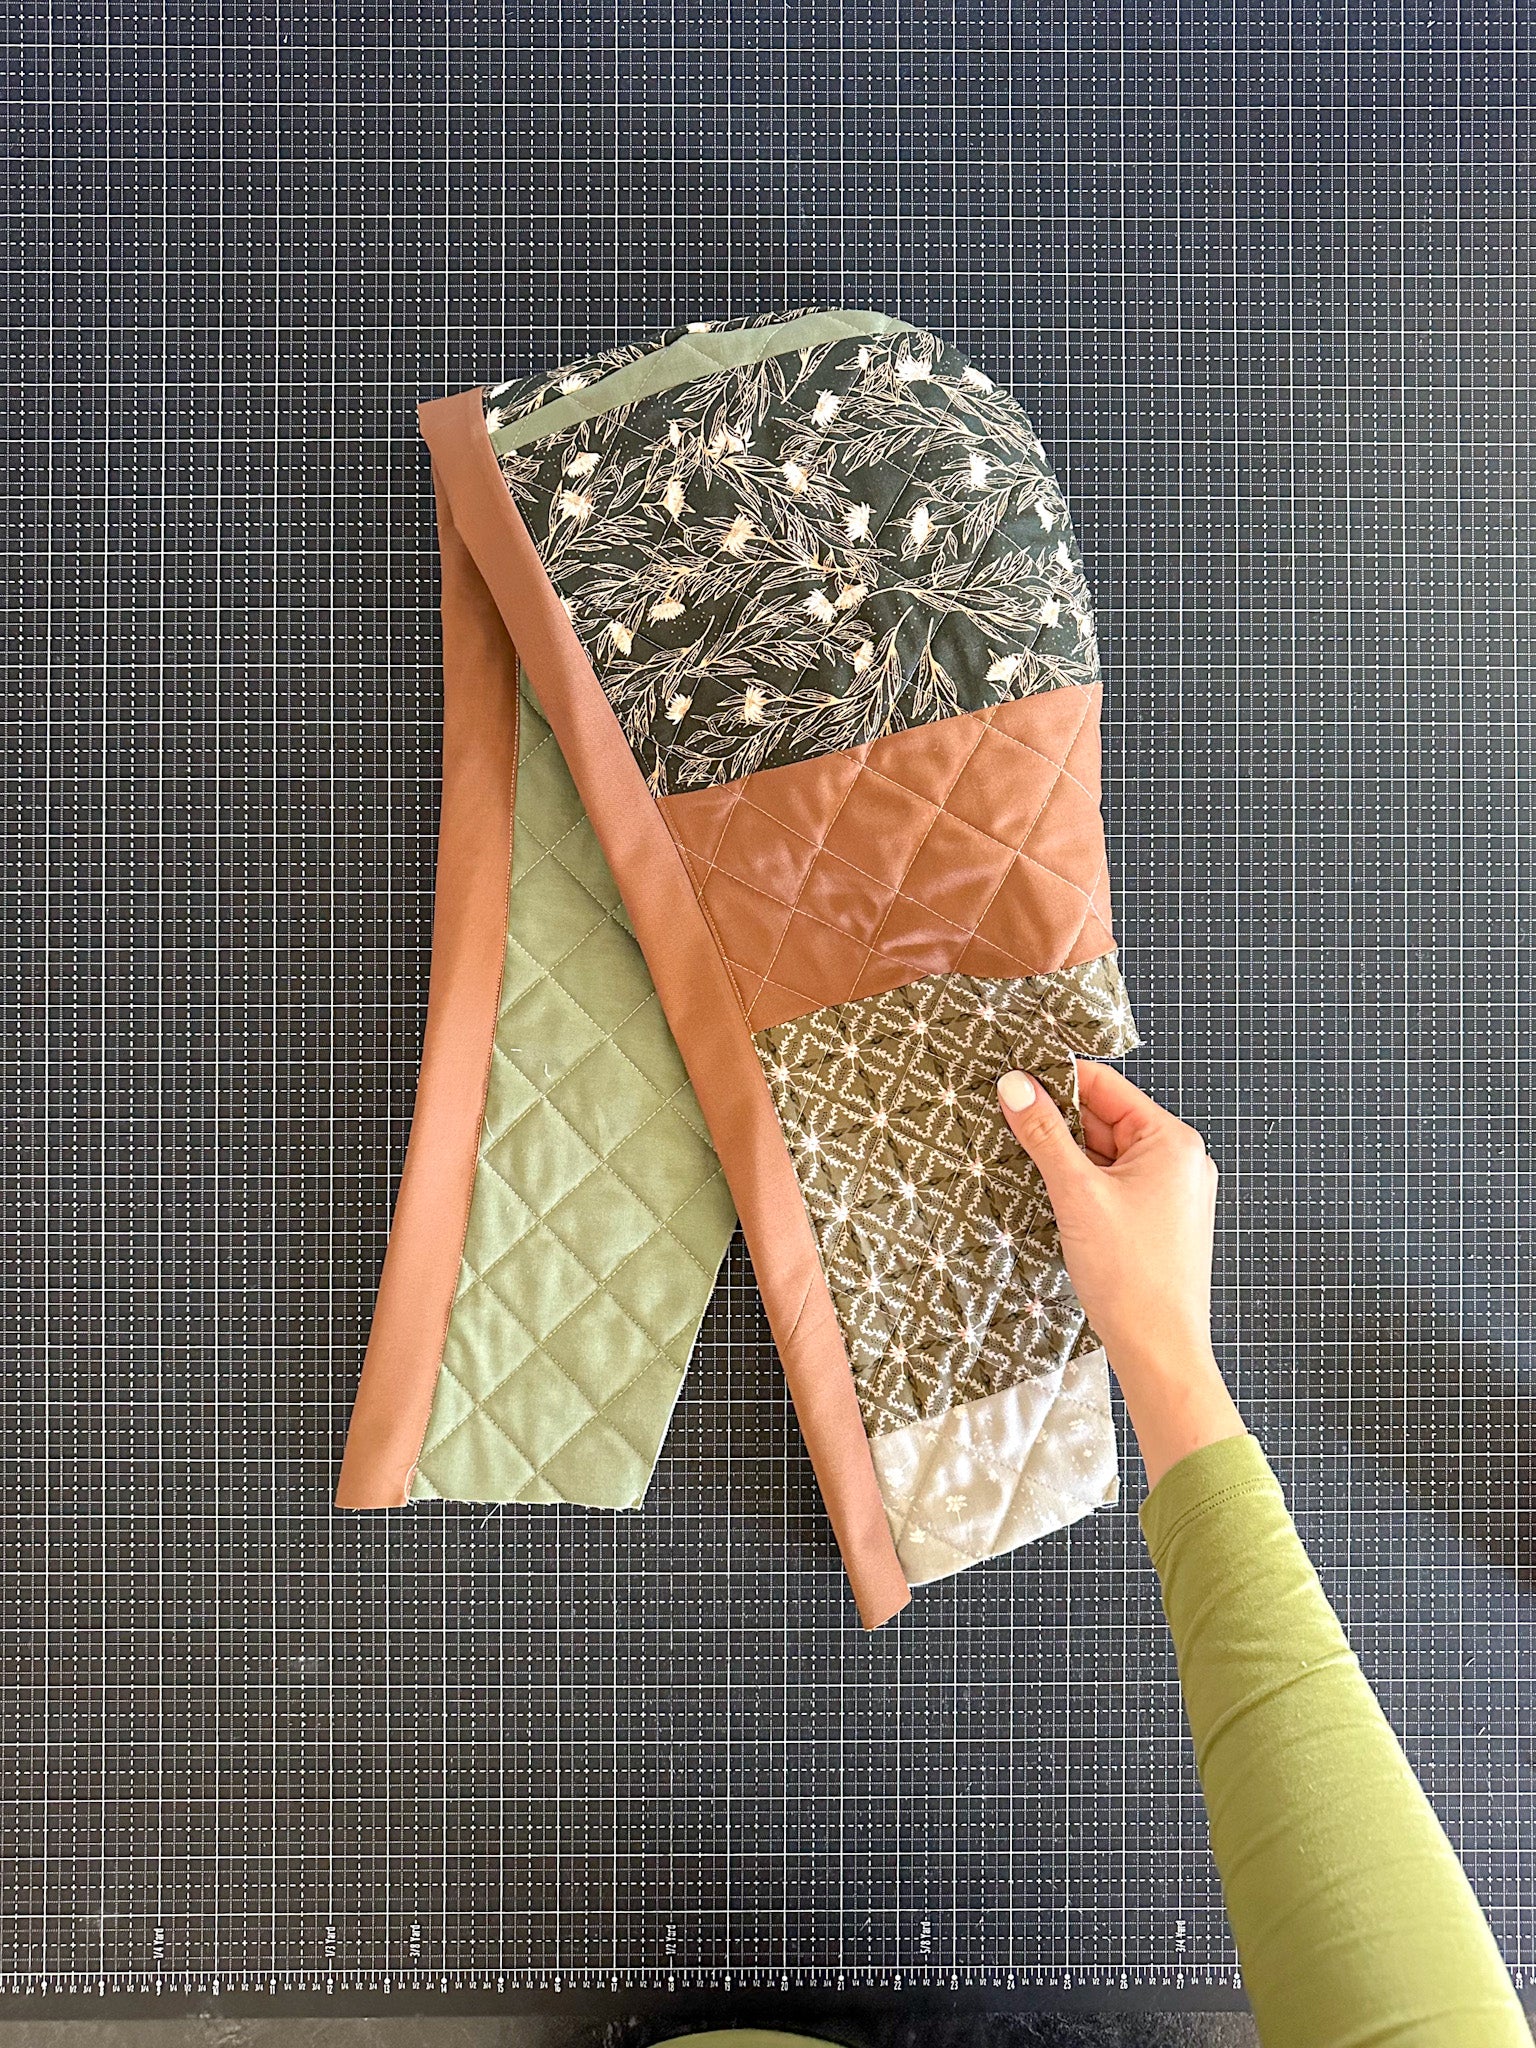
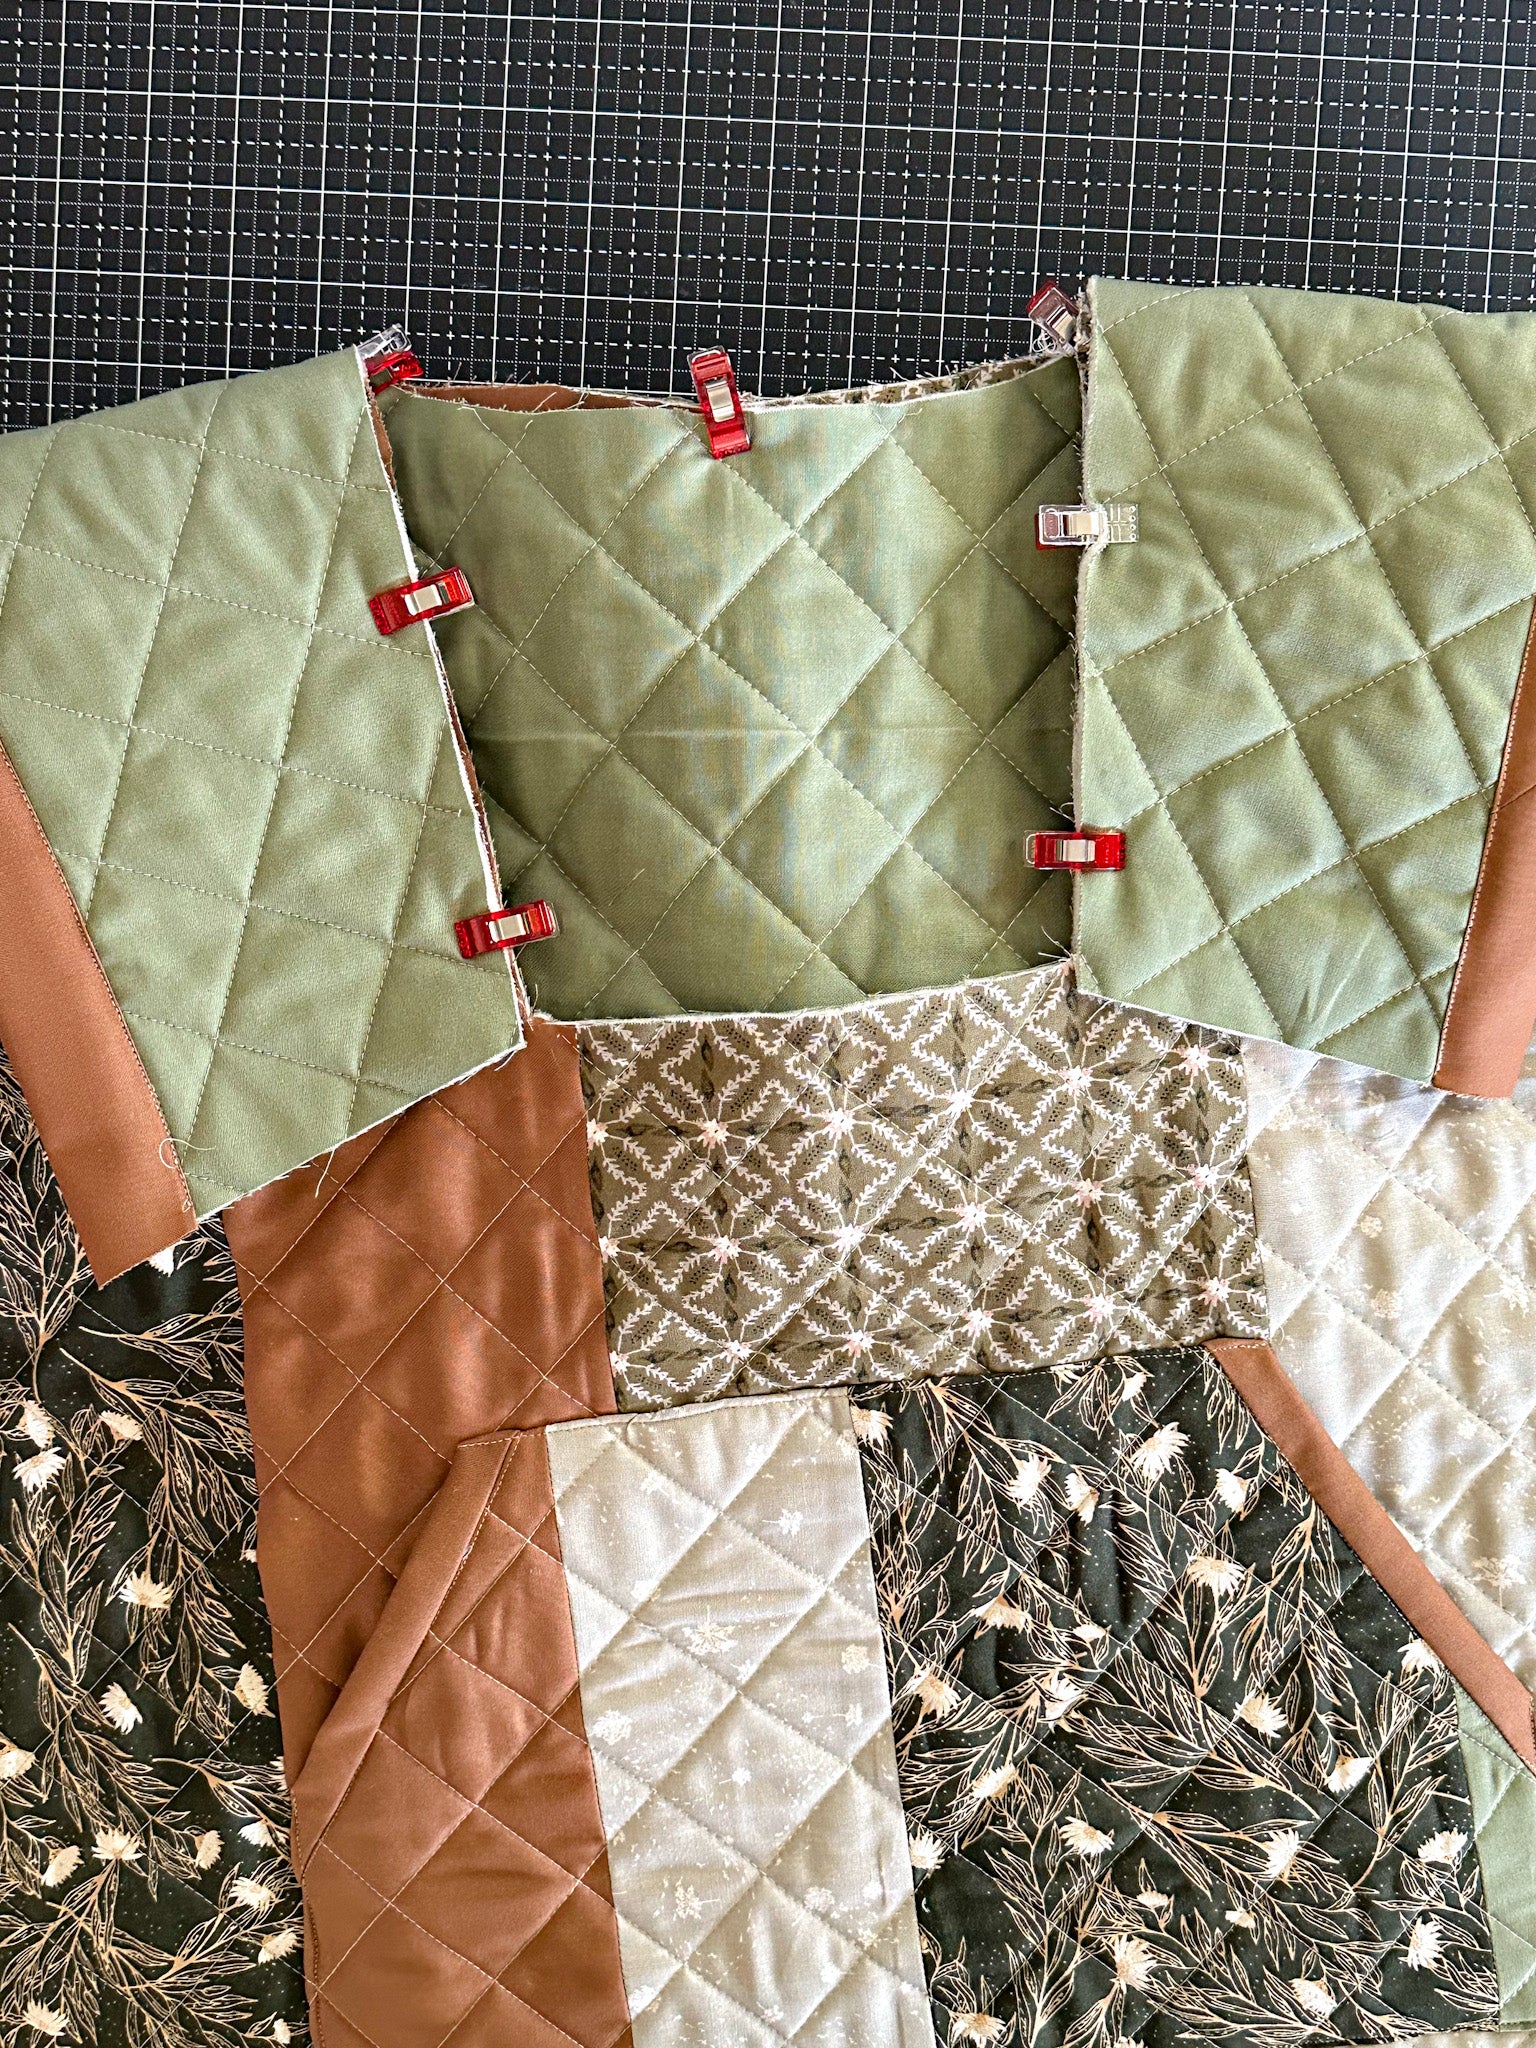
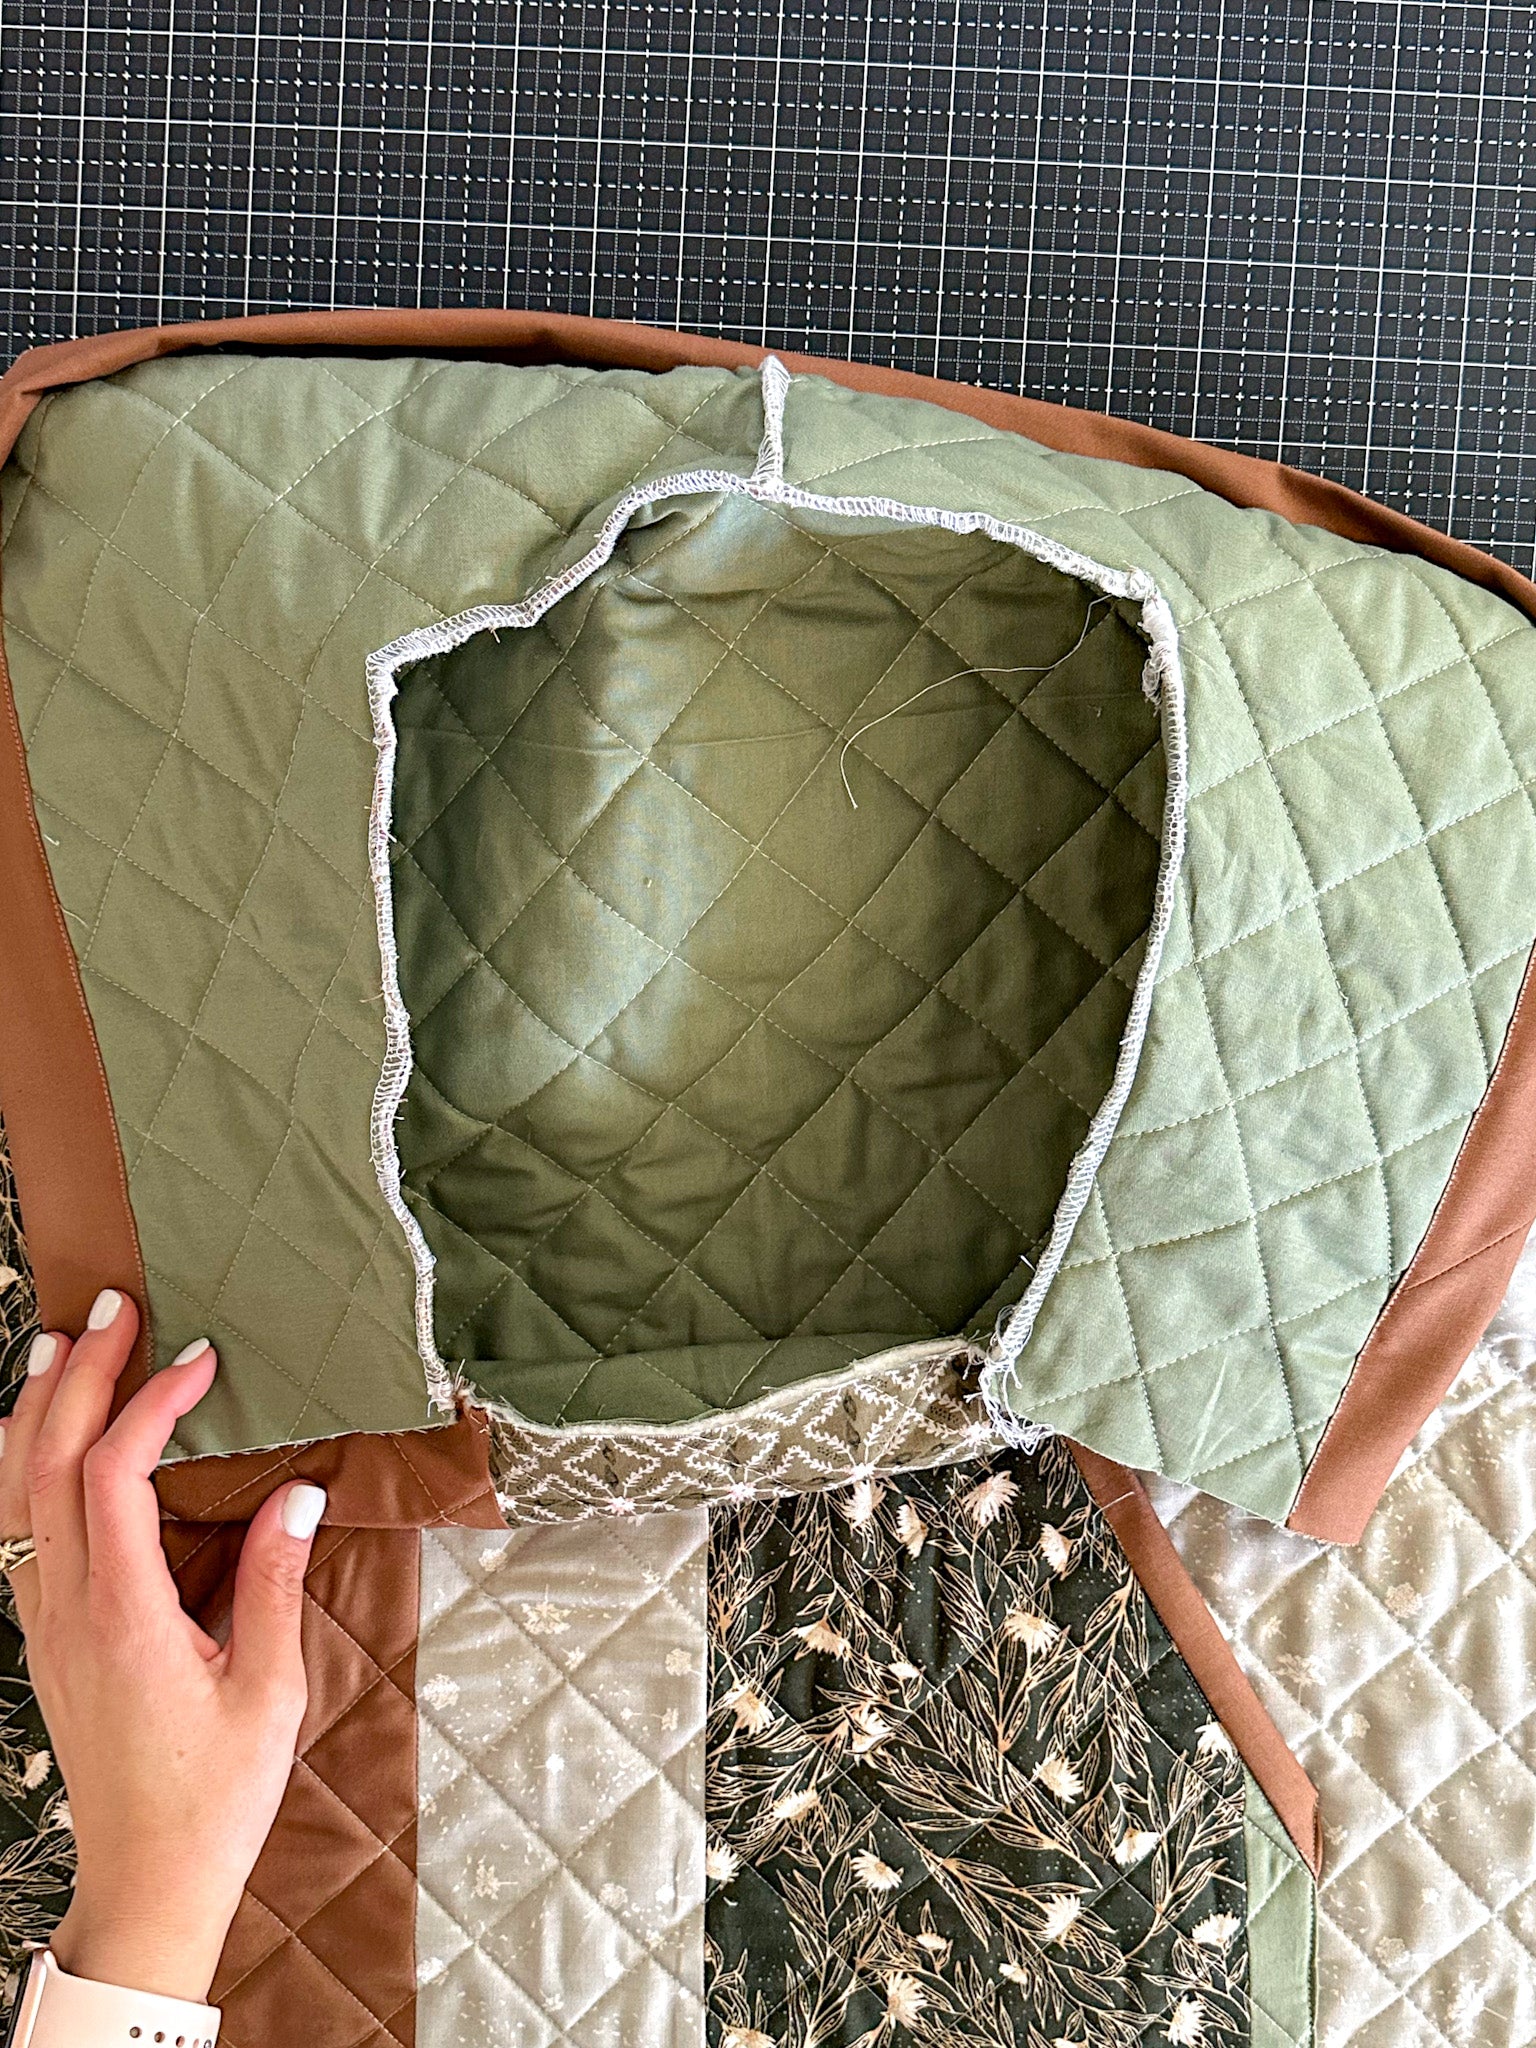
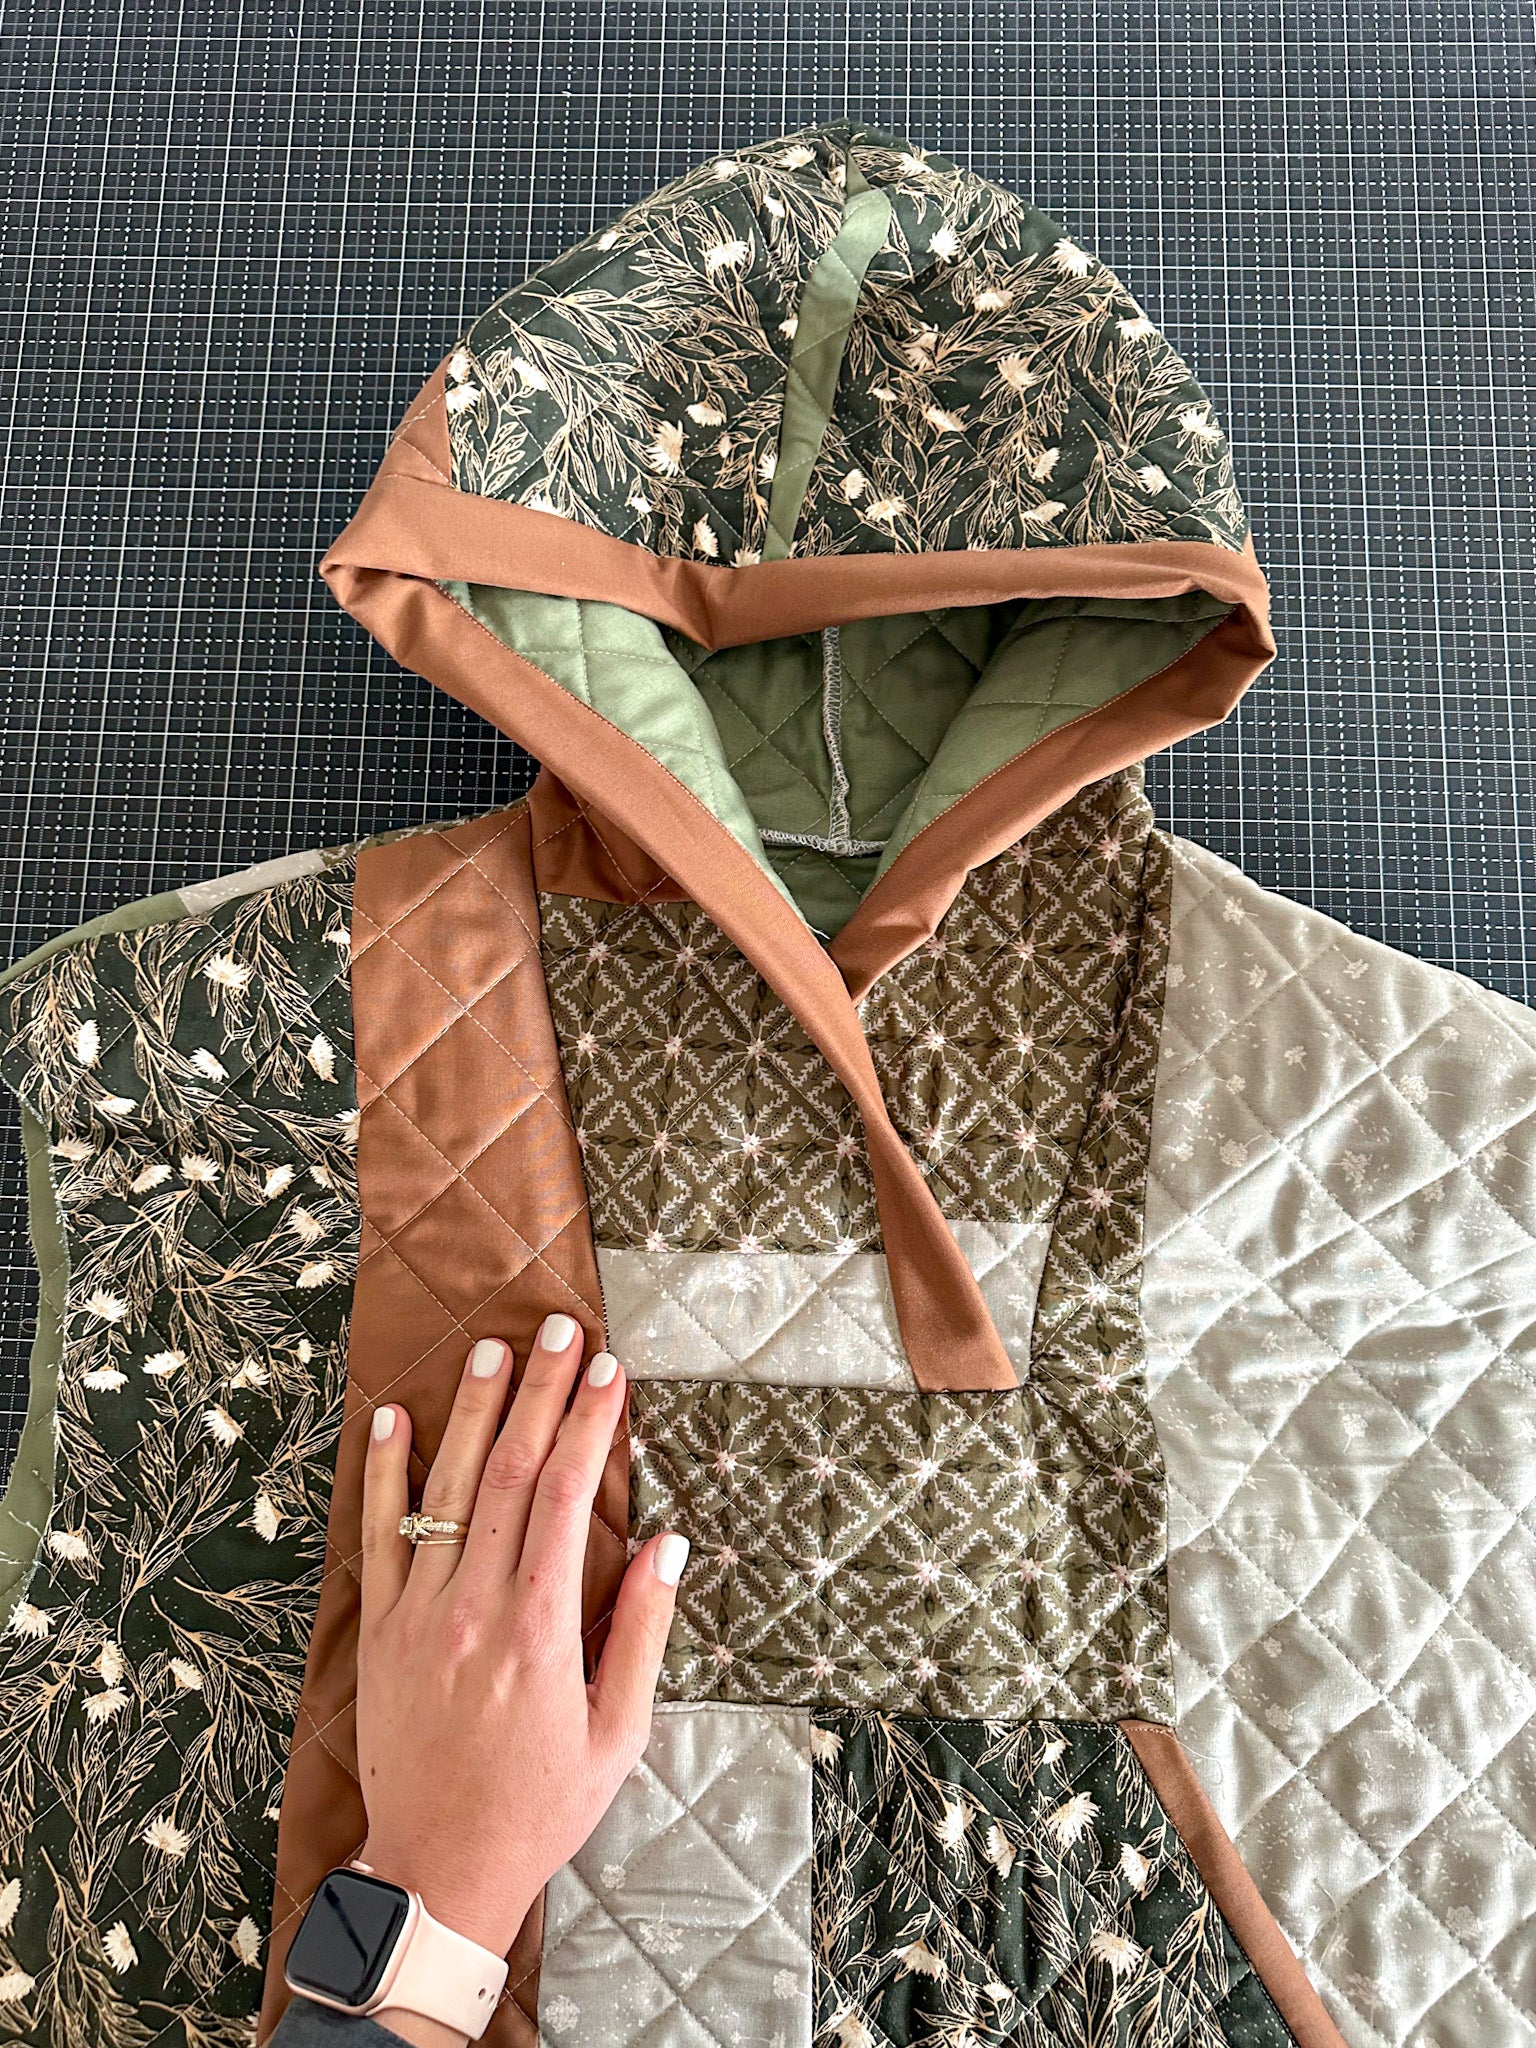
Step 5. This is probably the hardest step of the pattern. Layer the remaining edges of the hood together and clip. This is where the 3/8" excess helps to smooth the corners and layer the sections. It's a lot of fabric, so take it slow and possibly change your machine needle before sewing. My serger was unable to handle the layers, so I used my regular machine. Sew the 3 layers together.
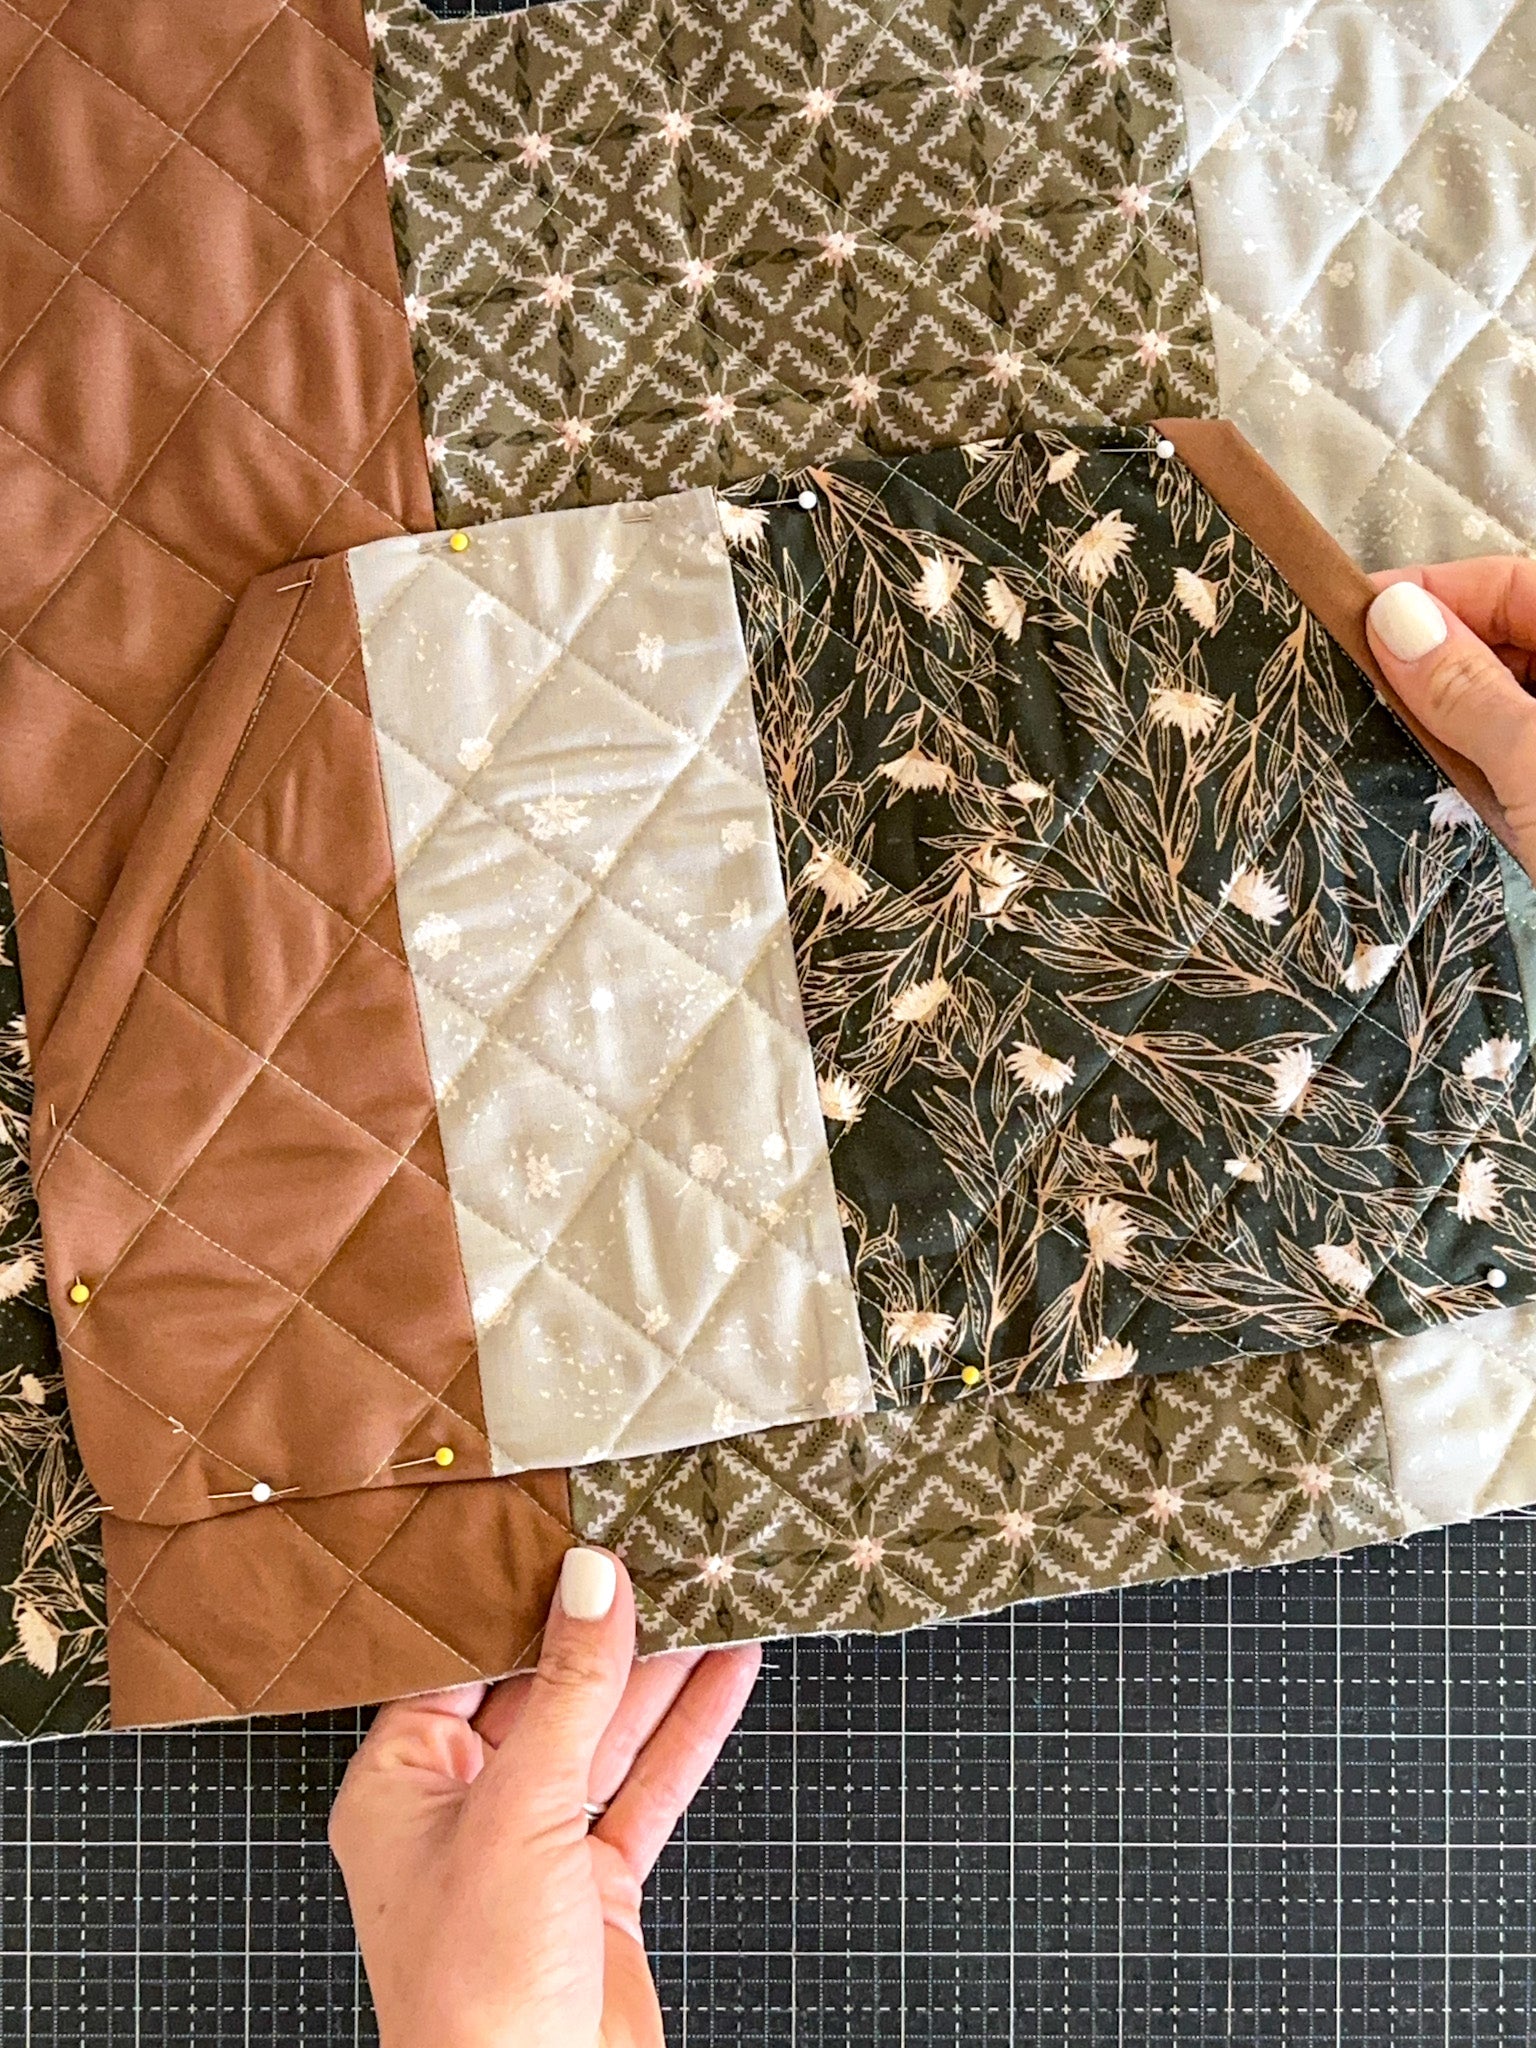
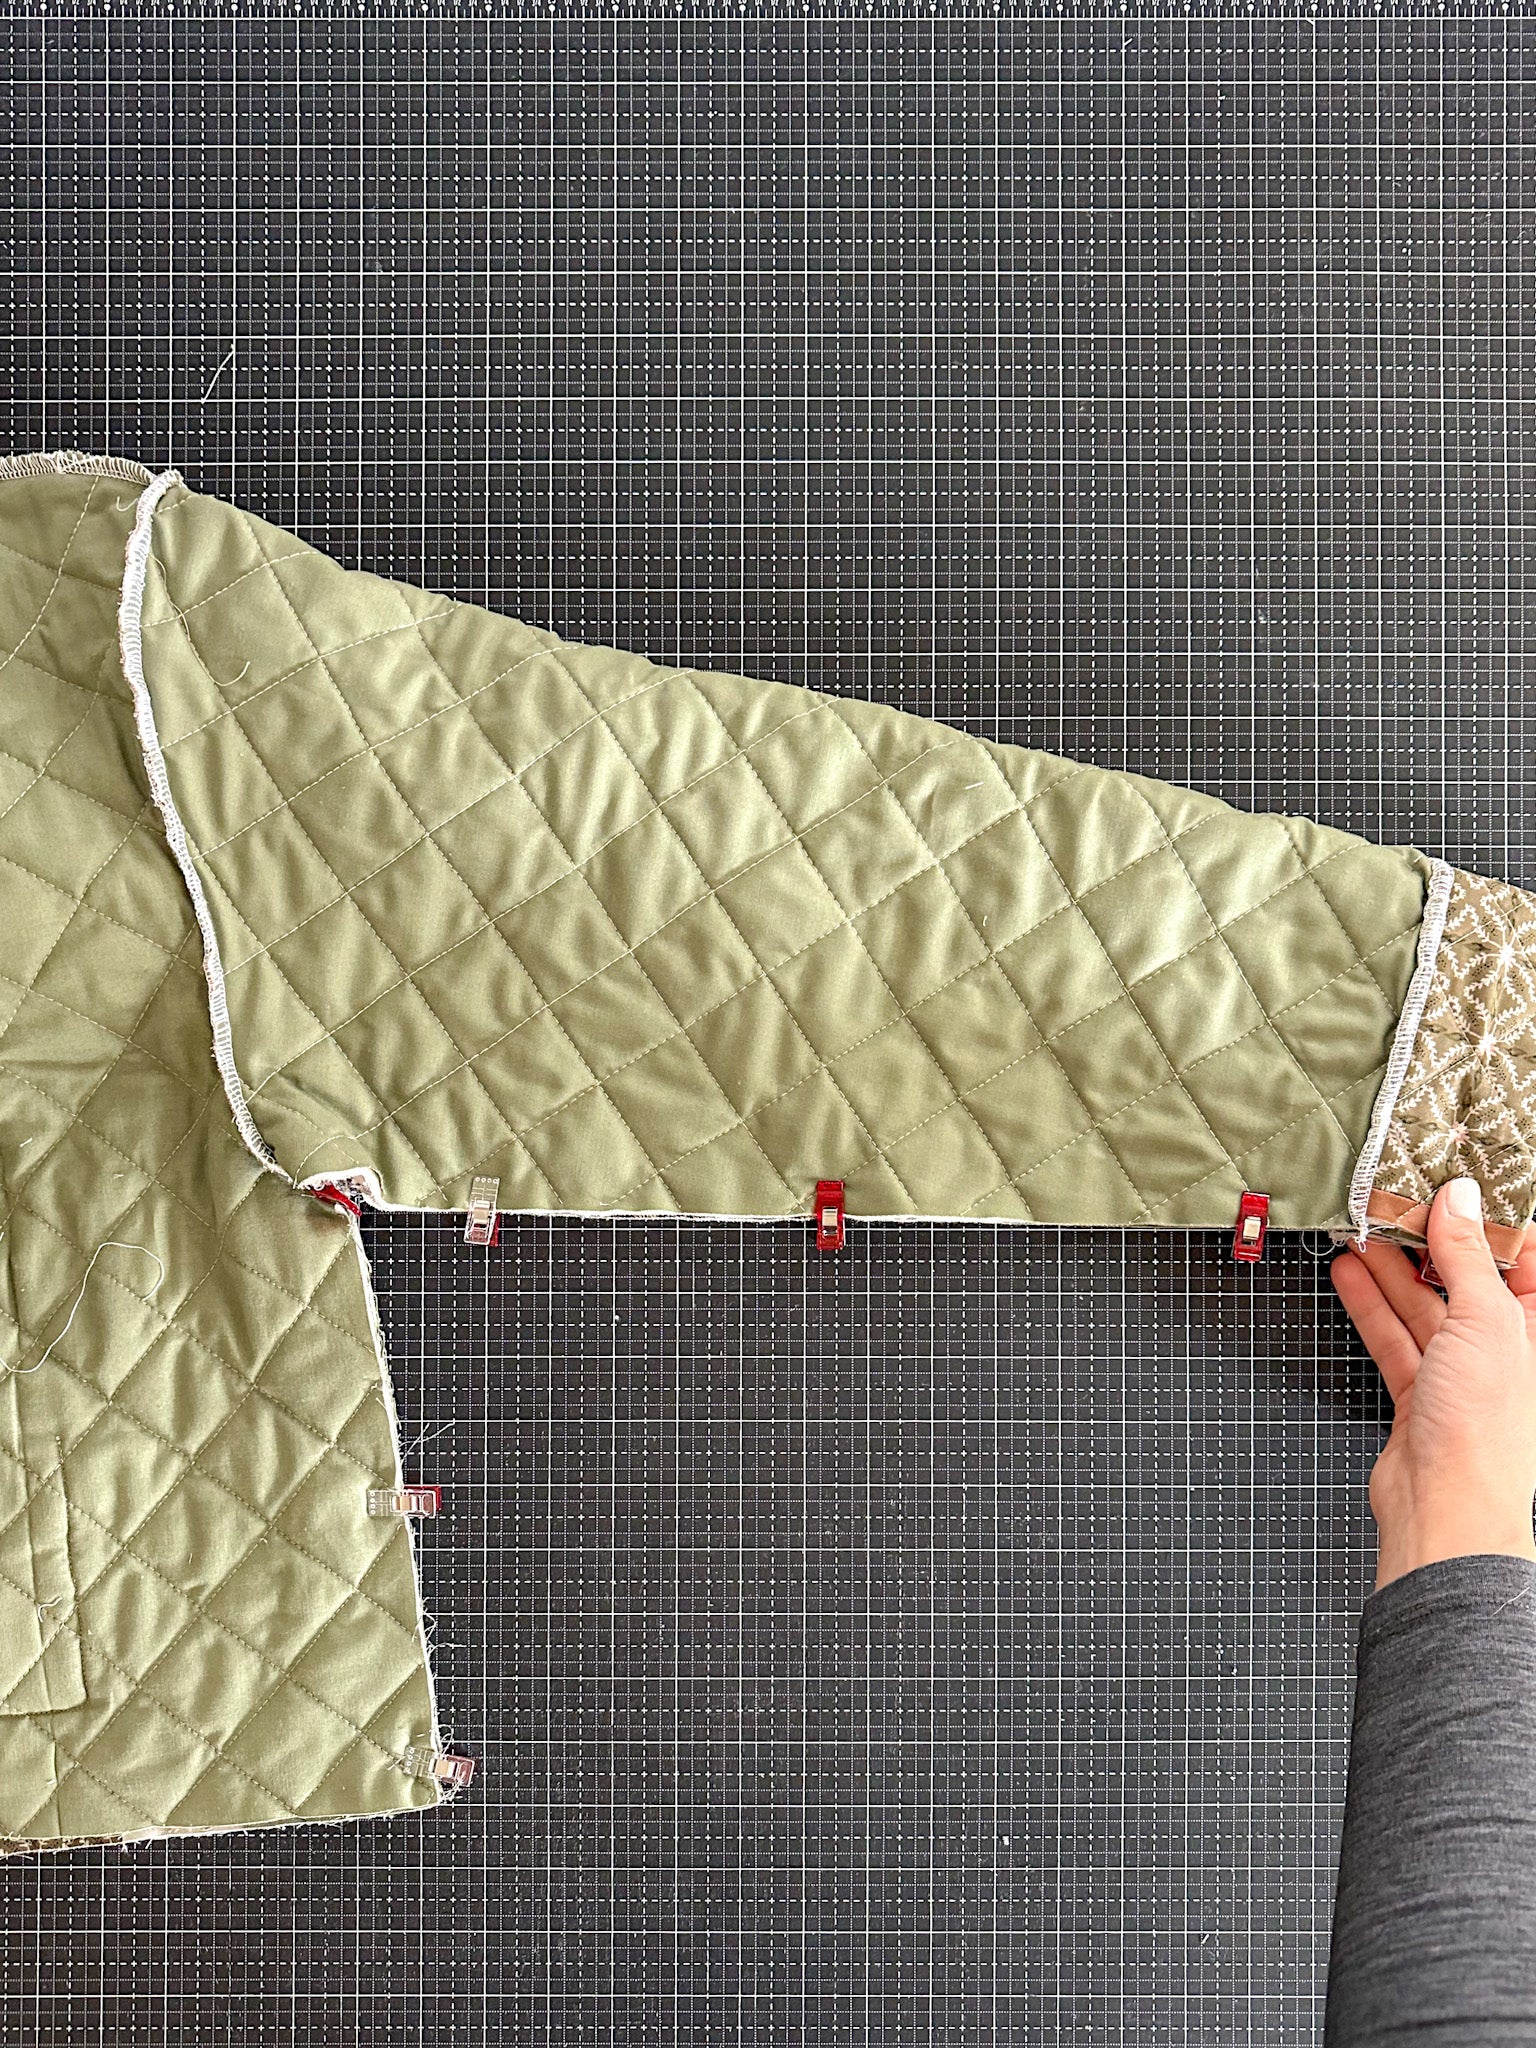
Step 6. Clip the sleeves right sides together to the body. First, clip the center and edges, then fill in the rest of the seamline. Sew together. Repeat for other sleeve.
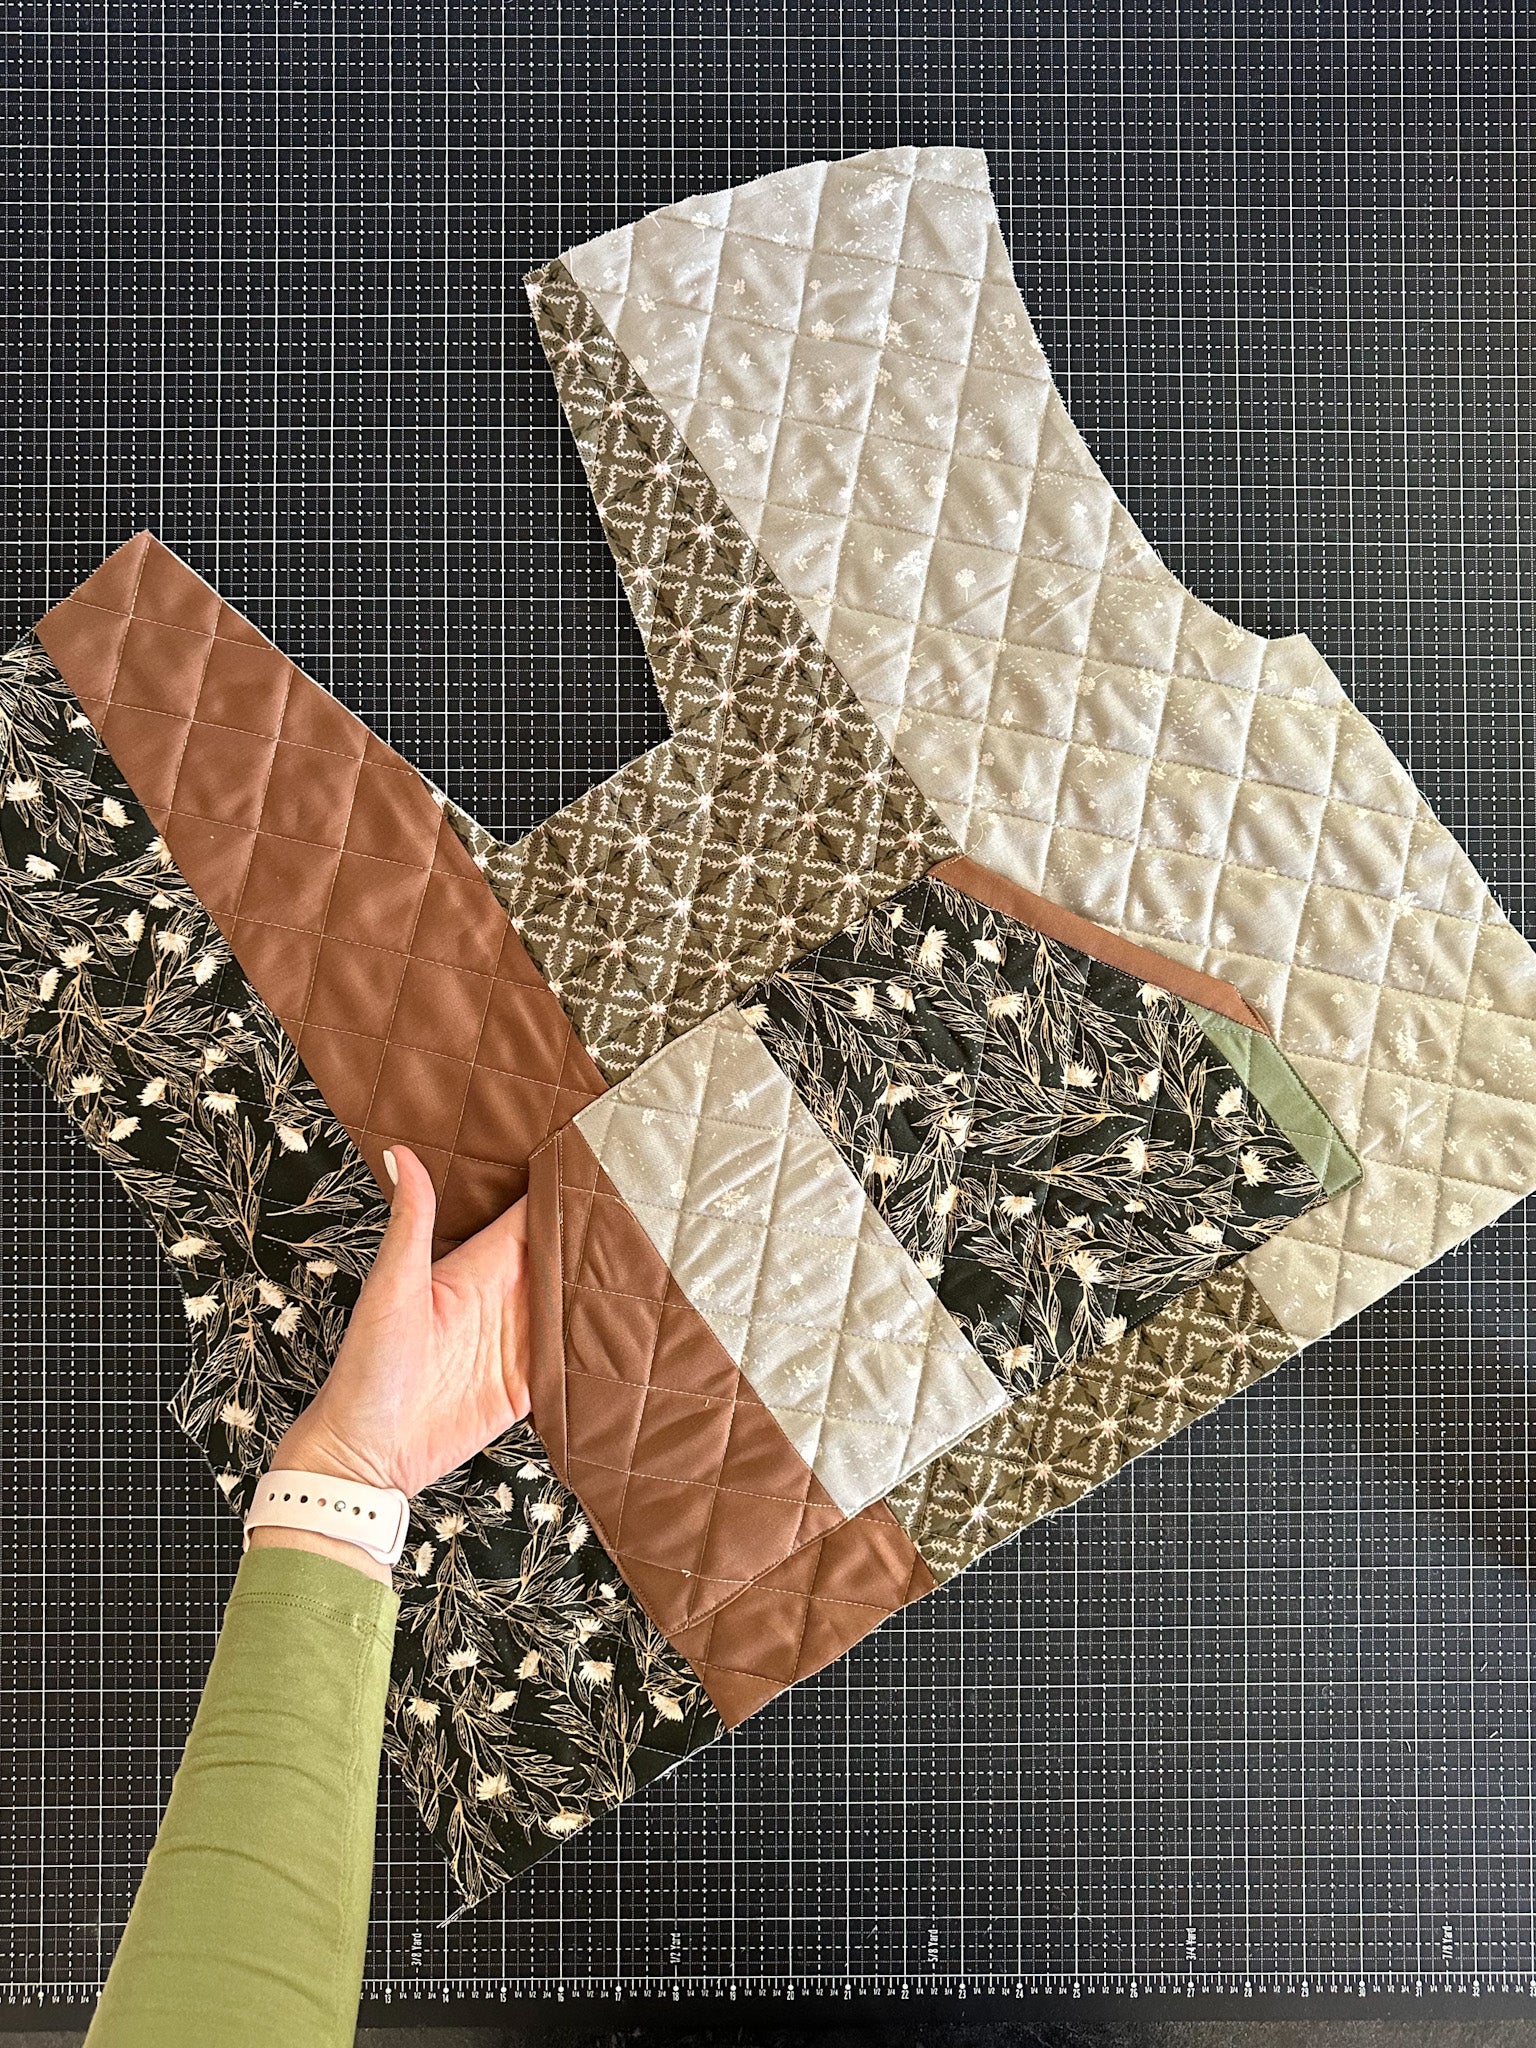
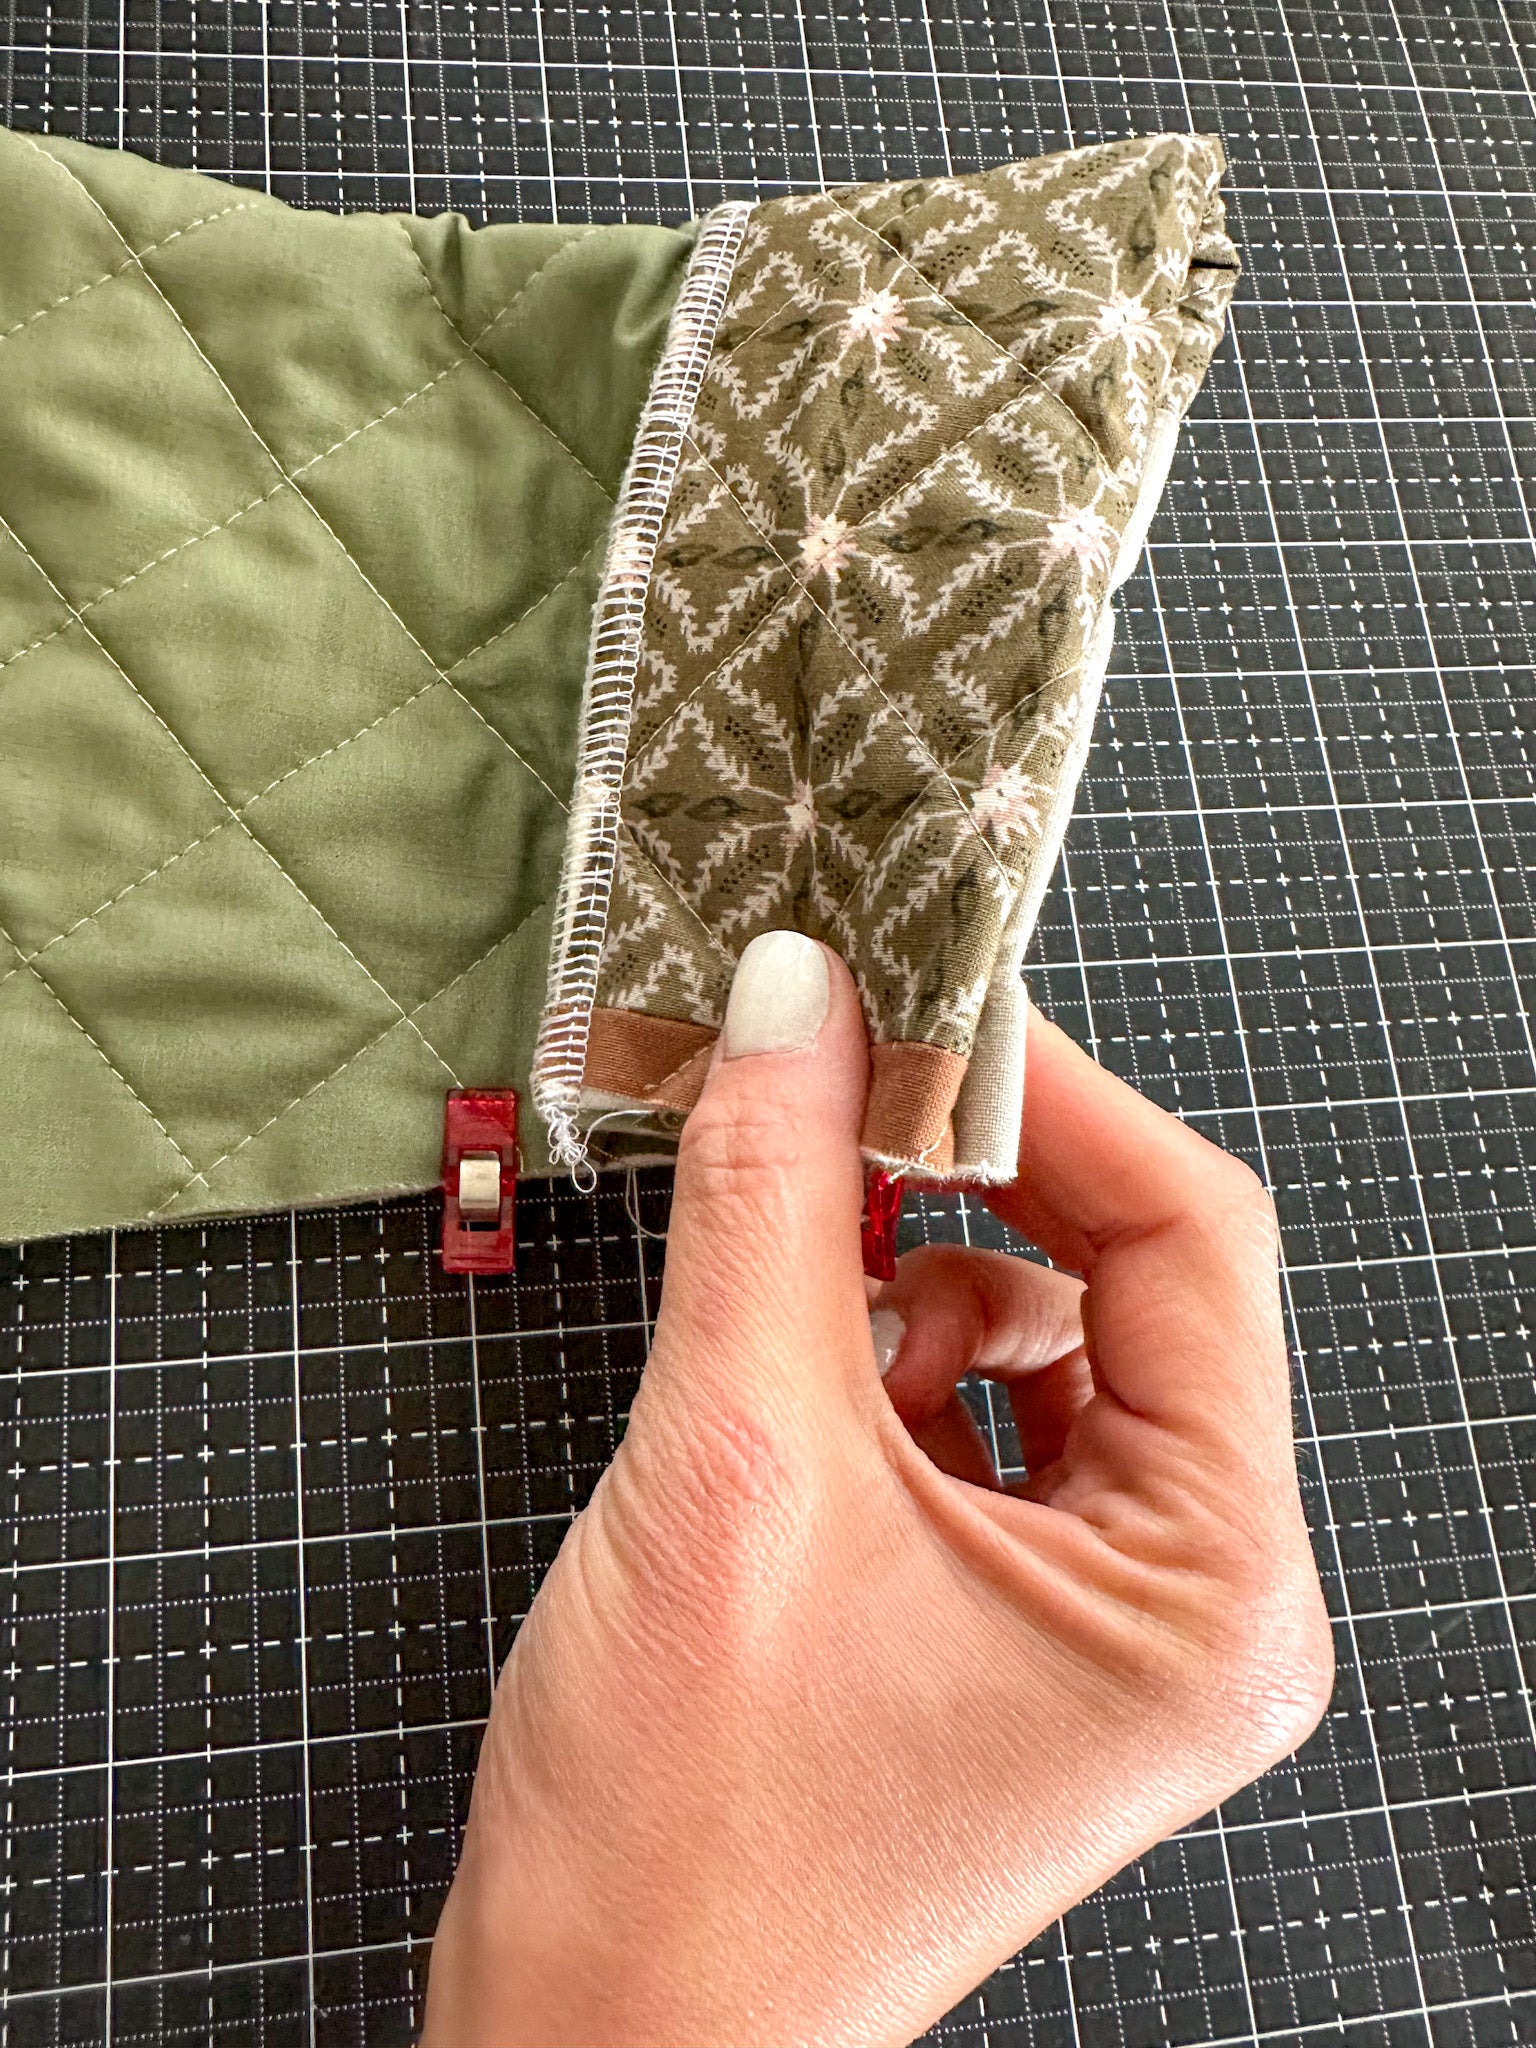
Step 7. Clip the side seam together. As with the sleeve attachment, align the midline sleeve seam, the cuffs, and bottom edges first, then fill in the other clips. Always start sewing from the cuffs, down to the bottom of the hoodie. You can trim misaligned lower edges, but the cuff can't be adjusted. Notice in the photo below, one of my lower edges was uneven. That's an easy trim. If the cuffs were uneven, I would've had to rip the seams and sew it again. Repeat for the other side.
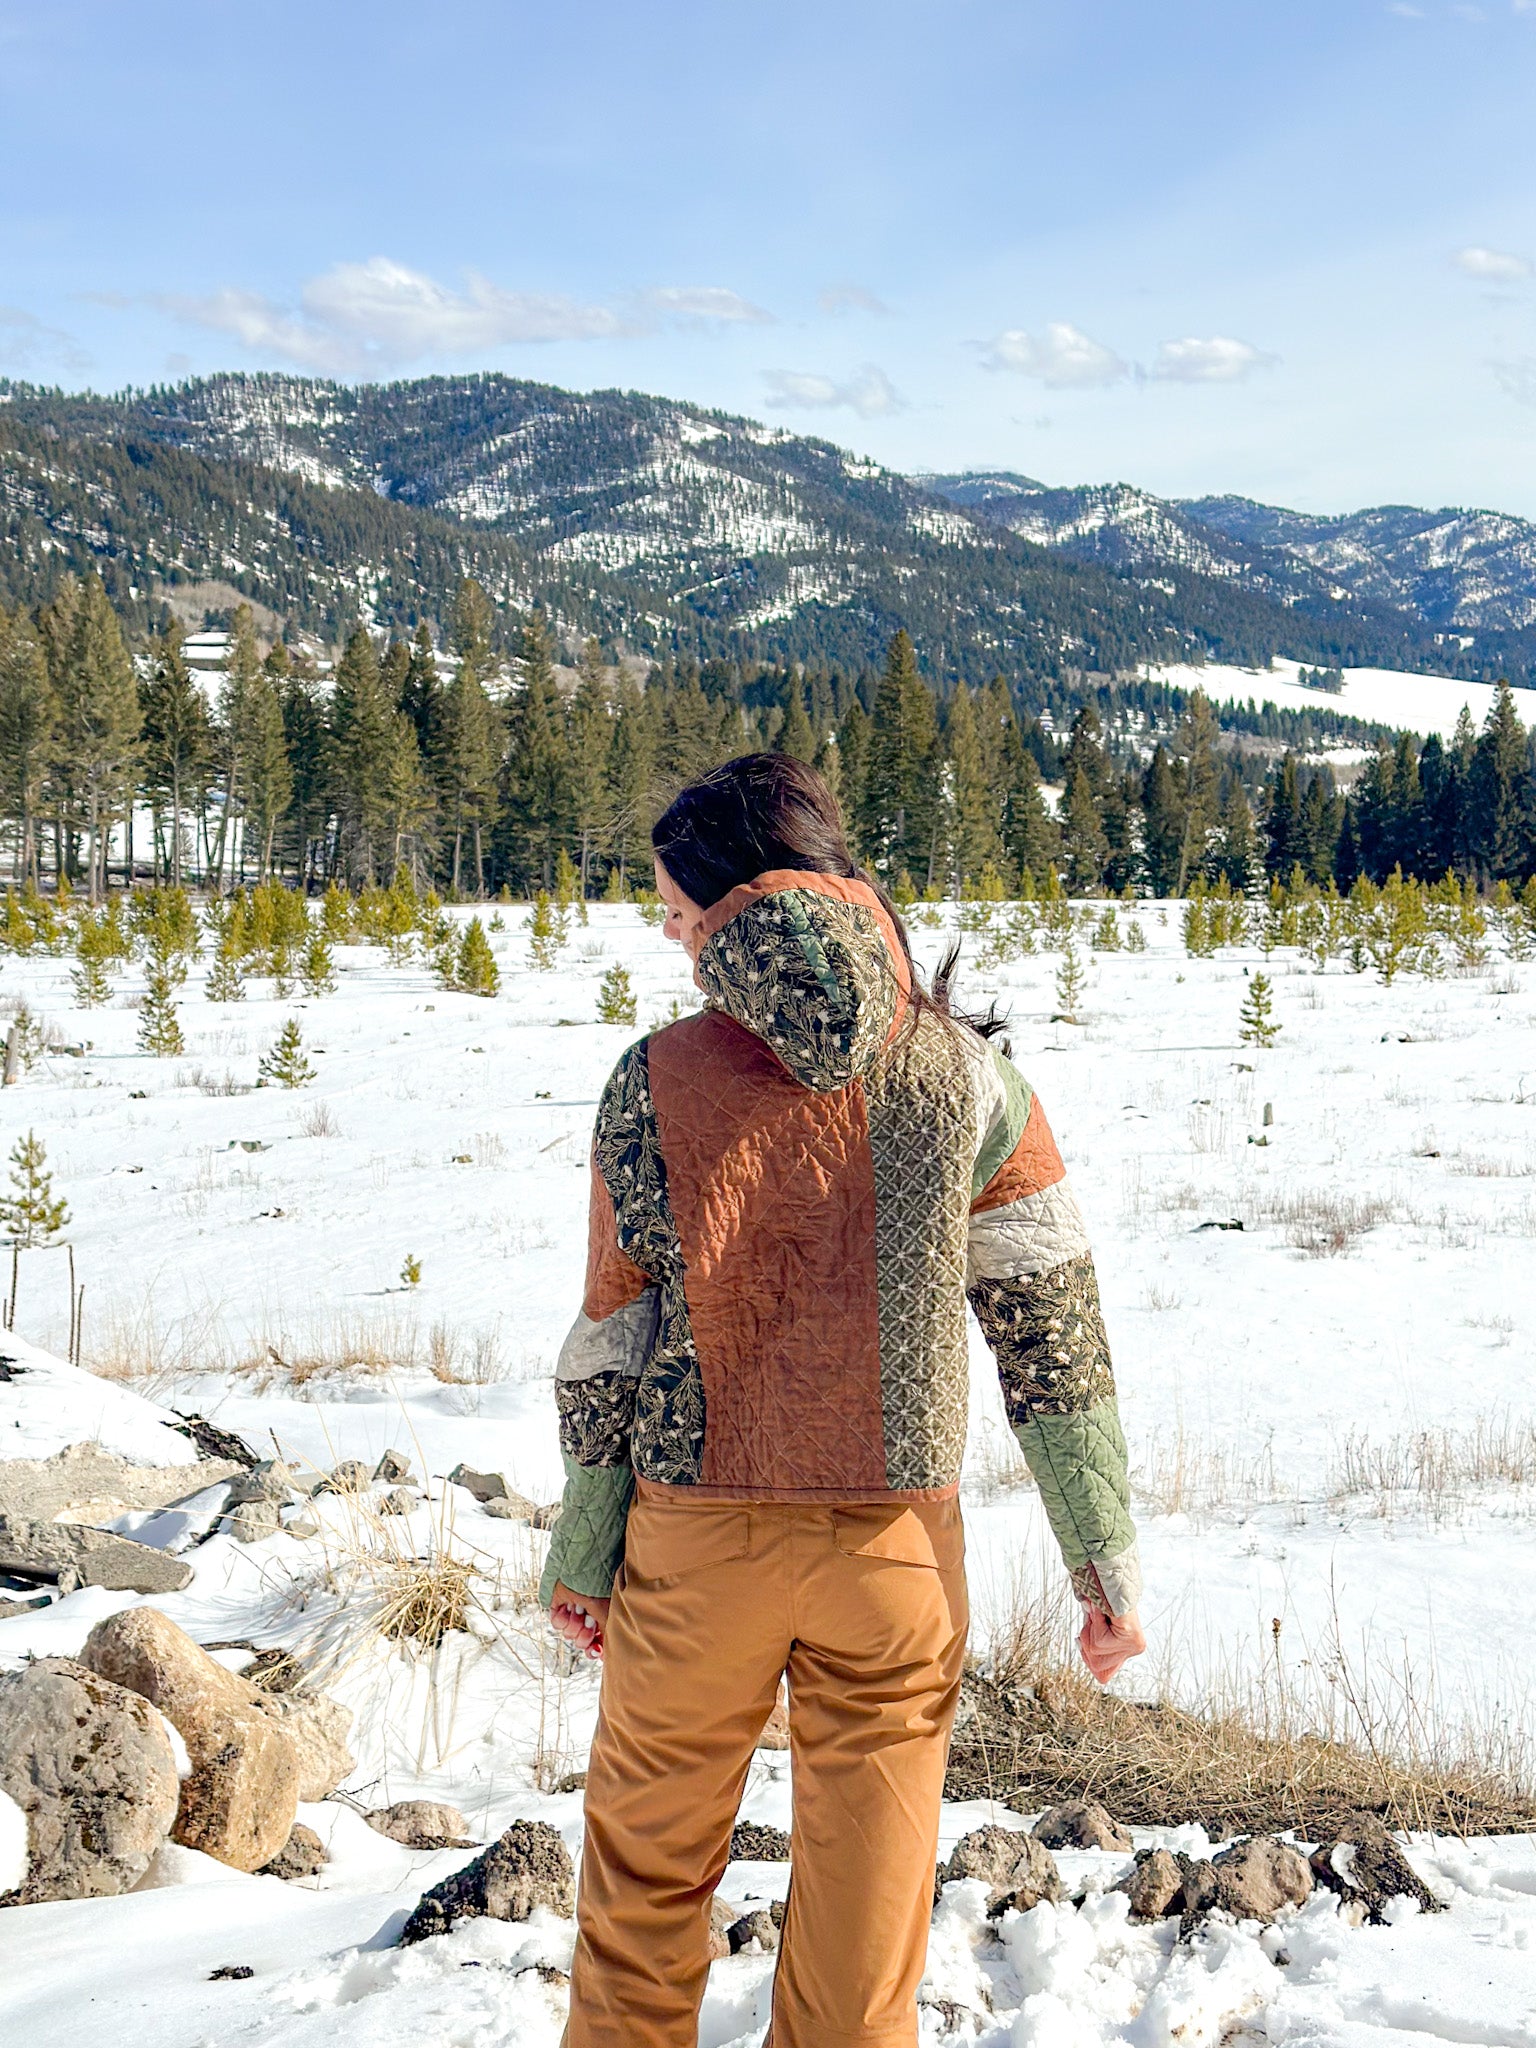
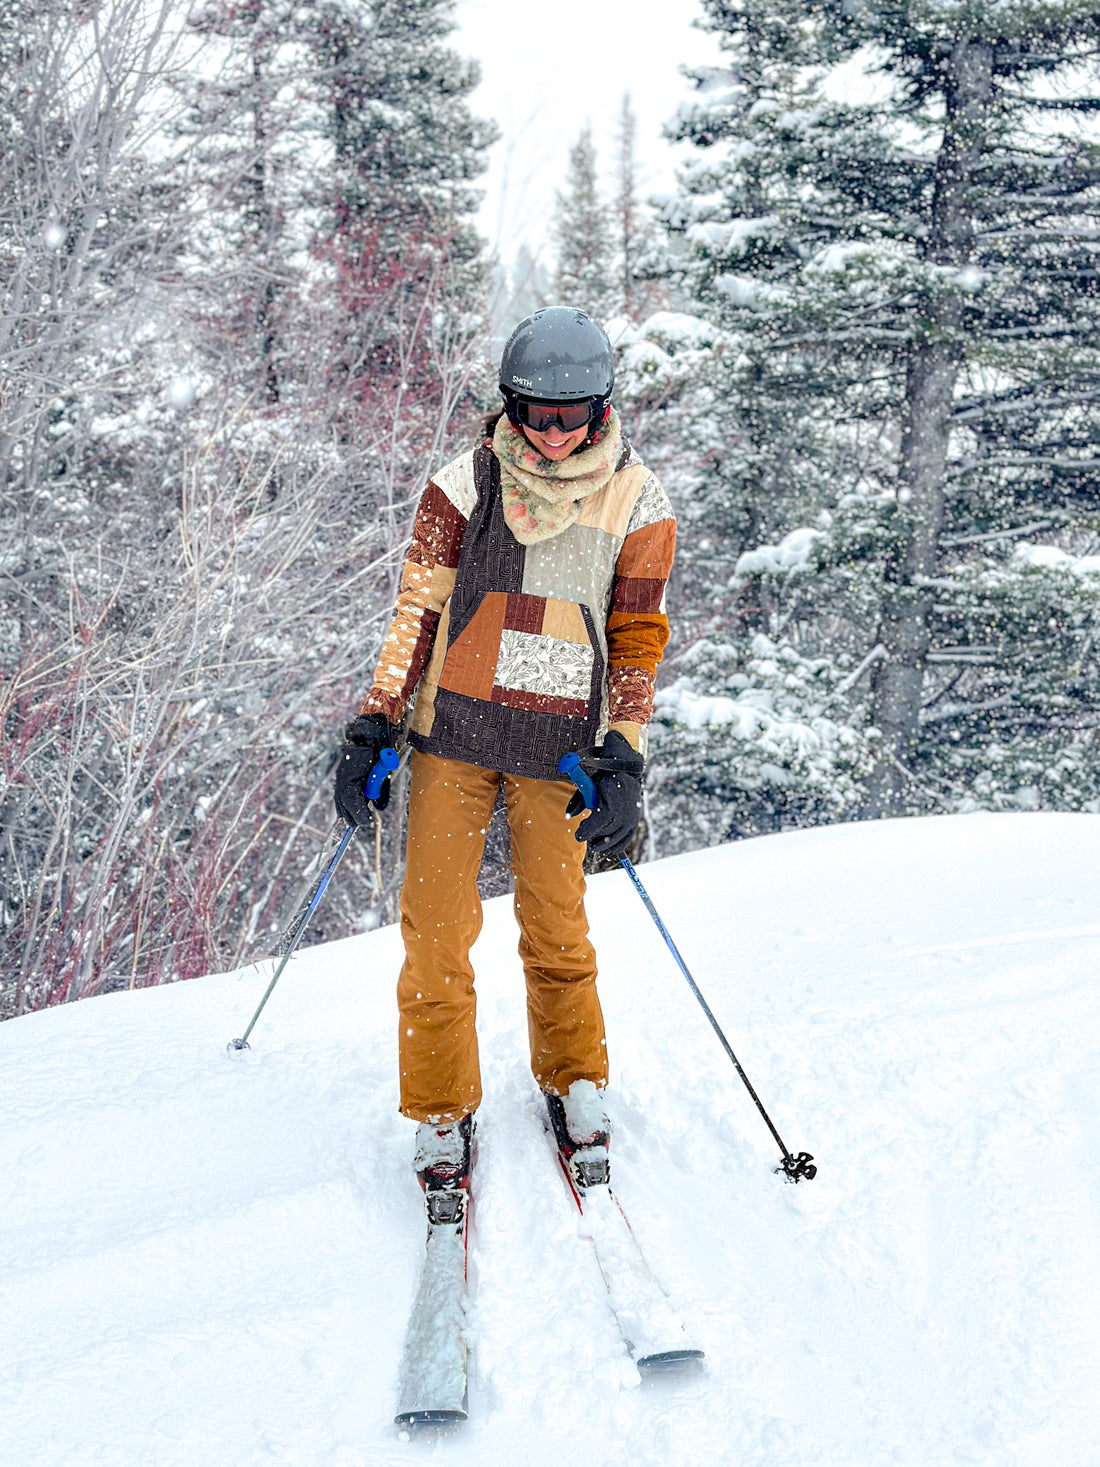
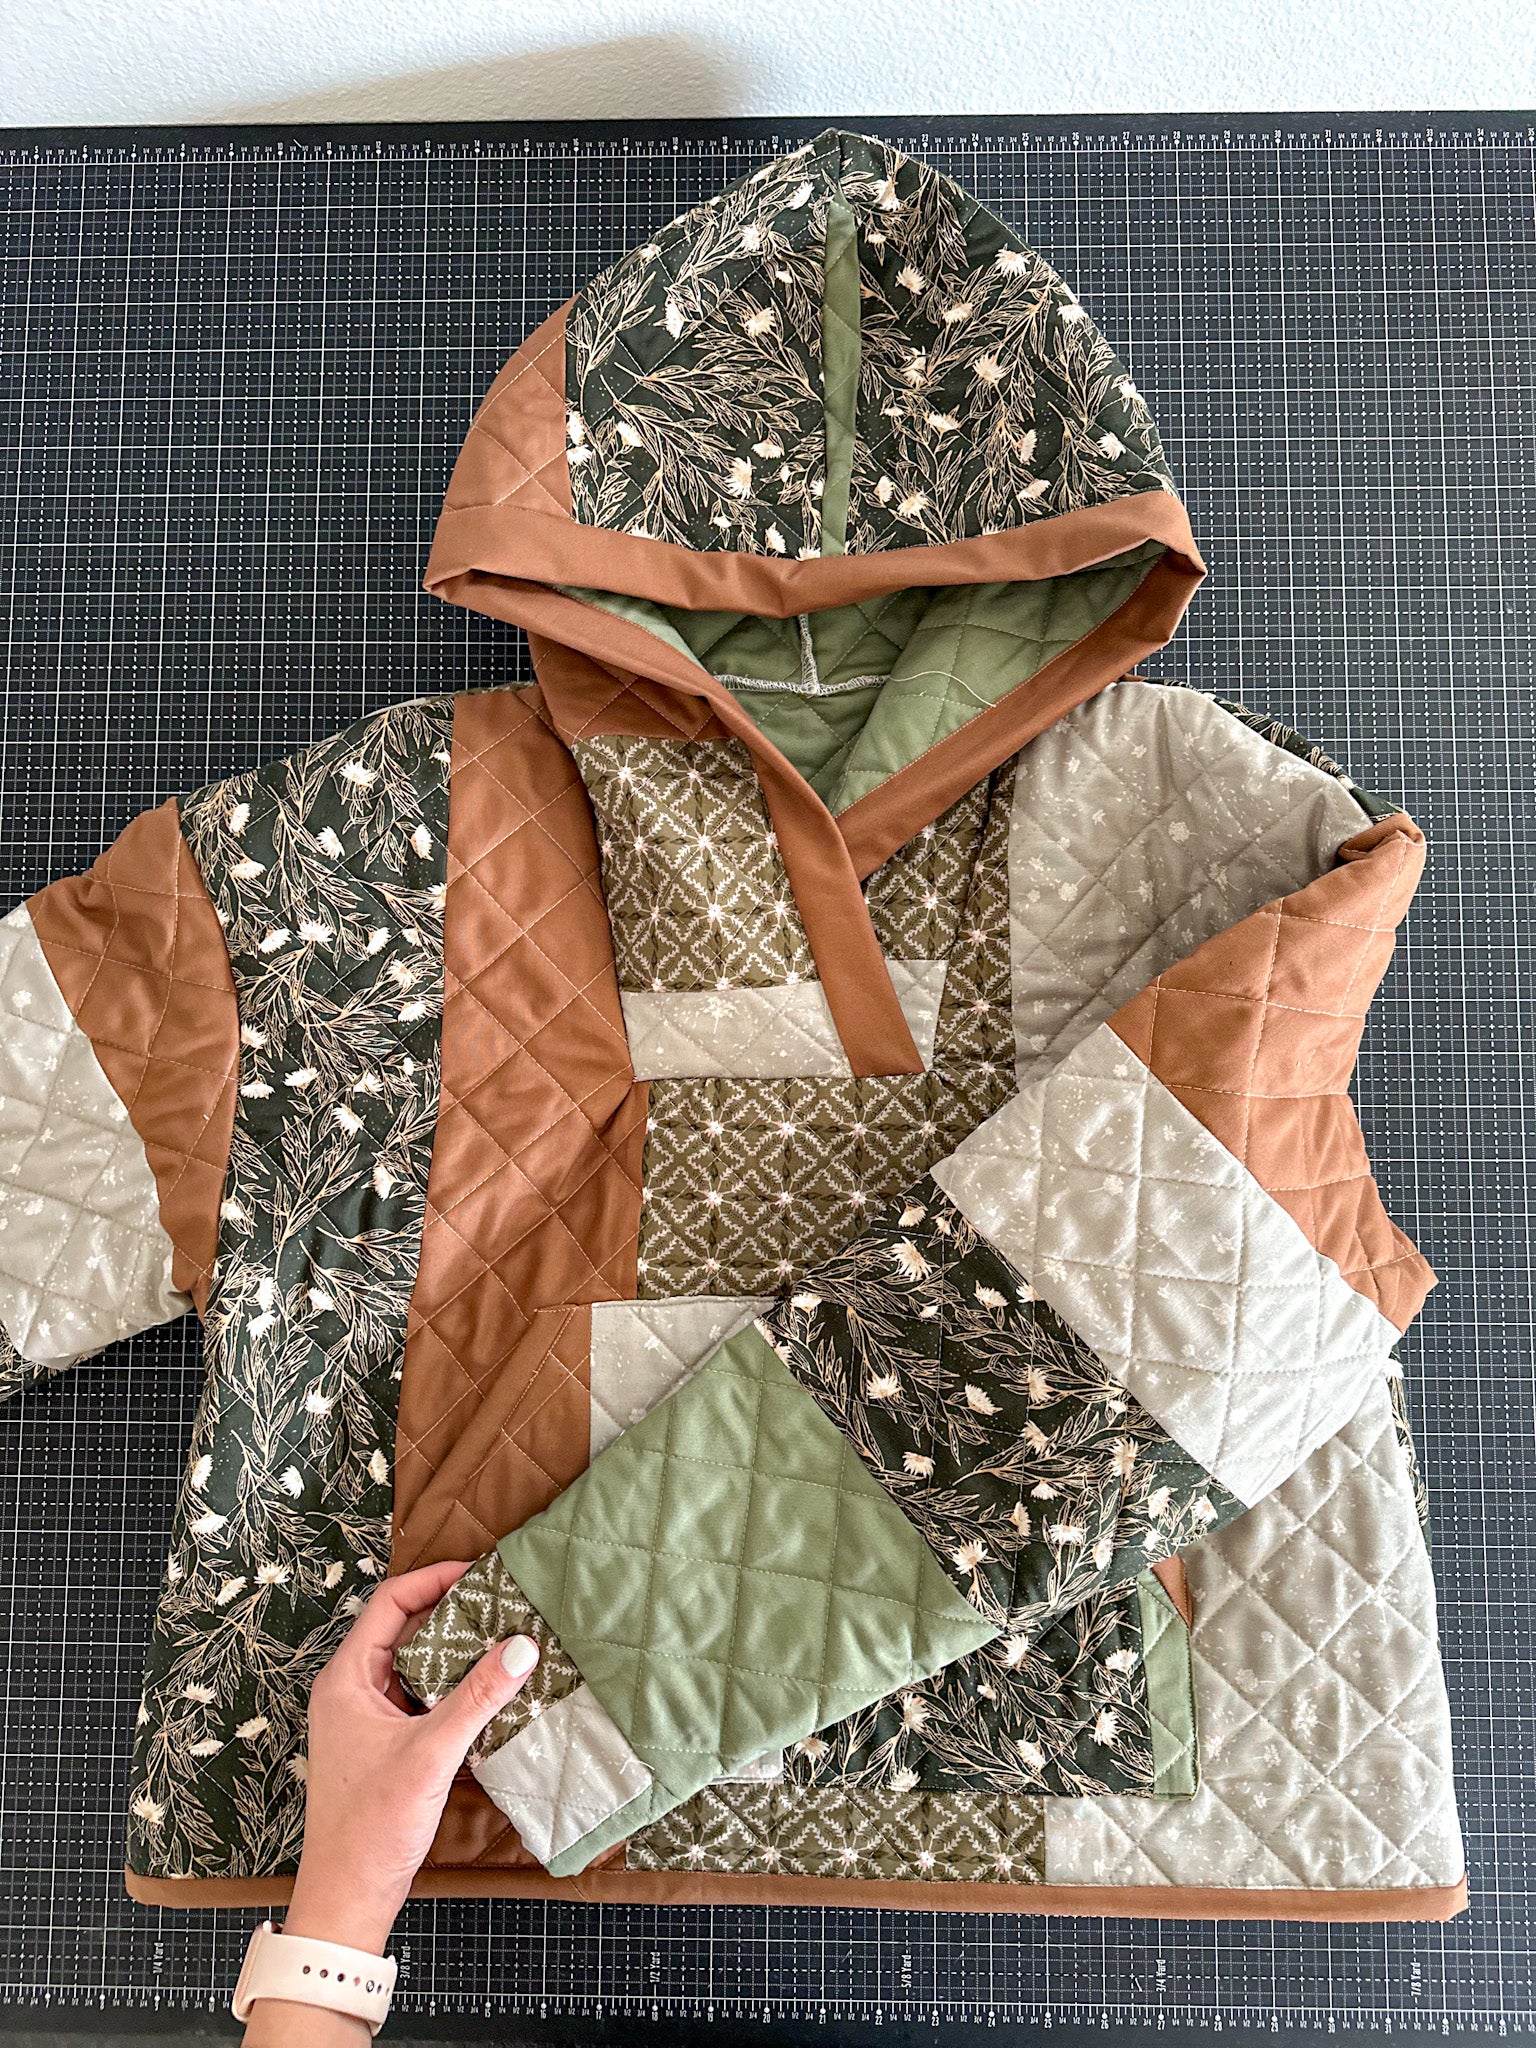
Step 8. Add binding to lower edge. And you're done!! Try it on and admire how amazing you look. Then take a picture and share it so others can admire your hard work as well!
Final Thoughts:
- I like both the cropped and long hoodies! So if you are between the two options, just make both:).
- I used my serger (for the first time) on the second hoodie, thinking it would be an easier way to finish the seams - spoiler alert - it wasn't. It was such a headache. Probably partially from operator error, but trust me, it was not worth the frustration. It was just too much fabric in too tight a space. I was cursing the sewing gods and almost scrapped the project. If you've had a different experience, I would love to know how you made it work!
- This would be the perfect project to gift a quilty husband, son, boyfriend, or brother in your life! Not all quilt projects are appreciated by the men in my life, but this one was and I think it would look great on a guy.
Let me know what you think, and be sure to tag me @wellspringdesigns_co in your progress photos and used #QuiltedHoodie to help me find you! I have LOVED seeing all of your gorgeous hoodies - each one is so amazing! You guys are just the best, and it has been so much fun making this project together!


10 comments
I’m unable to find the site/link to post a photo of my hoodie….Help this ol’ lady please…
Thank You, I am looking forward to giving this a try,
I am making a test one of your first version. How did you finish the seam on the inside of the hood where you join both pieces? I assume you didn’t have the raw edges showing all the time. Thanks!
Where can I obtain the patter. Very cute.
As for using a serger, I found that if you run all the pieces thru the serger, one at a time, you have nice finished edges that you won’t have to zigzag later. Worth the time in my opinion.