DIY Quilted Hoodie Quilt-A-Long: Week 1
Welcome to Week 1 of the DIY Quilted Hoodie QAL!
If you're looking for the perfect spring quilting project to transition from winter to spring, get ready - this DIY Quilted Hoodie is going to be your new favorite thing! It's so cozy, versatile, and the templates are FREE. Download them here!
Over the next 3 weeks (March 24th - April 13th), I'll be walking you through the pattern to make your own version. I am so excited to share the tips and tricks I picked up, and hopefully make your experience as easy as possible. This first week is dedicated to selecting your fabrics.
First things first: If you are unsure of your size, MAKE A TEST VERSION. I know this feels unnecessary, but as someone who has cut up a quilt I loved, only to have the garment not fit - take the extra time. You can use a cheap store bought quilt, or some extra fabric (it doesn't even need to be quilted), and quickly sew together a practice version. It will give you so much confidence, and it is worth the extra time!
What you need:
Fabric Requirements (based on size Medium, adjust accordingly for larger and smaller sizes):
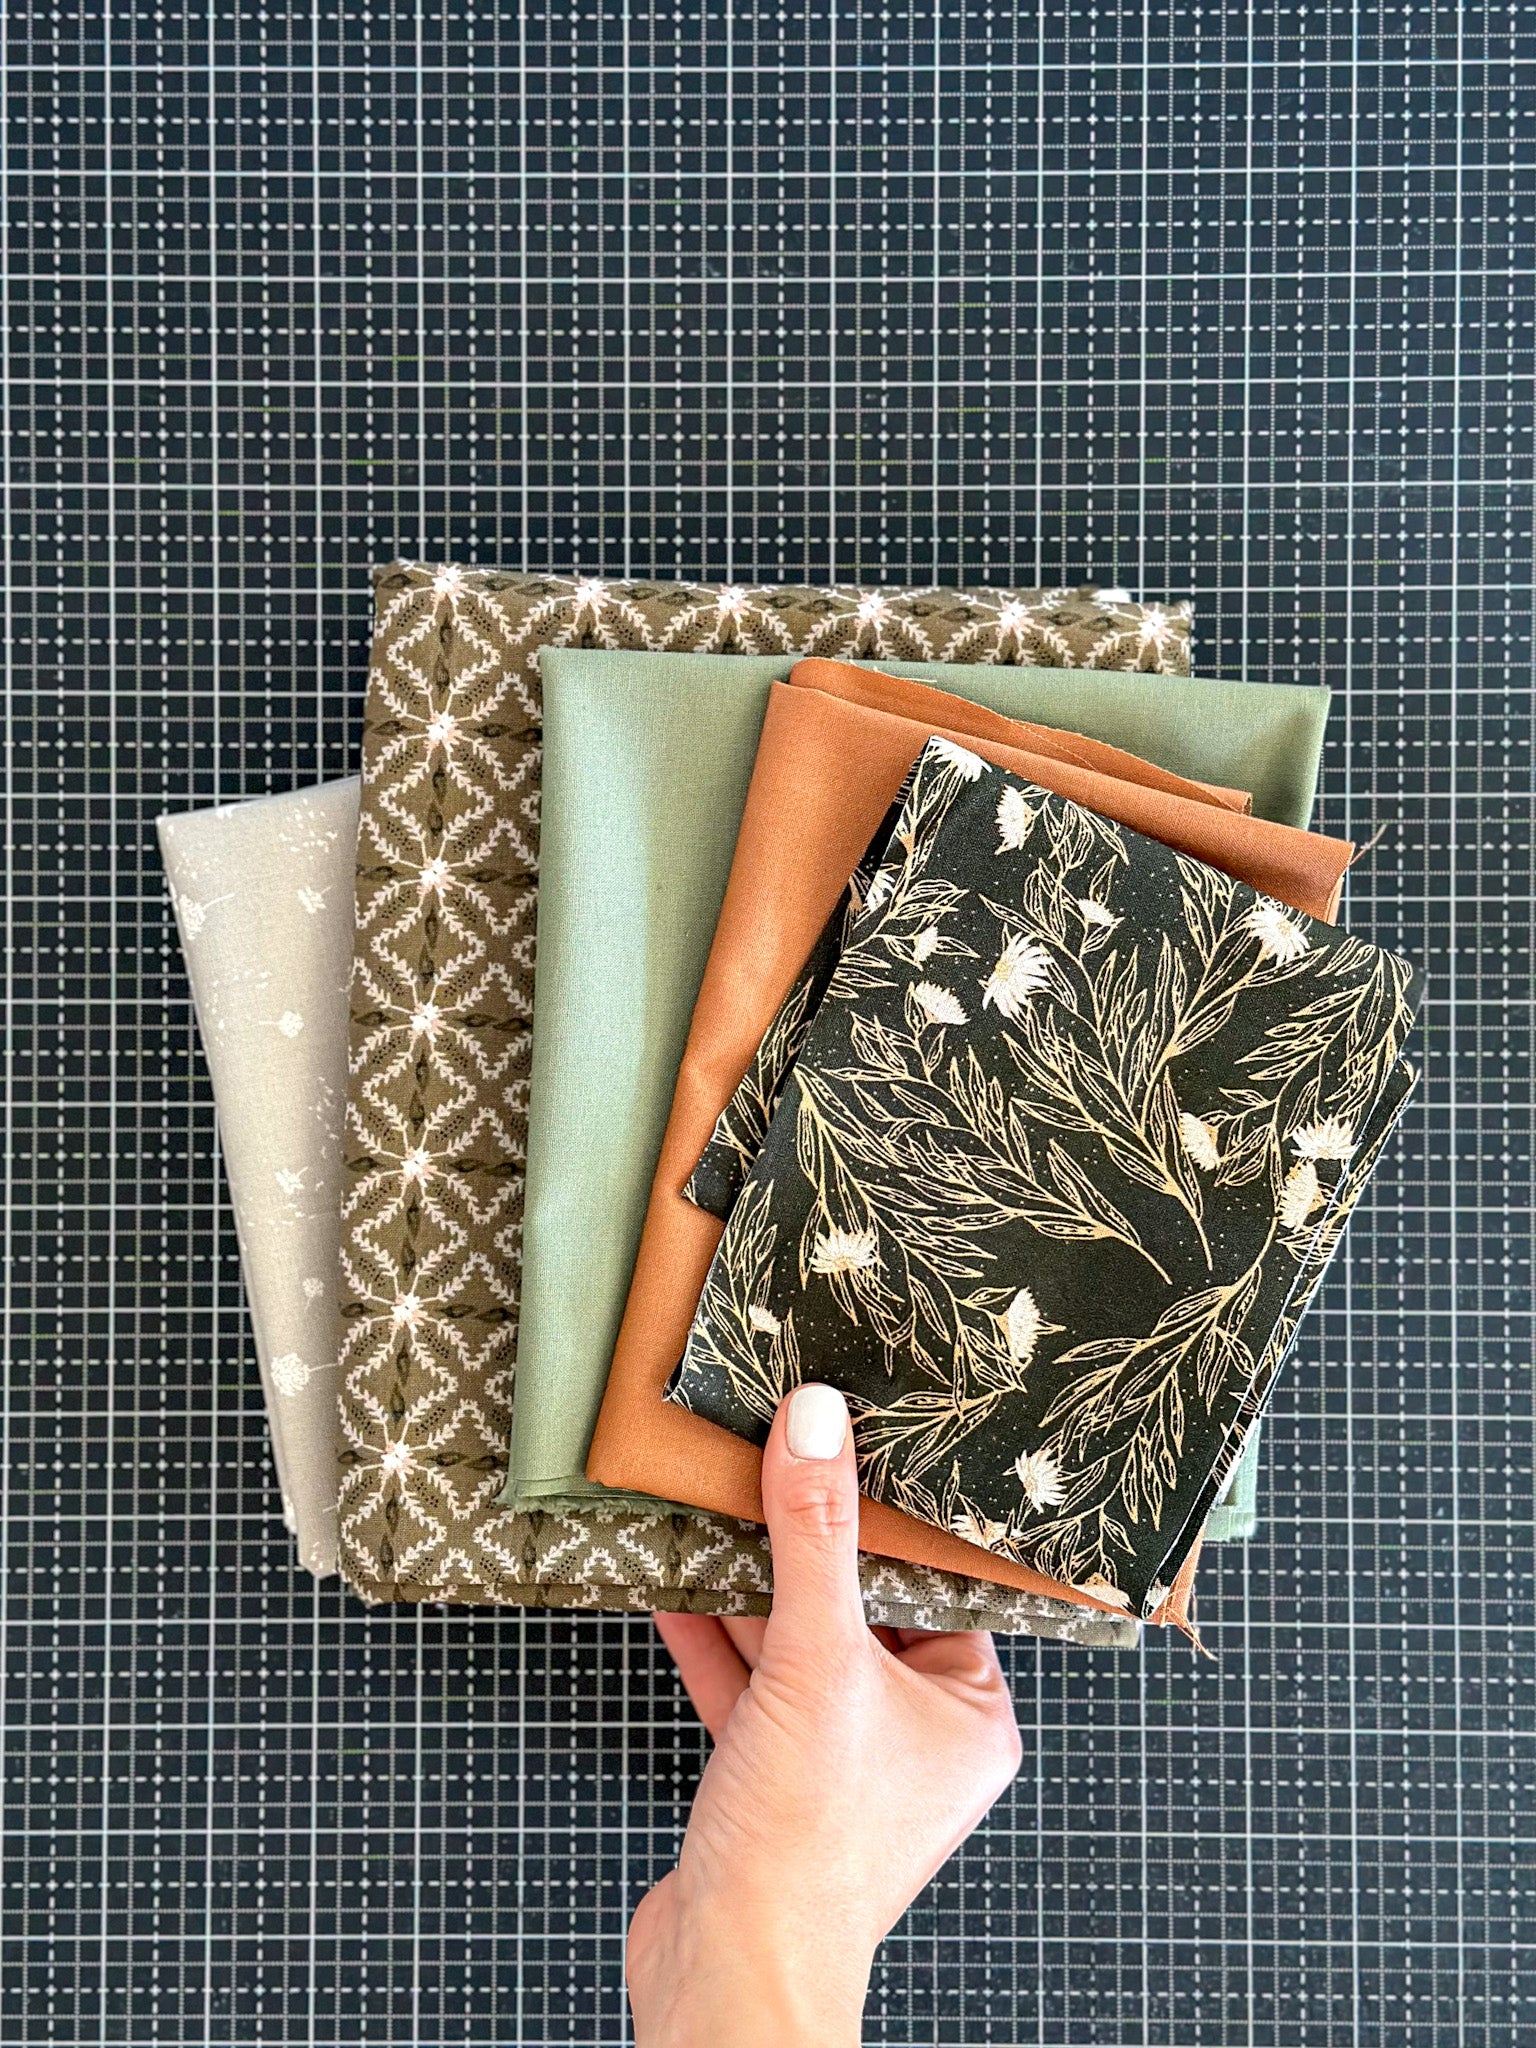
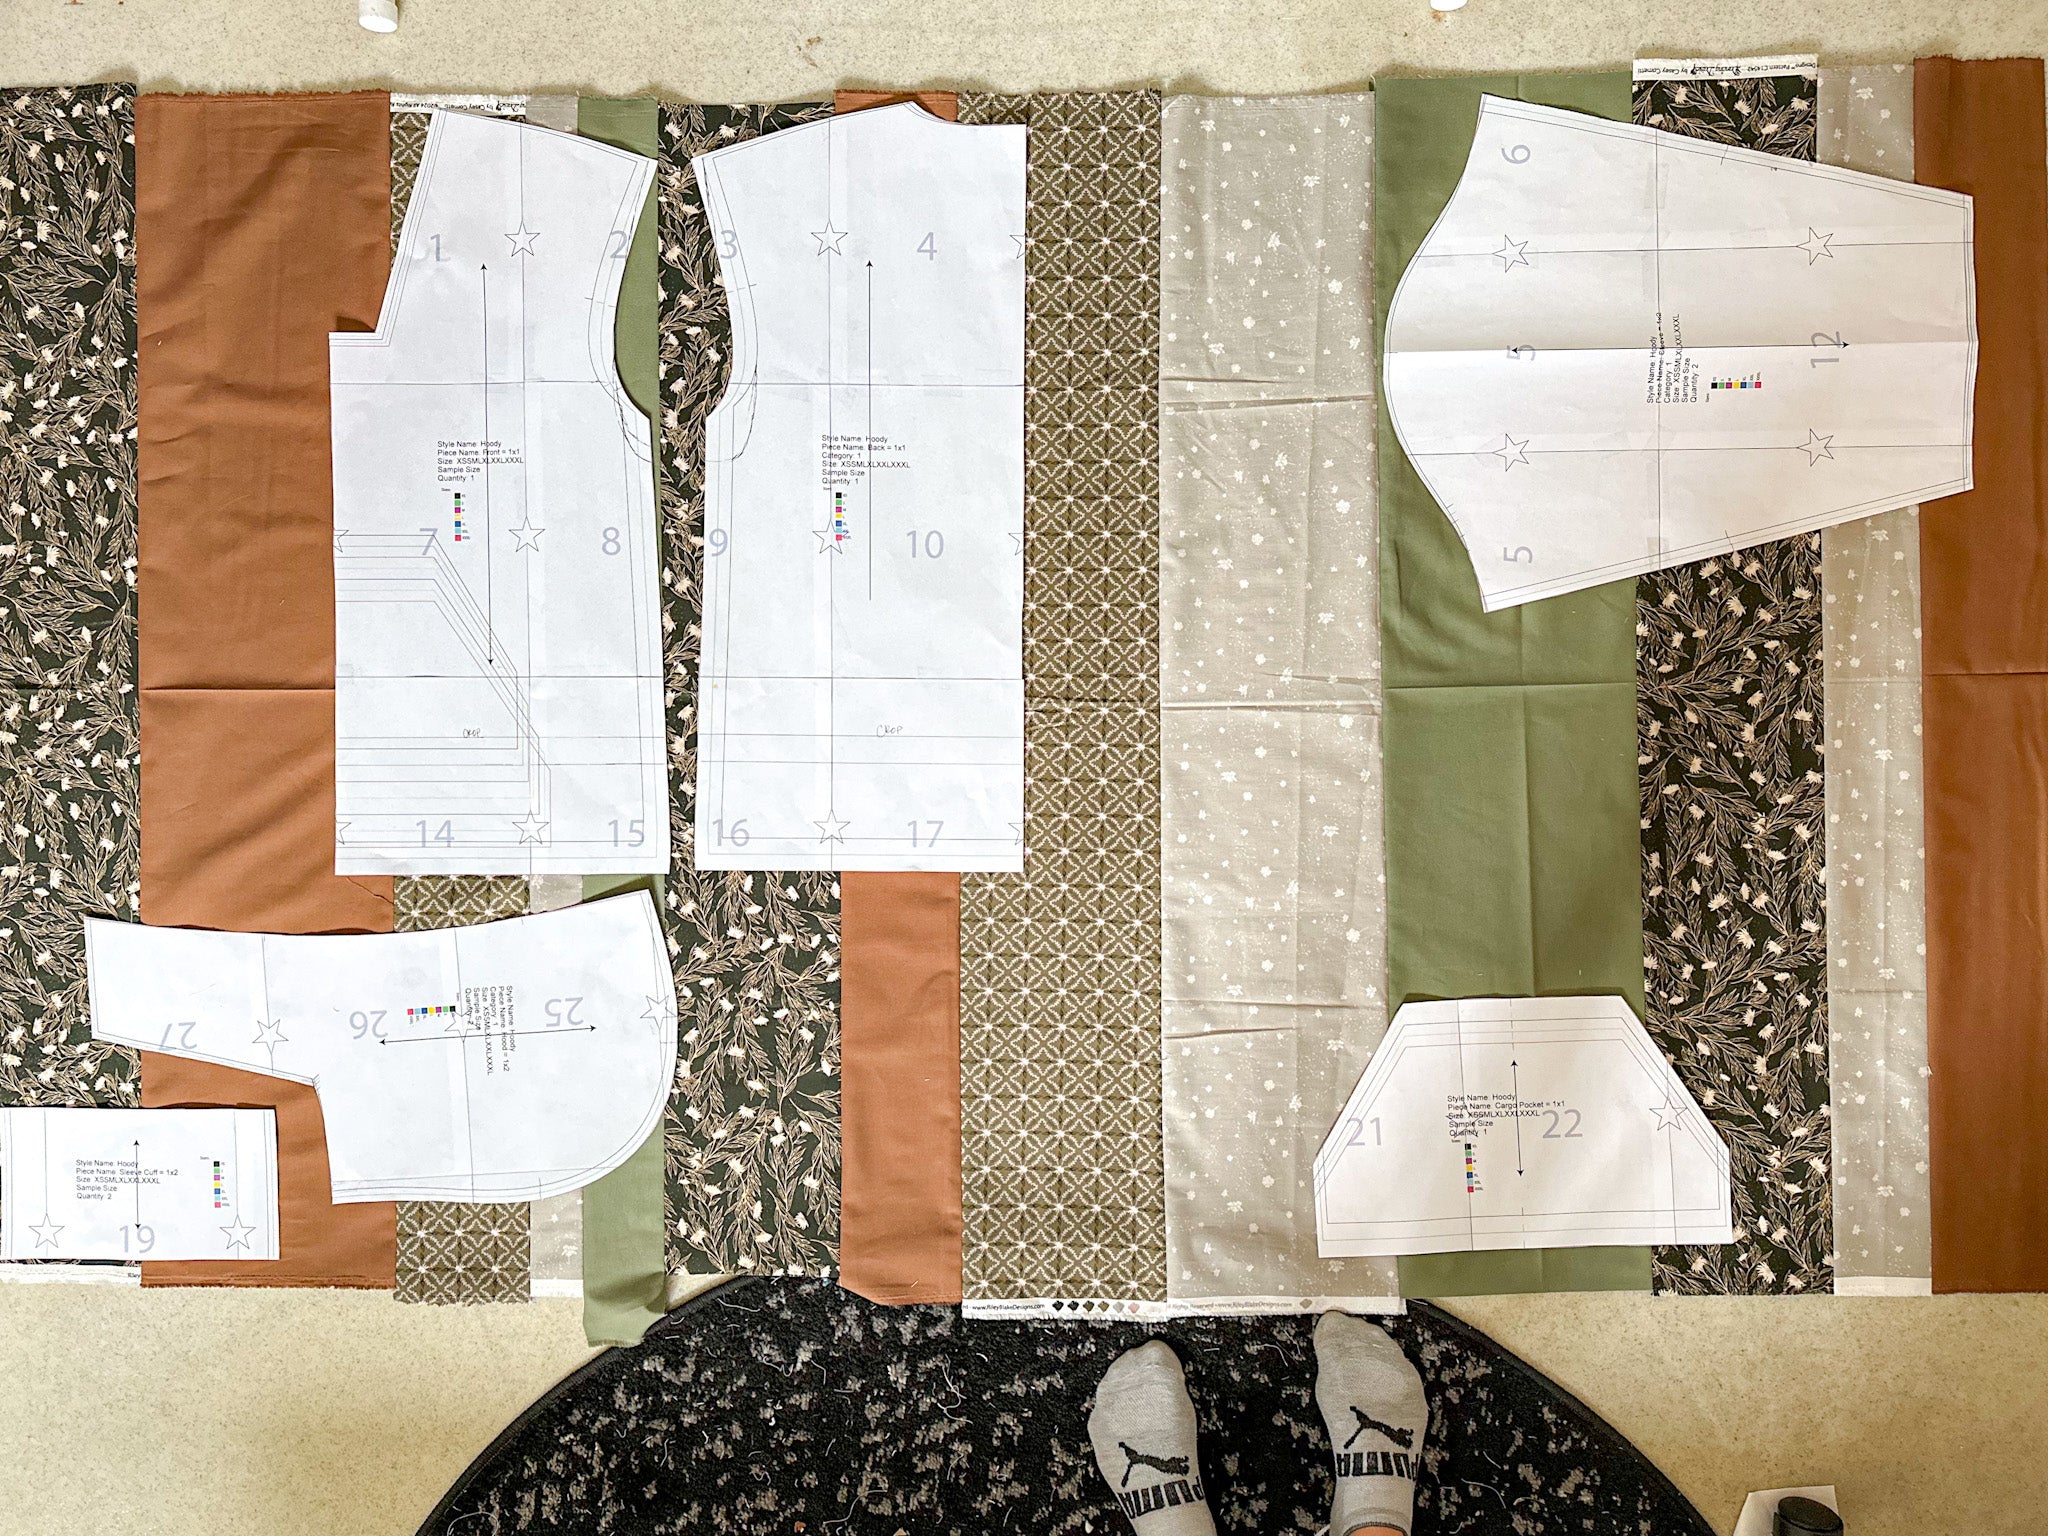
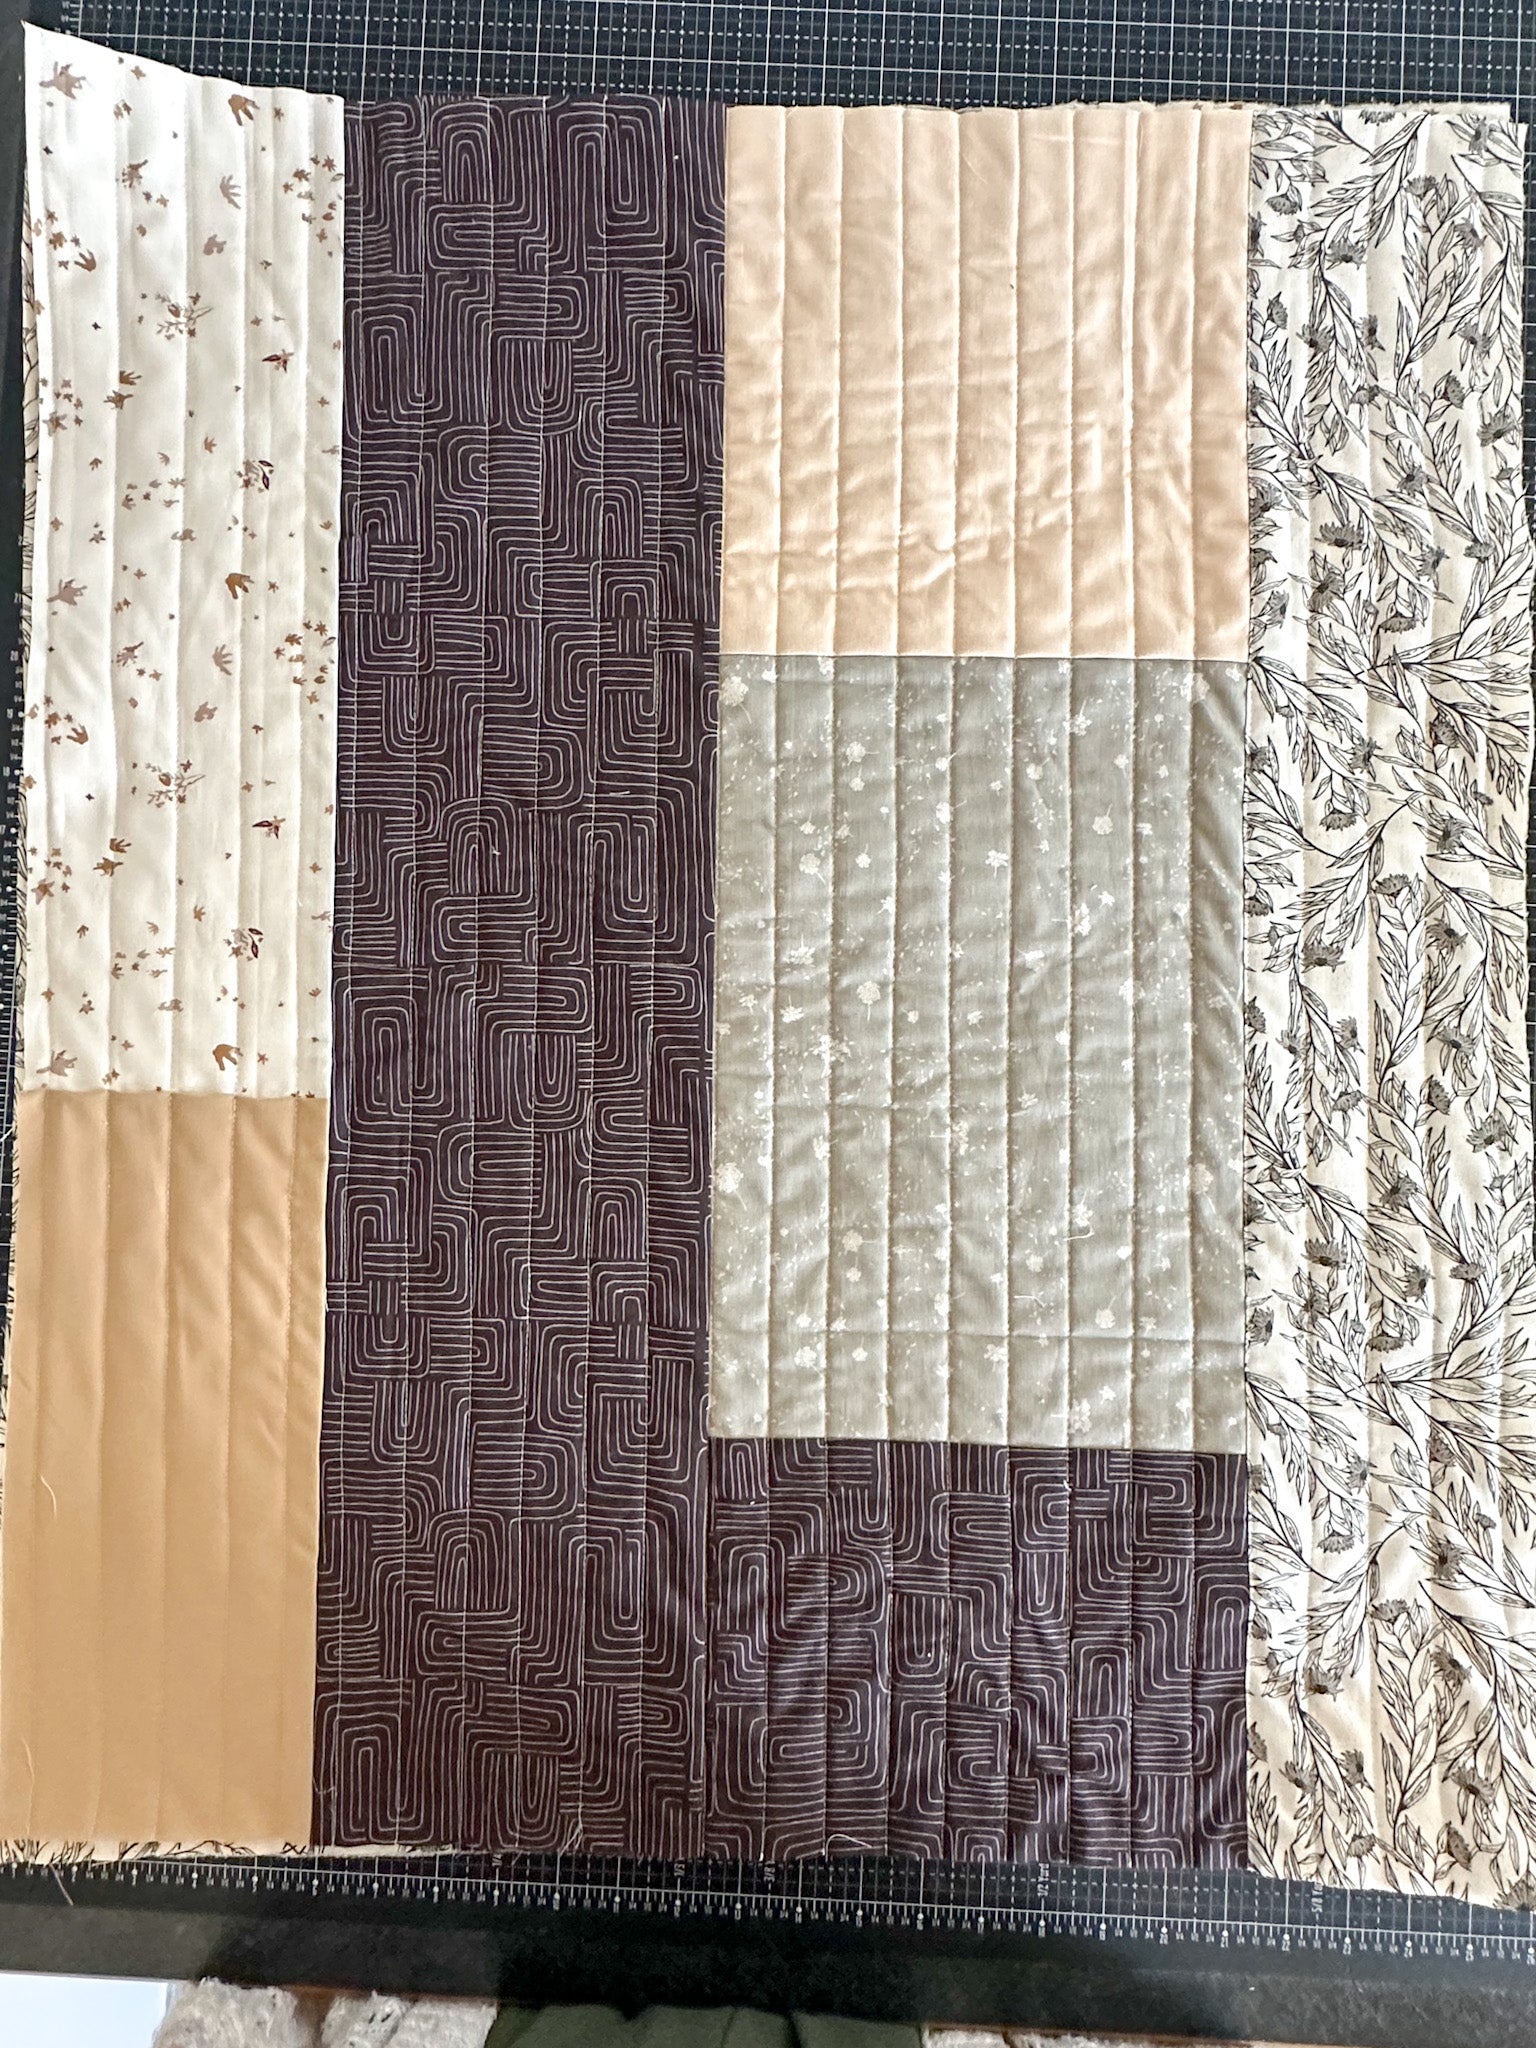
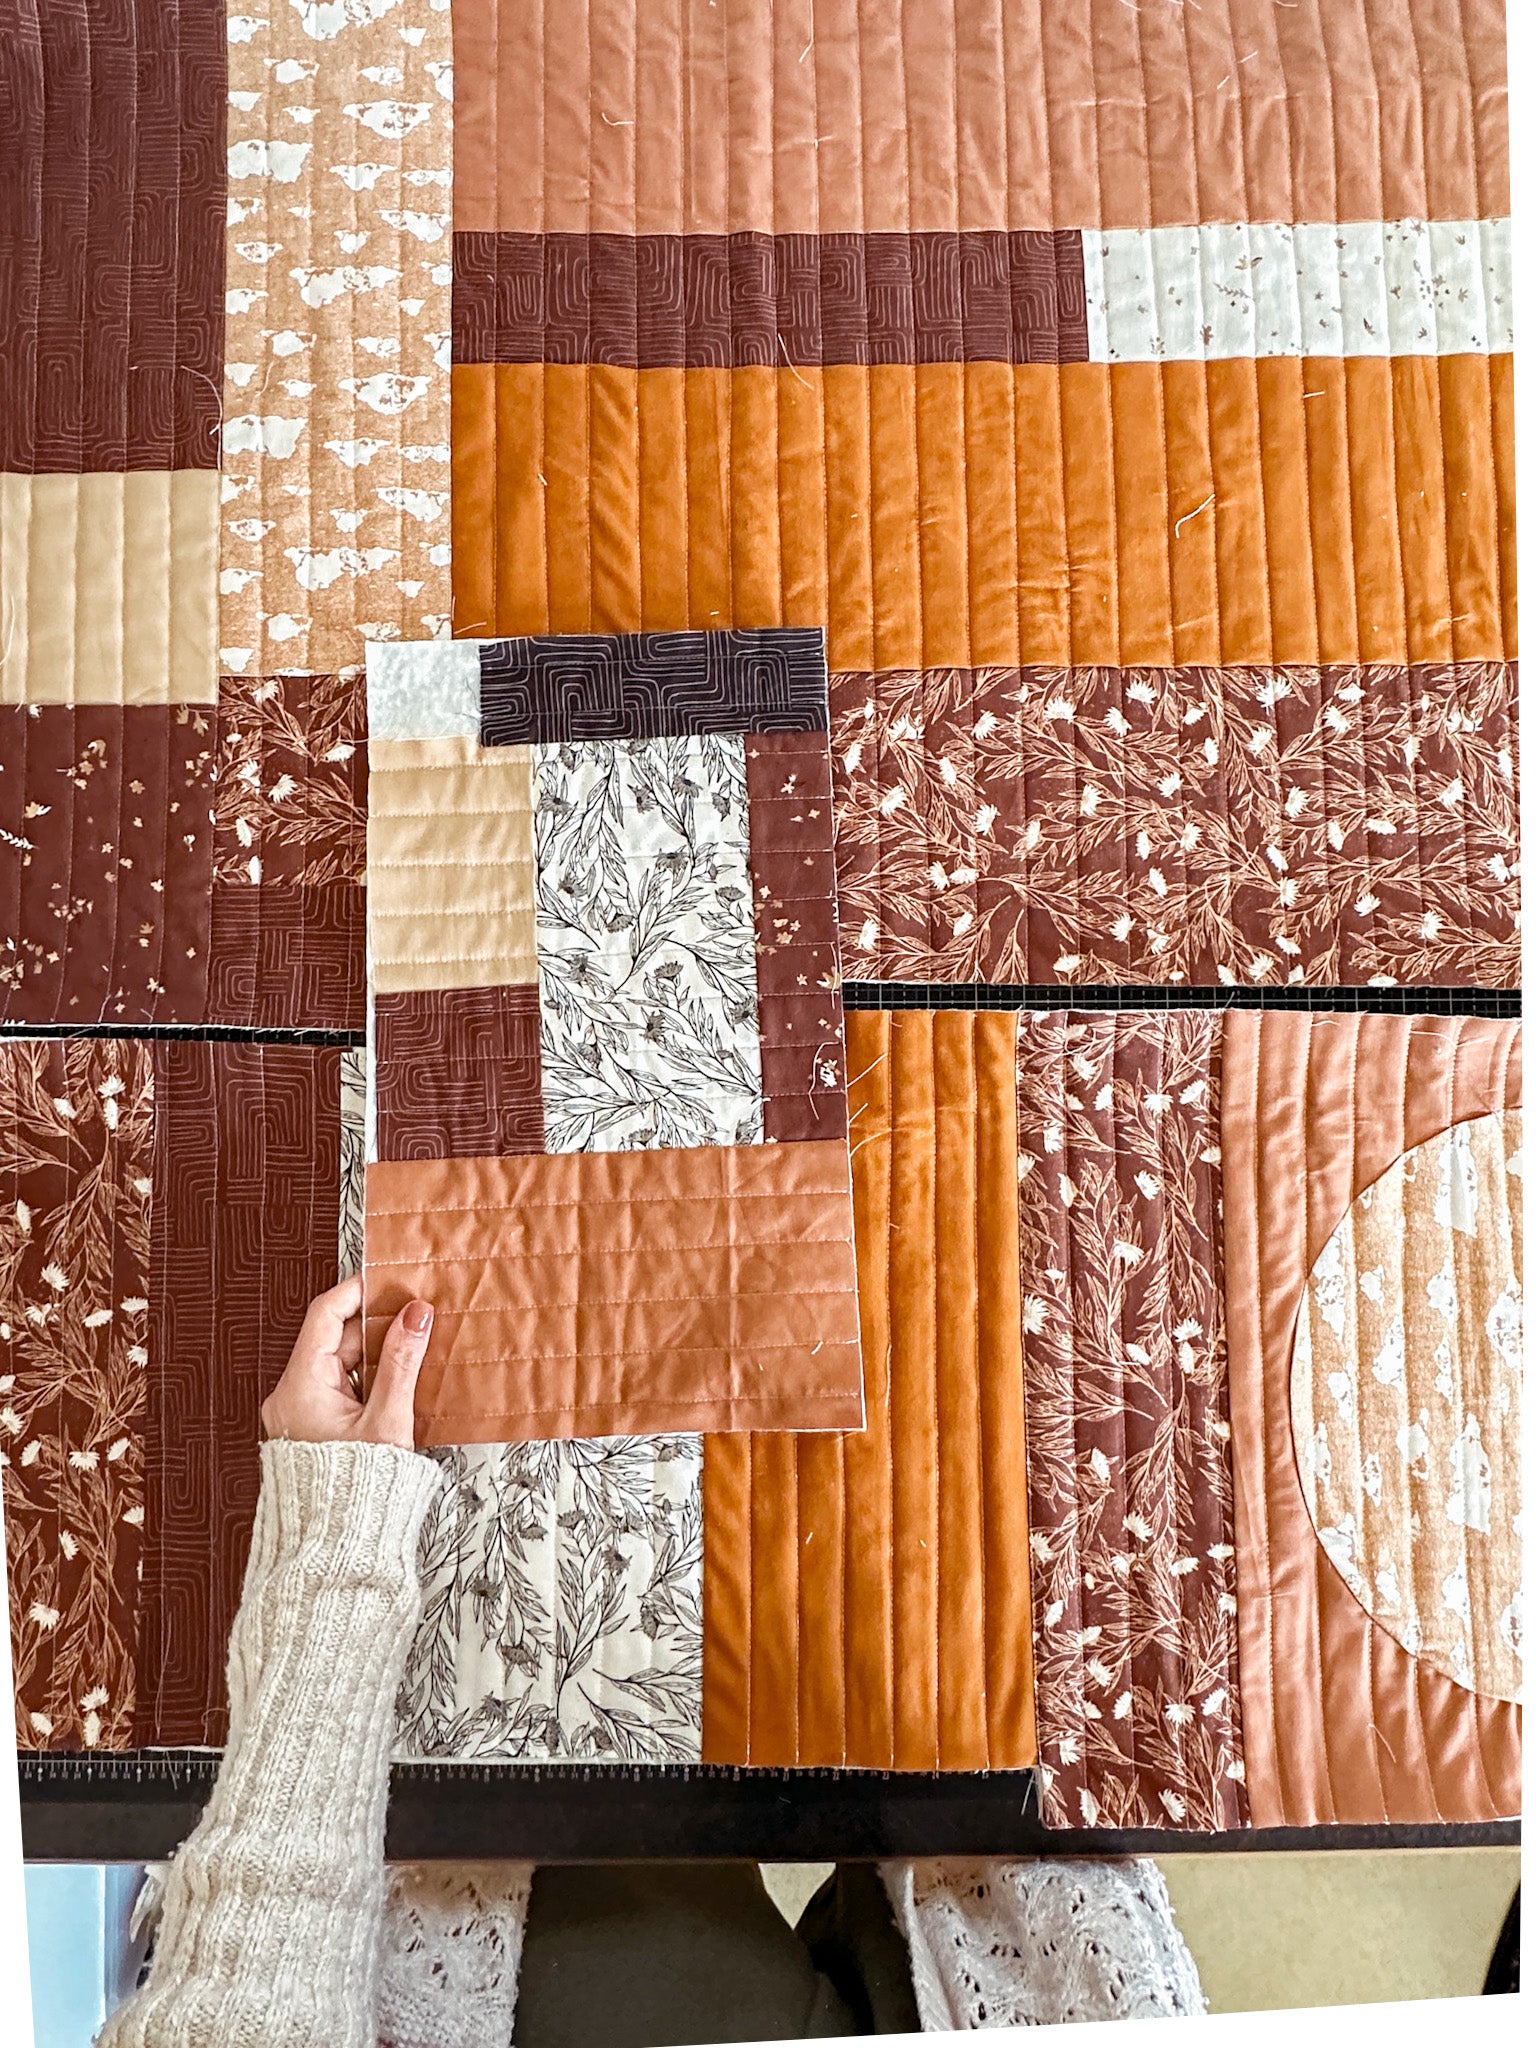
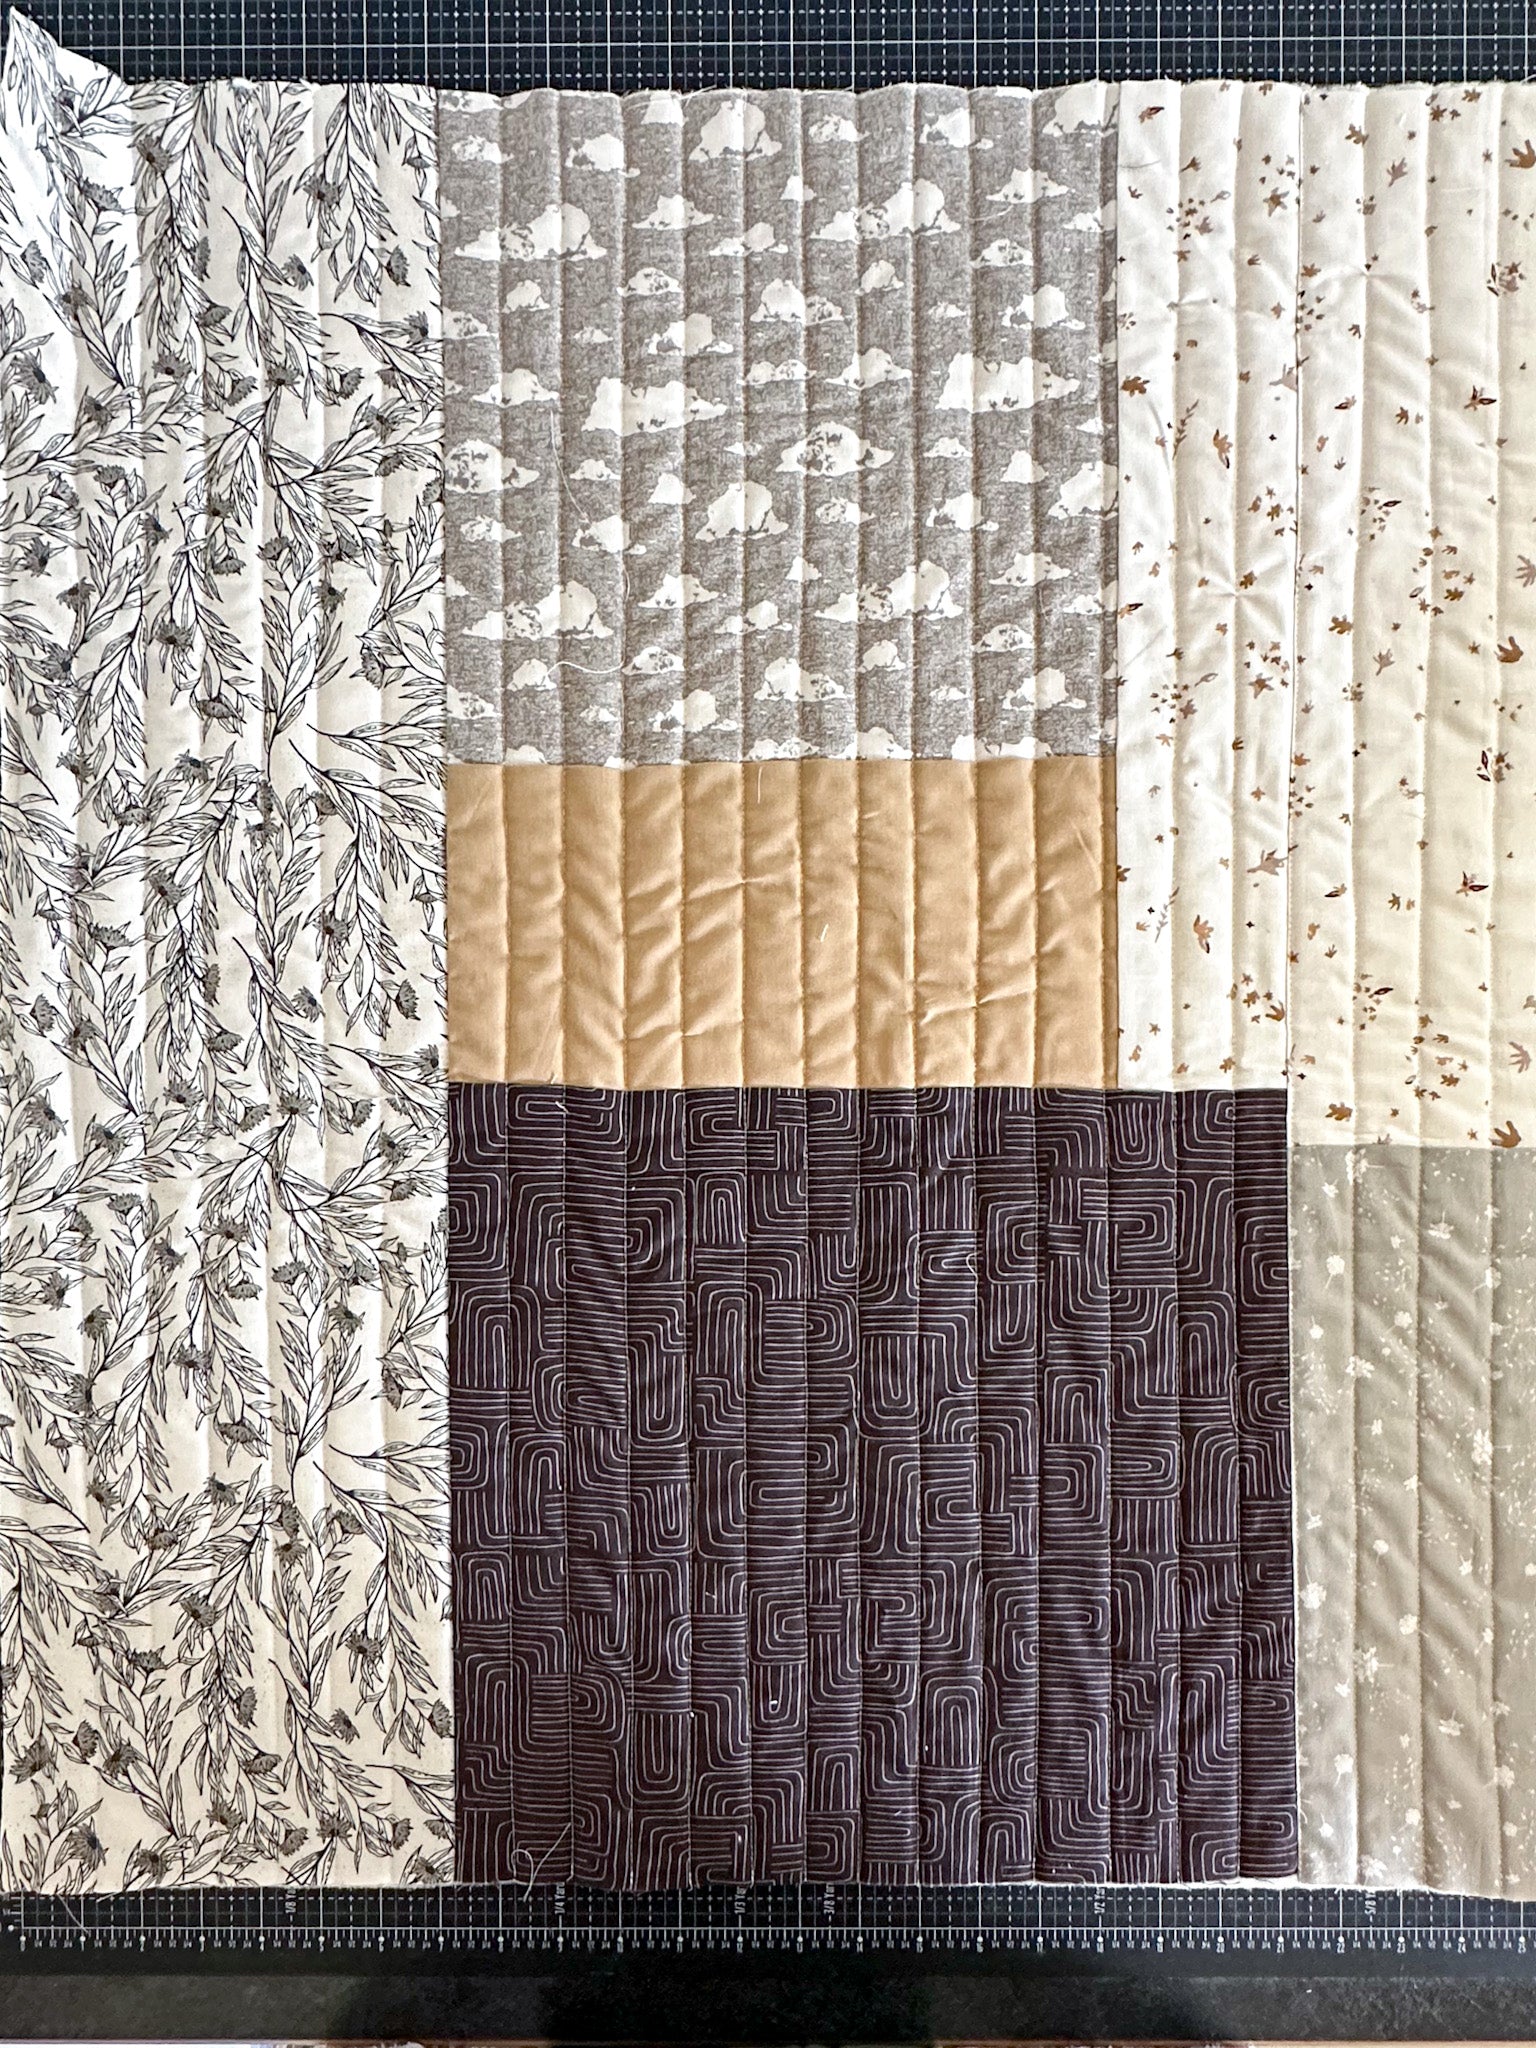
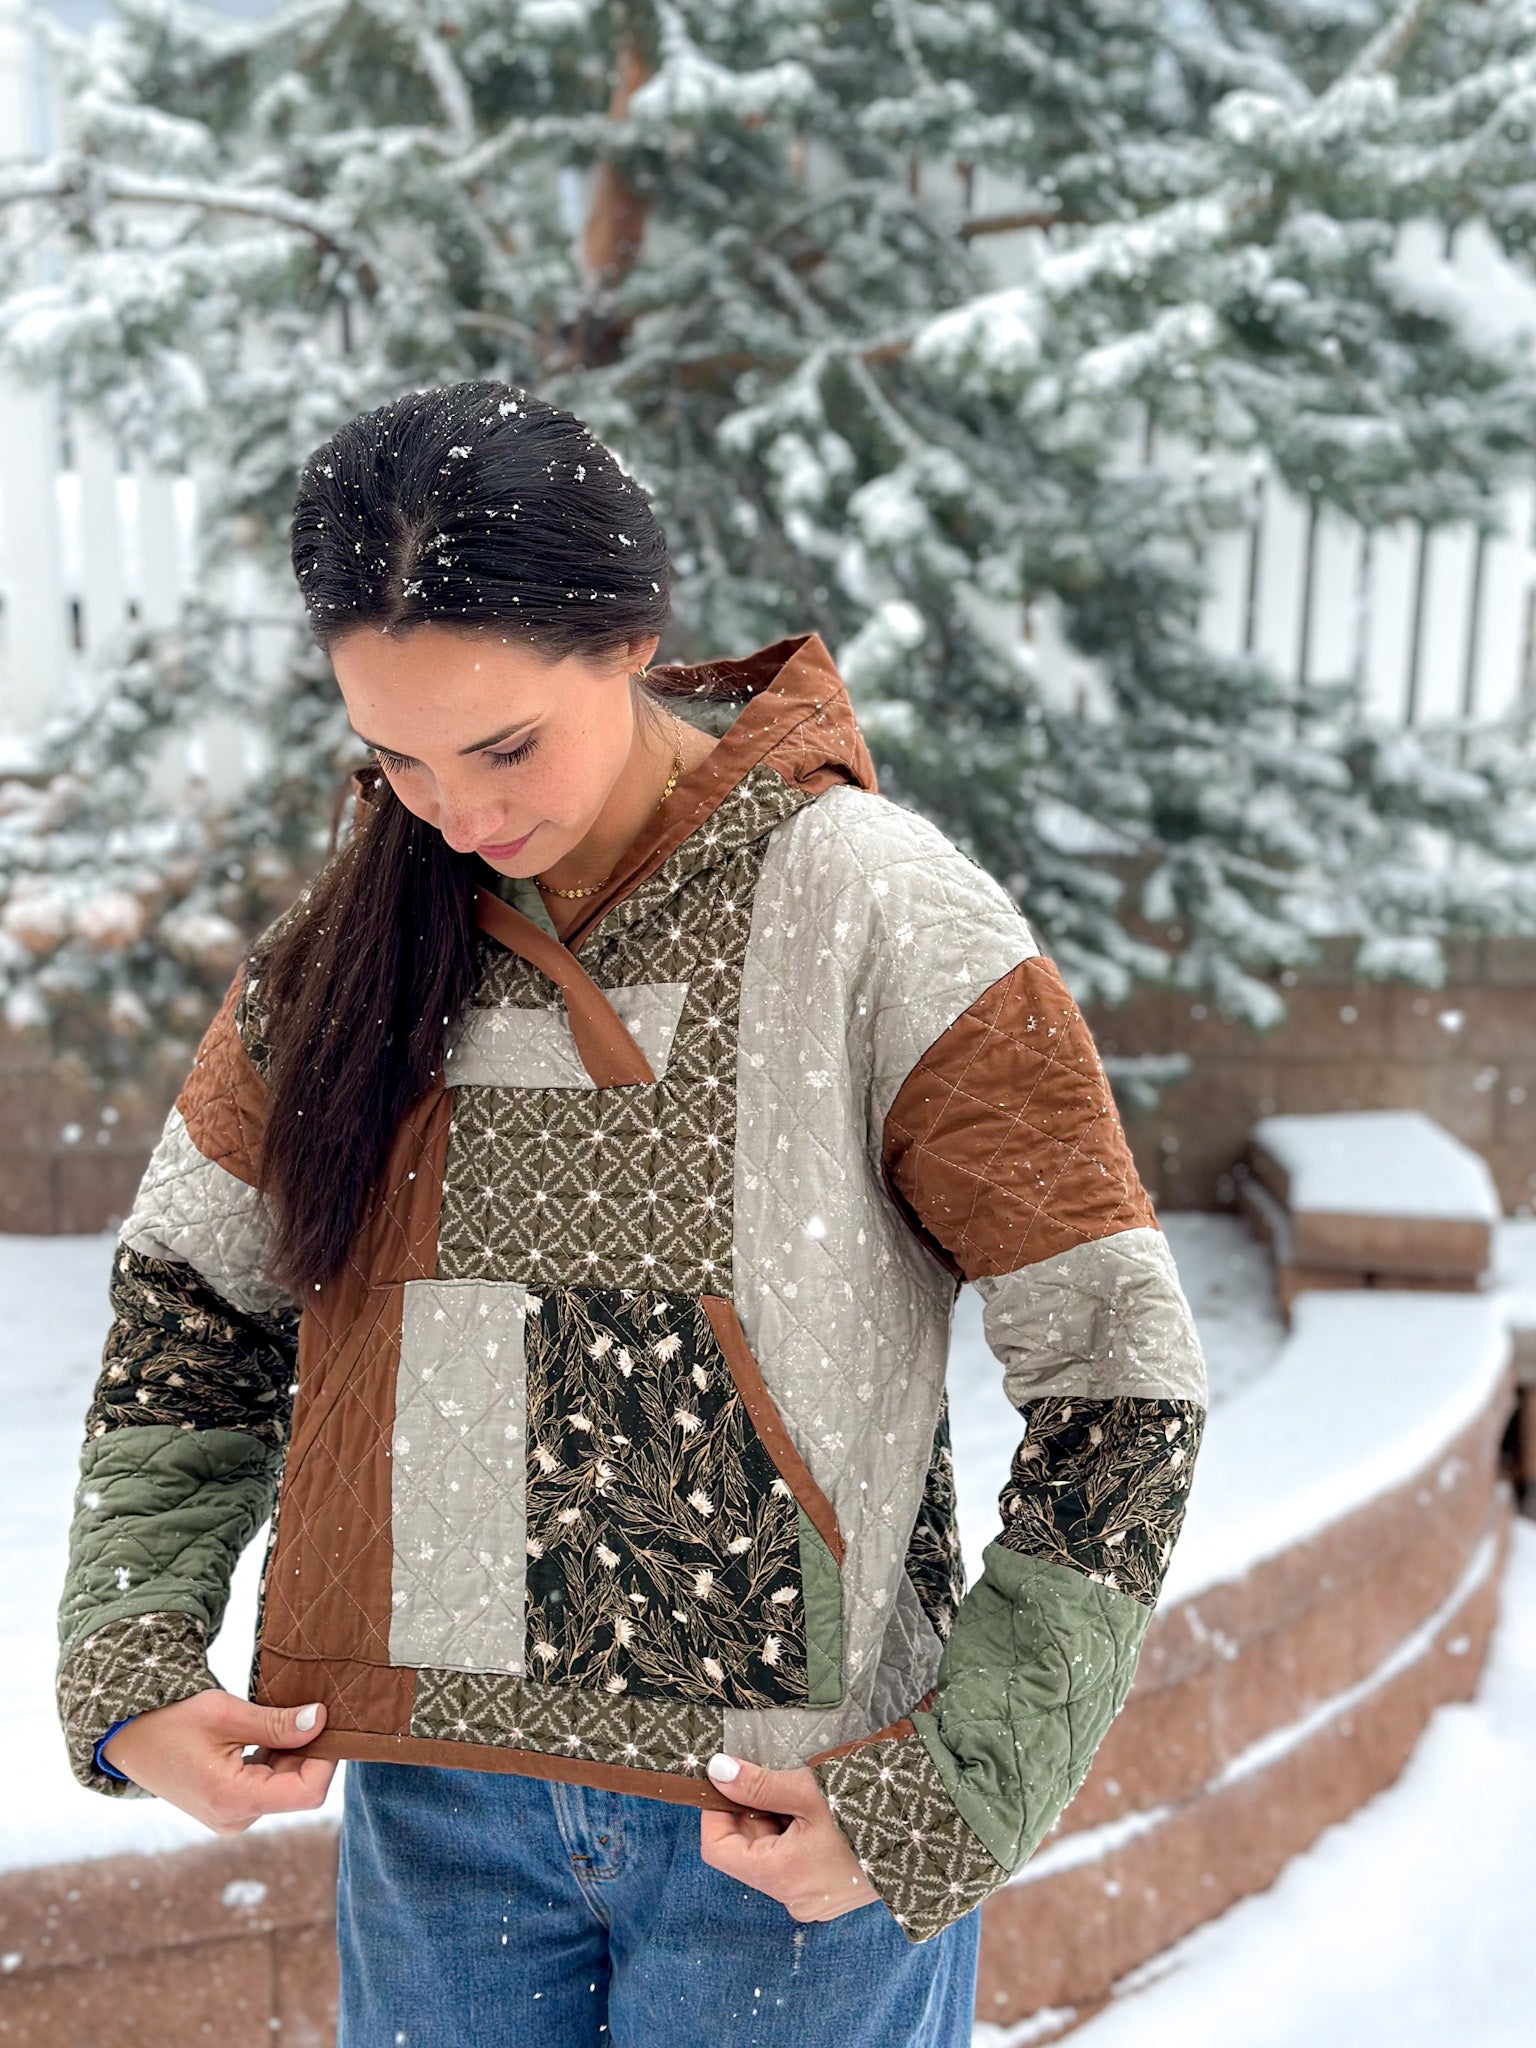
- At least 3 yards of quilt top - a large throw size quilt top should provide enough space to fit all of the templates. I used scraps from my Riley Blake Dancing Daisies Collection and Confetti solids line to piece sections for each template.
- At least 3 yards of backing fabric
- At least 3 yards of batting
- Binding (I used about 1/4 yard cut into 3" strips and 6" strips)
Tools:
- Rulers
- Cutting mat
- Scissors or rotary cutter
- Adhesive spray — for stabilizing templates and appliqué
- Wonder clips — These are my newest obsession, they will make your sewing experience so much better!
- Hera marker
- Sewing machine (this is the one I sew with - it is reasonably priced, and has been able to handle every project I've tried on it!)
- Serger if desired. I am piecing my second version with a serger and will share more about my experience in a subsequent post, but this is an option for finishing the internal seams.
- Thread
- Button
- Iron
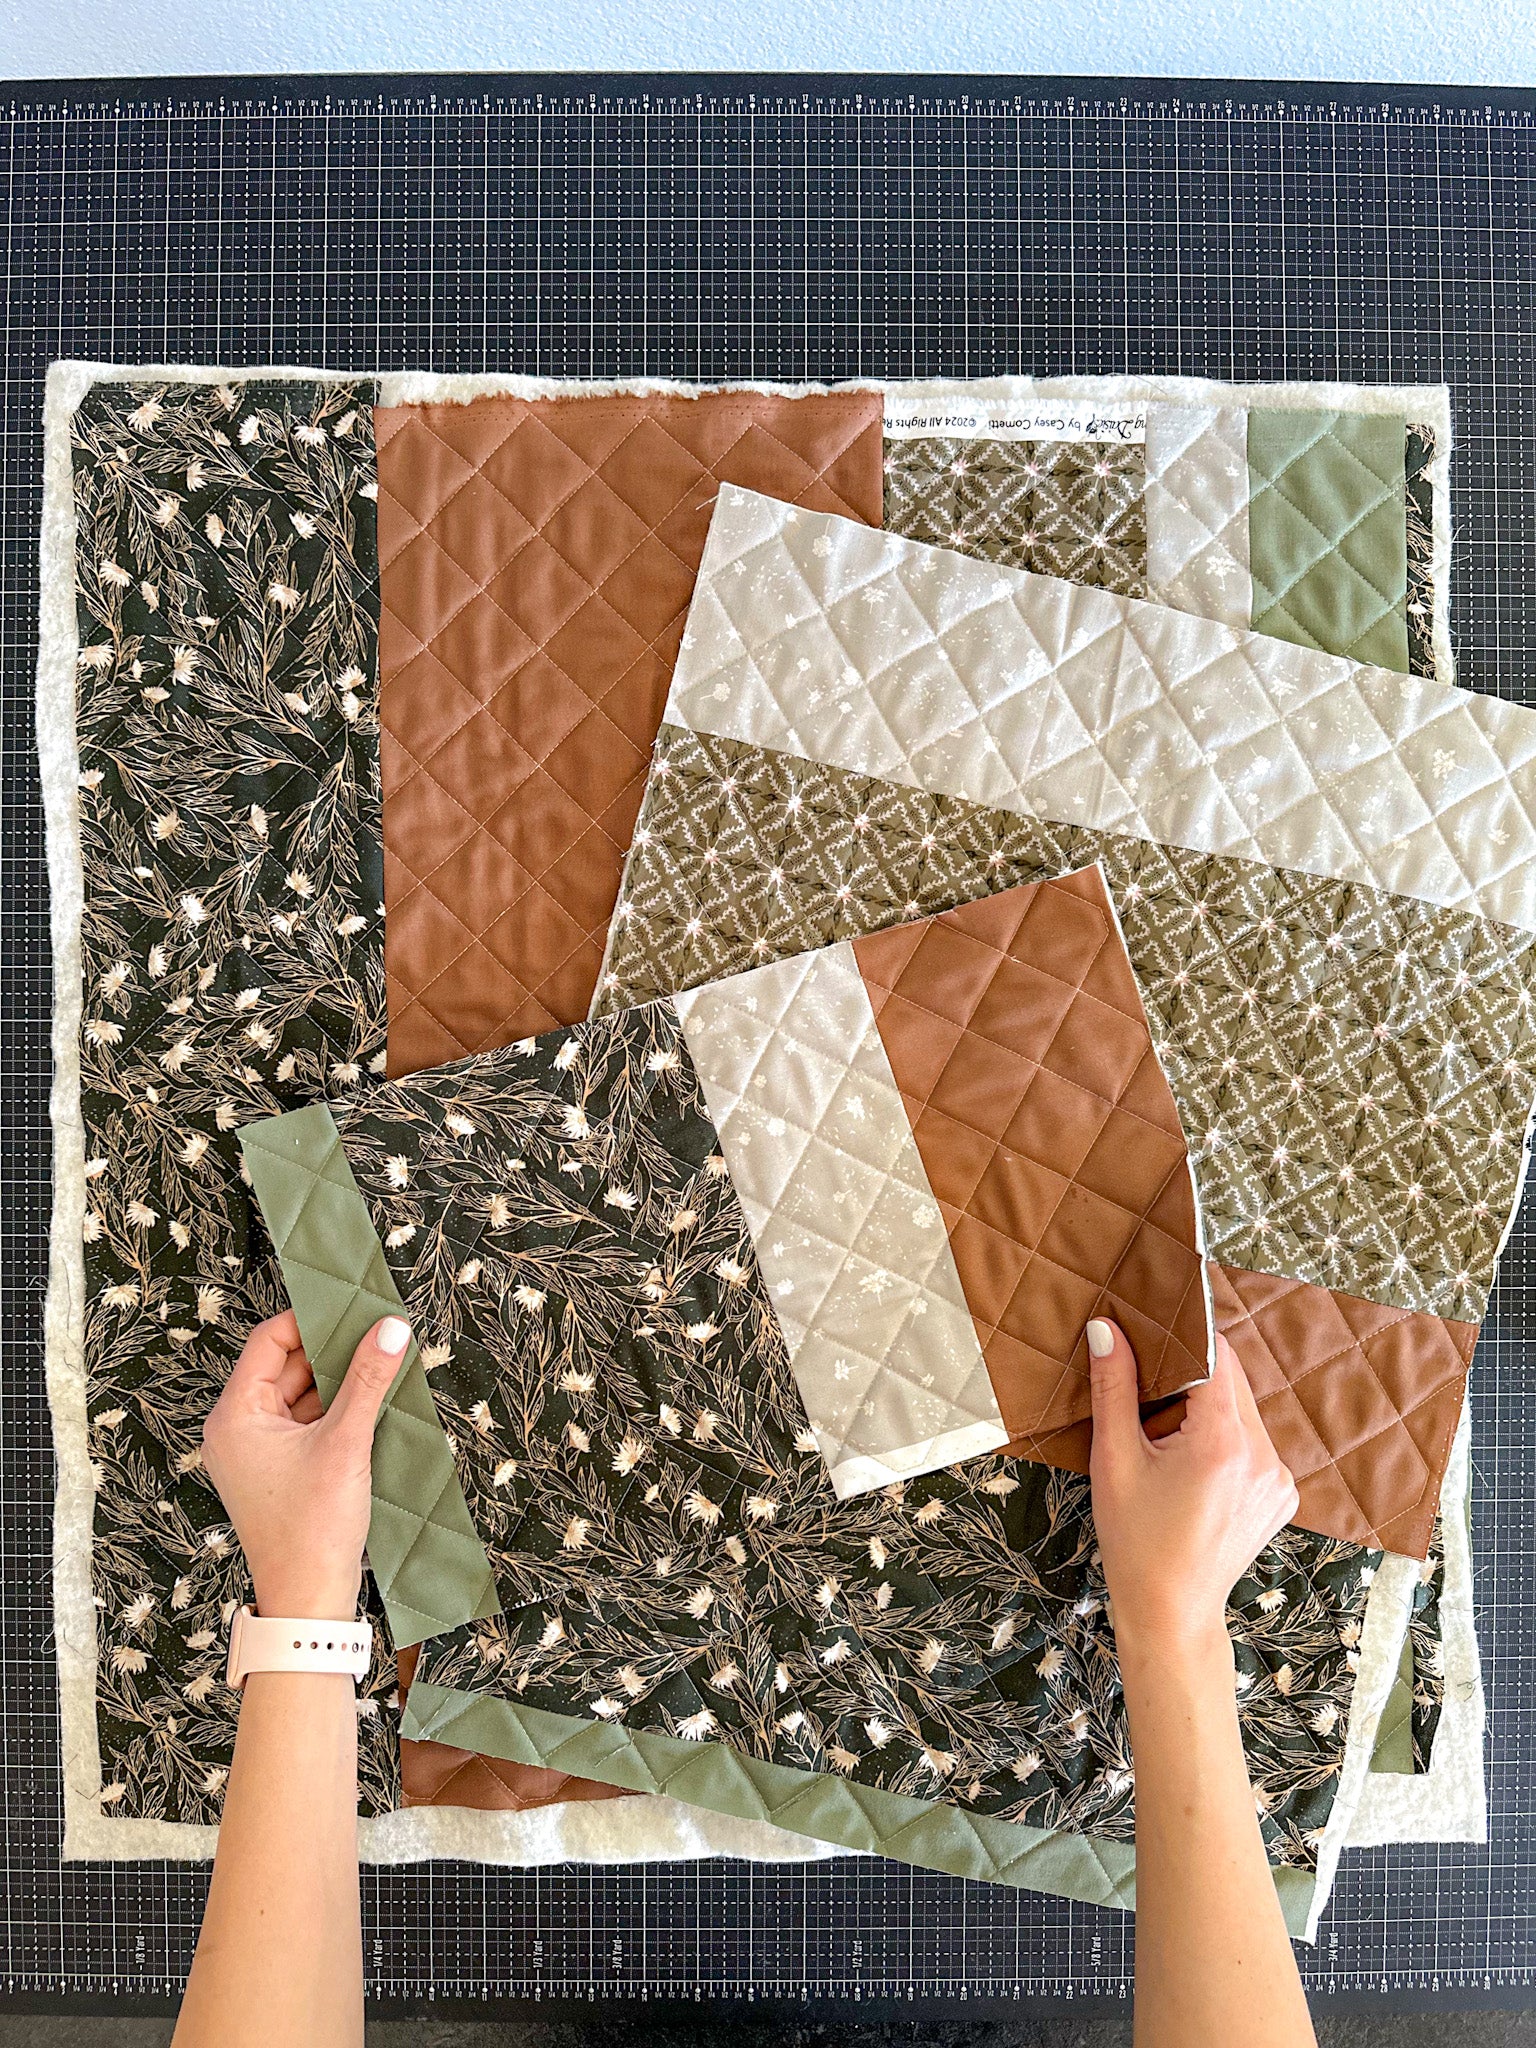
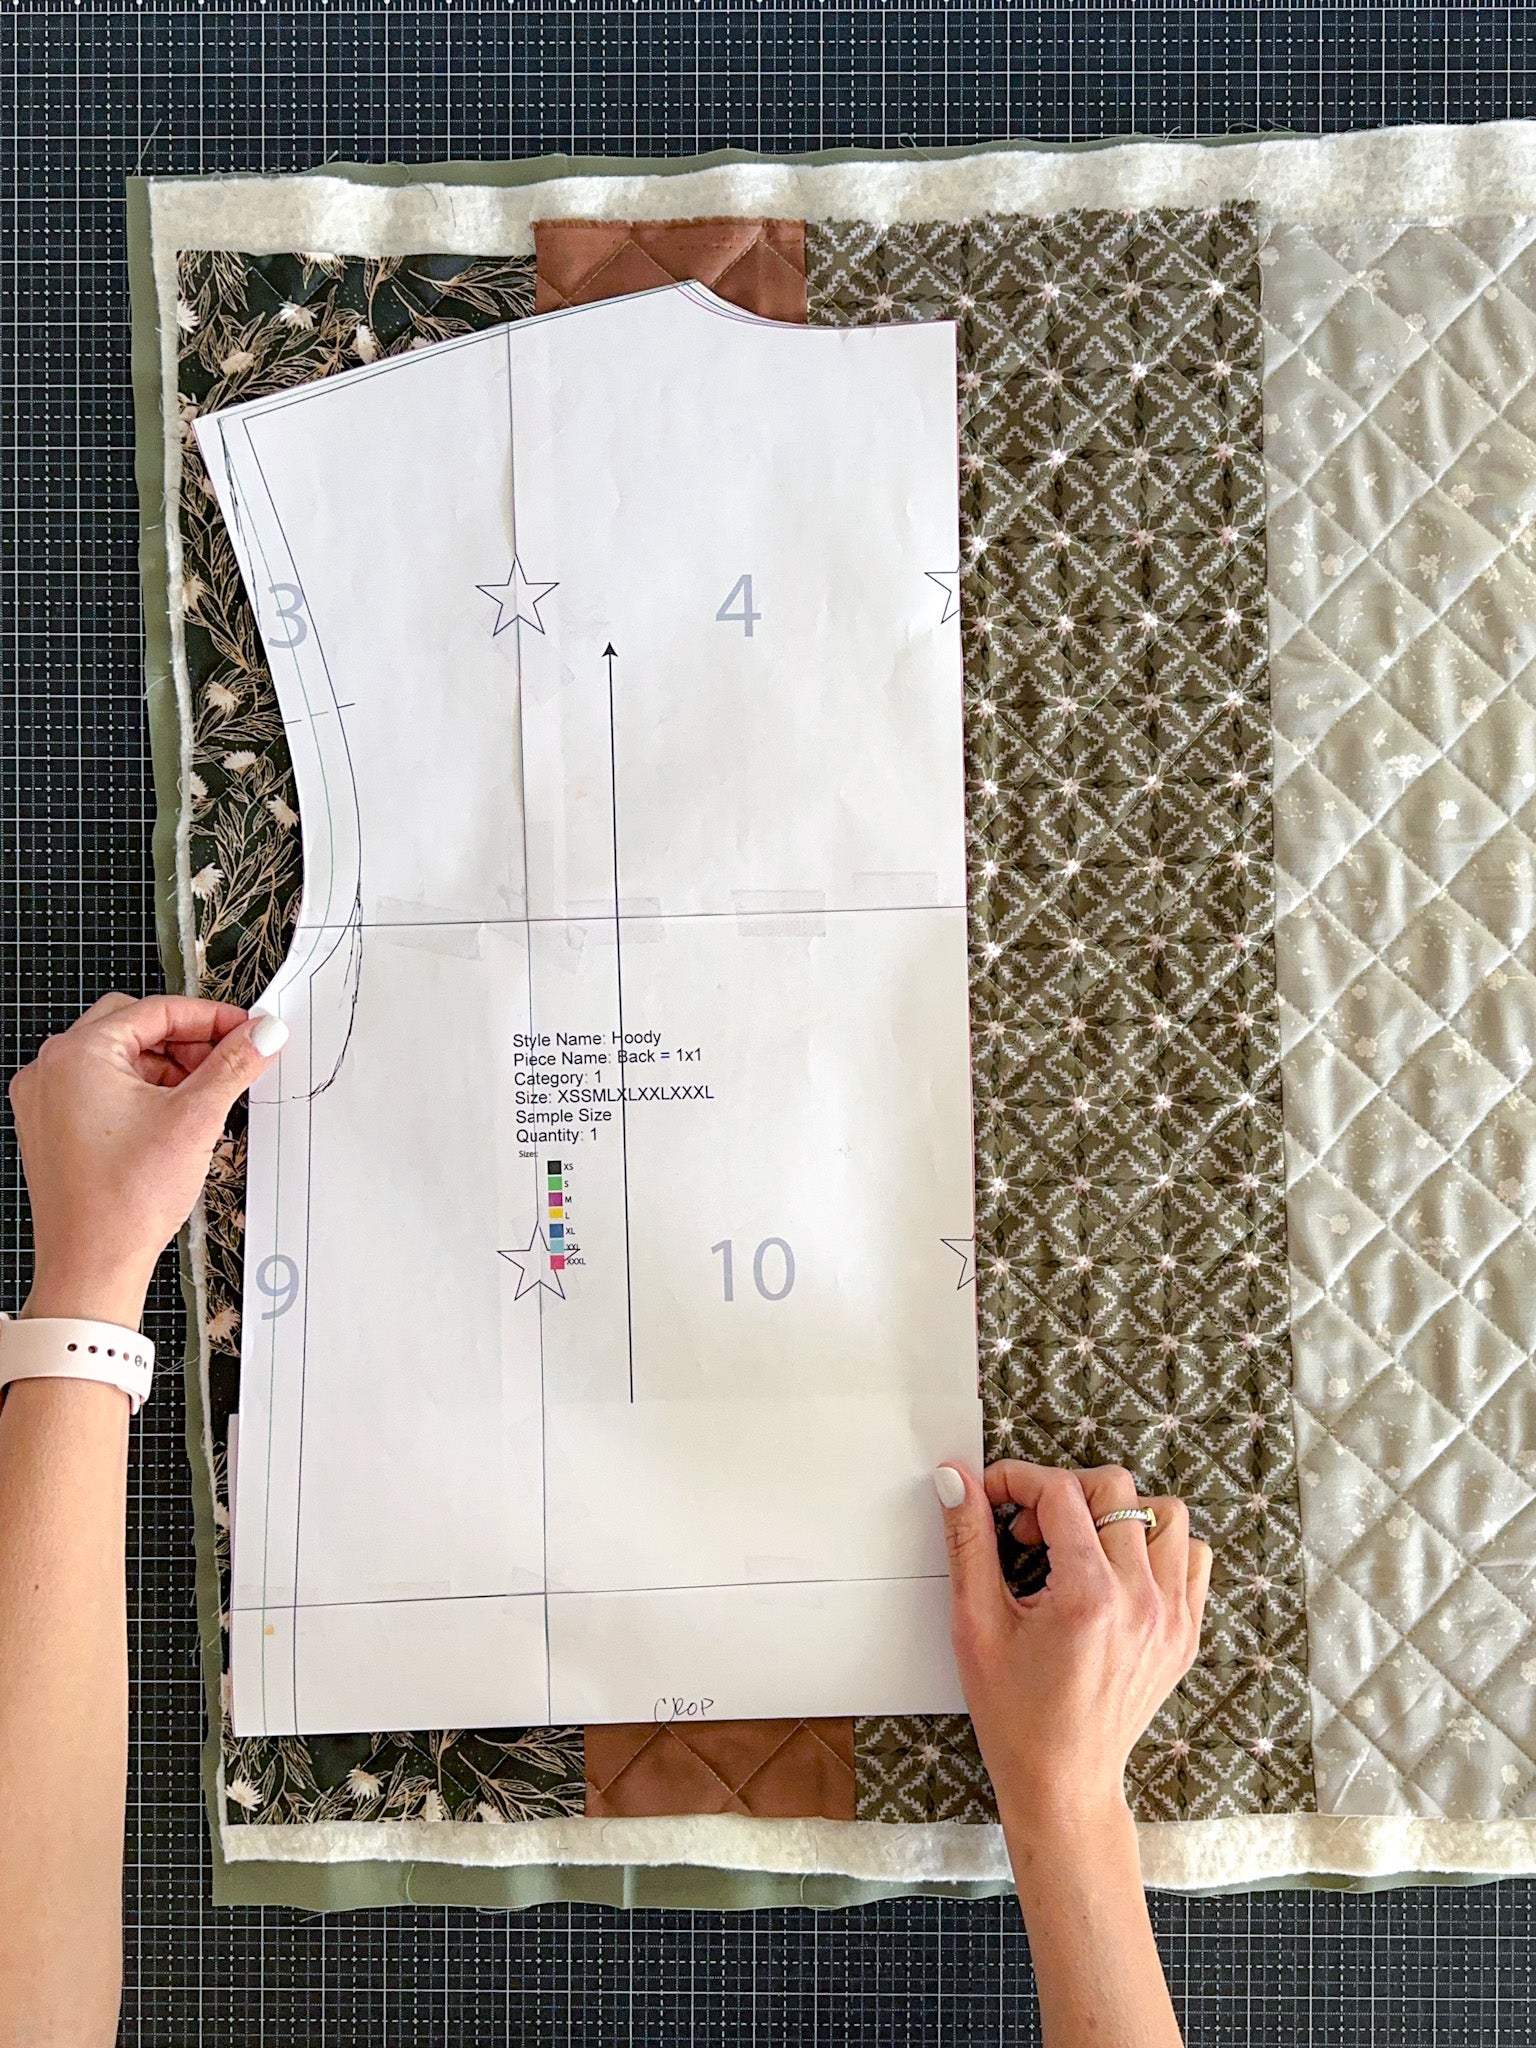
Take quilt top or fabric scraps, and backing fabric. Baste the fabric to the batting using adhesive spray, and quilt as desired. Mark the quilting lines with your hera marker. The first hoodie had 1" vertical quilting lines, but this made it a little challenging to arrange the templates. For my second version, I quilted a simple 1.5” diagonal grid so the final result would be non-directional. It allowed more flexibility when arranging the templates.
Tips for selecting fabrics
Just use my new line!! JK, any of your favorite fabric will work, but bonus points if you use my new collection by Riley Blake. It’s in shops now! In fact, did you know the "Grand Prize" for the QAL is 1 yard of everyyyyy print in my new collection?! That's 21 yards of (the best) fabric!! To enter, post a progress photo and tag me @wellspringdesigns_co each week. That's only 3 posts, you can do it!! At the end of the QAL, I'll choose a winner from those who have posted each week. It could be you!
Option 1:
Selected a completed quilt. This might be controversial (don’t we wish the world’s problems were as big as our quilt drama). If you don’t know, some quilters have strong feelings about seeing old or new quilts repurposed into clothing. While I understand handmade quilts may be under-appreciated and cutting heirlooms shouldn’t be done lightly — we’ve all seen the piles of forgotten hand-stitched quilts sitting in thrift stores, antique shops, dusty attics, etc. In my humble opinion, if one get a second chance and is repurposed into a garment — well, that’s pretty amazing. Resew, requilt, recycle: the eco-friendly quilty mantra.
Option 2:
Find an unfinished quilt top. As a quilter with a wandering eye, I am definitely guilty of getting distracted with a new project and leaving behind an unquilted quilt top. Maybe I didn’t love it as much as I thought I would, and so it got folded it up and stuffed away in my sewing room. Have you ever done that? Well, if you have this is the perfect time to pull out that quilt top and repurpose it! Lay it out, arrange your pattern sections on it, and see if it will work. A large throw should accommodate most of the Hoodie pattern sizes. You can either quilt the whole top or cut sections from the quilt top first then baste and quilt individually.
Option 3:
Piece sections for each template piece. After all of the talk about repurposing old projects — this is actually what I did for my two hoodies. Do as I say not as I do. The first hoodie was from the Wayward and Park Day Quilt scraps. Right after finishing a quilt is the best time for a scrappy project! Why? Because you already have a group of coordinating fabrics, and the scrap measurements are likely similar in size which makes piecing easier. I suggest making 6 sections (front panel, back panel, (2) hood/cuff, sleeves and pocket). These are the sections measurements I used for my Medium hoodie cropped by 6" (so add 6" to the full length panels).
- Front/Back Panels: (2) 26" x 28"
- Sleeves (single panel for both): 25" x 40"
- Hood/cuff panel: 18" x 24"
- Pocket: 10" x 16"
- 3" x WOF binding
- 6" x WOF binding
Bonus Tips:
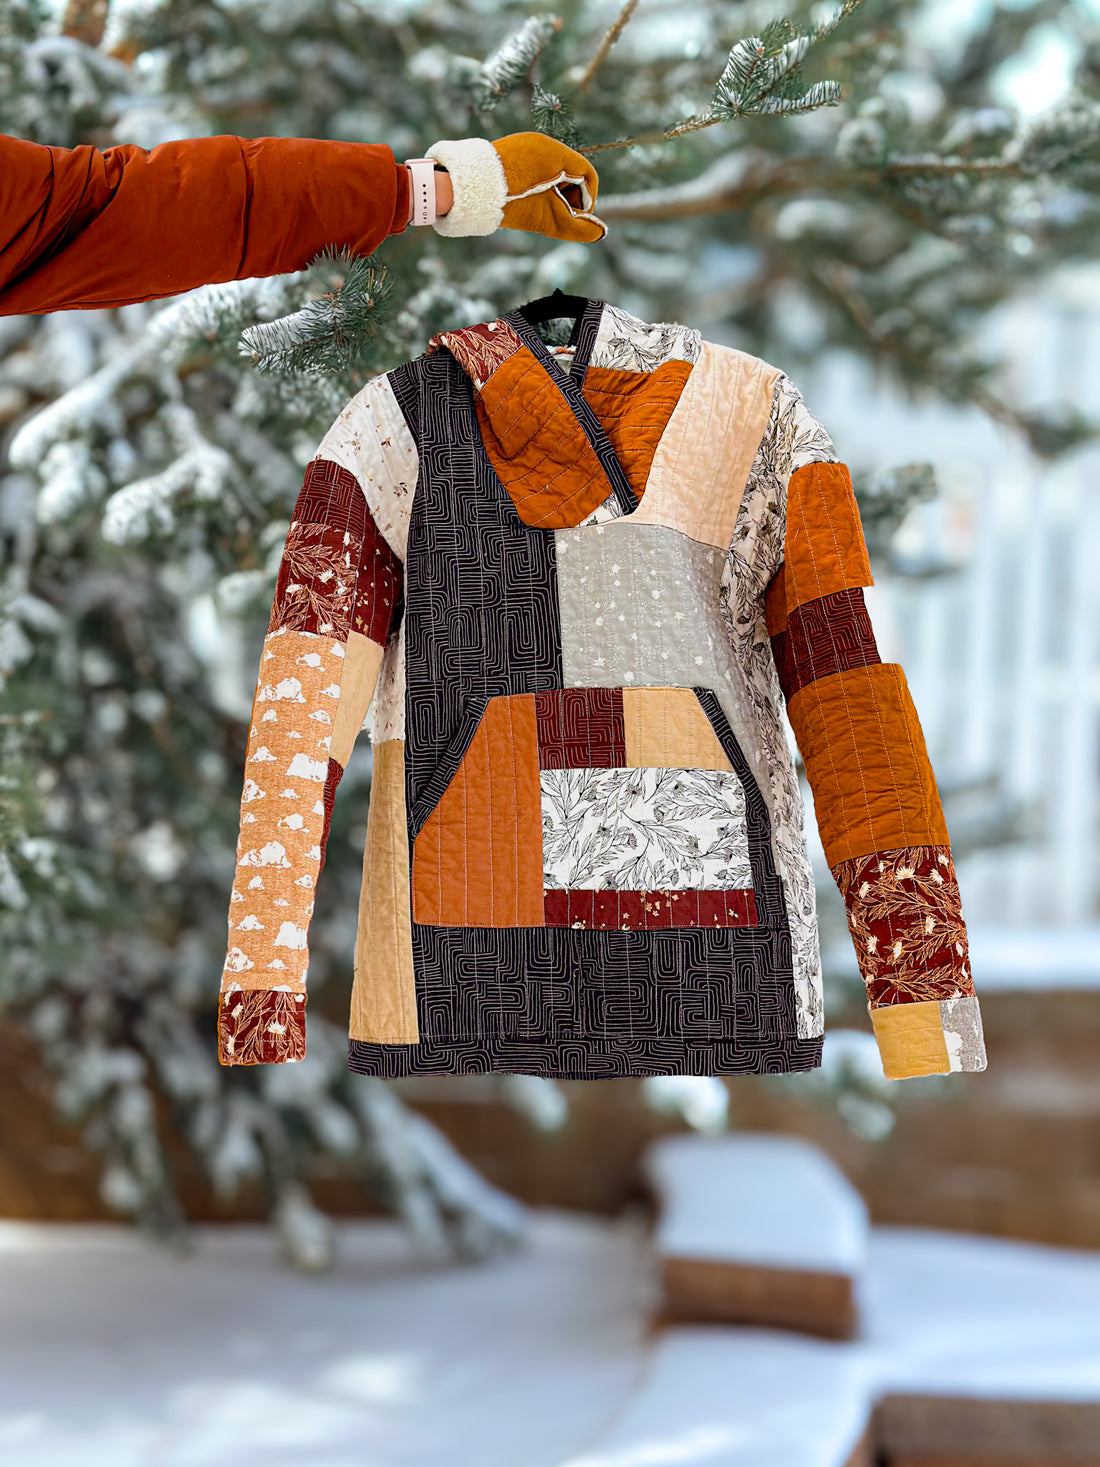
- Select fabrics in colors you like to wear. We don't always quilt with colors we wear, so keep this in mind when selecting fabric combinations.
- Use darker colors around the sleeves and neckline. I can't be the only one that dips my sleeves in ketchup or rubs makeup on my collar, right? High-use areas benefit from darker fabric tones! Also think about this when choosing the lining fabric.
- Alternate high impact prints with solids or blenders. If you look closely at my versions, I try to break up the larger prints with solids or minimal prints to visually balance the piece.
FAQ:
Several people have asked about sizing measurements for the pattern, and the short answer is: I don't have specific measurements. This is my first time creating garment templates (which is why they are free), so I am still learning and will be sure to include them in future patterns. The pattern runs fairly true to size as an oversized sweatshirt, although quilts have minimal stretch, so if in doubt make a test version. I had help from another garment sewist who based the sizing on average XS-XXL measurements. In the photos I am wearing a medium.


22 comments
awww LOVE!!! hoping it is okay I am late to the game, but so excited!!!
How do you put pattern together? I thought there would be instructions…
It says on the pattern “all around 1cm sewing allowances except for the hem which is 2.5cm” which is 3/8 inch and 1 inch respectively.
What days can we expect the next instructions? Was assuming once a week? It did not come through yesterday? Thanks
For those asking about the sizing, I measured myself and then measured the pattern making sure I doubled the measurement to gauge the size. I am usually a 12-14 in womens sizes, but wanted more roominess in the hoodie so I am going with the XXL, hope that helps some. Also in garment sewing, there is usually 5/8" seam allowance so that is what I am using. I think it is added to the pattern, but I am not sure…. can someone give a definitive answer on that? Thanks again!!